How to… remove a bridge
by claesgellerbrink
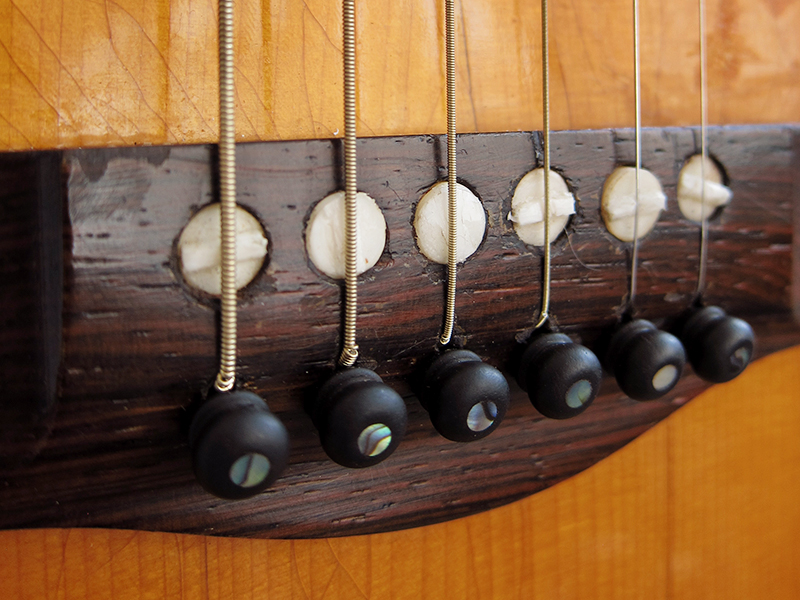
The old plastic saddles before I removed the bridge on my Goya Model 163 from 1968.
I recently had to remove my first bridge on an acoustic guitar, after removing my first neck it just felt like a natural next step. It turned out to be both harder and easier than I first thought it would be. I needed to do this for two reasons, first because the bridge started to come loose, it felt like the glue had dried up and started to fall apart. Second, I wasn’t too excited about the extremely low individual height adjustable plastic saddles, as Levin calls them, that the previous owner had left me. They were too low to adjust and made some strings sound muted and dull. I watched a Youtube clip before I started with Julyan Wallis, who happened to be working on a Levin guitar as well, and learned a few good tricks. He was heating up the spatula on an normal clothes iron and that way managed to loosen the old glue under the bridge. It worked extremely well.
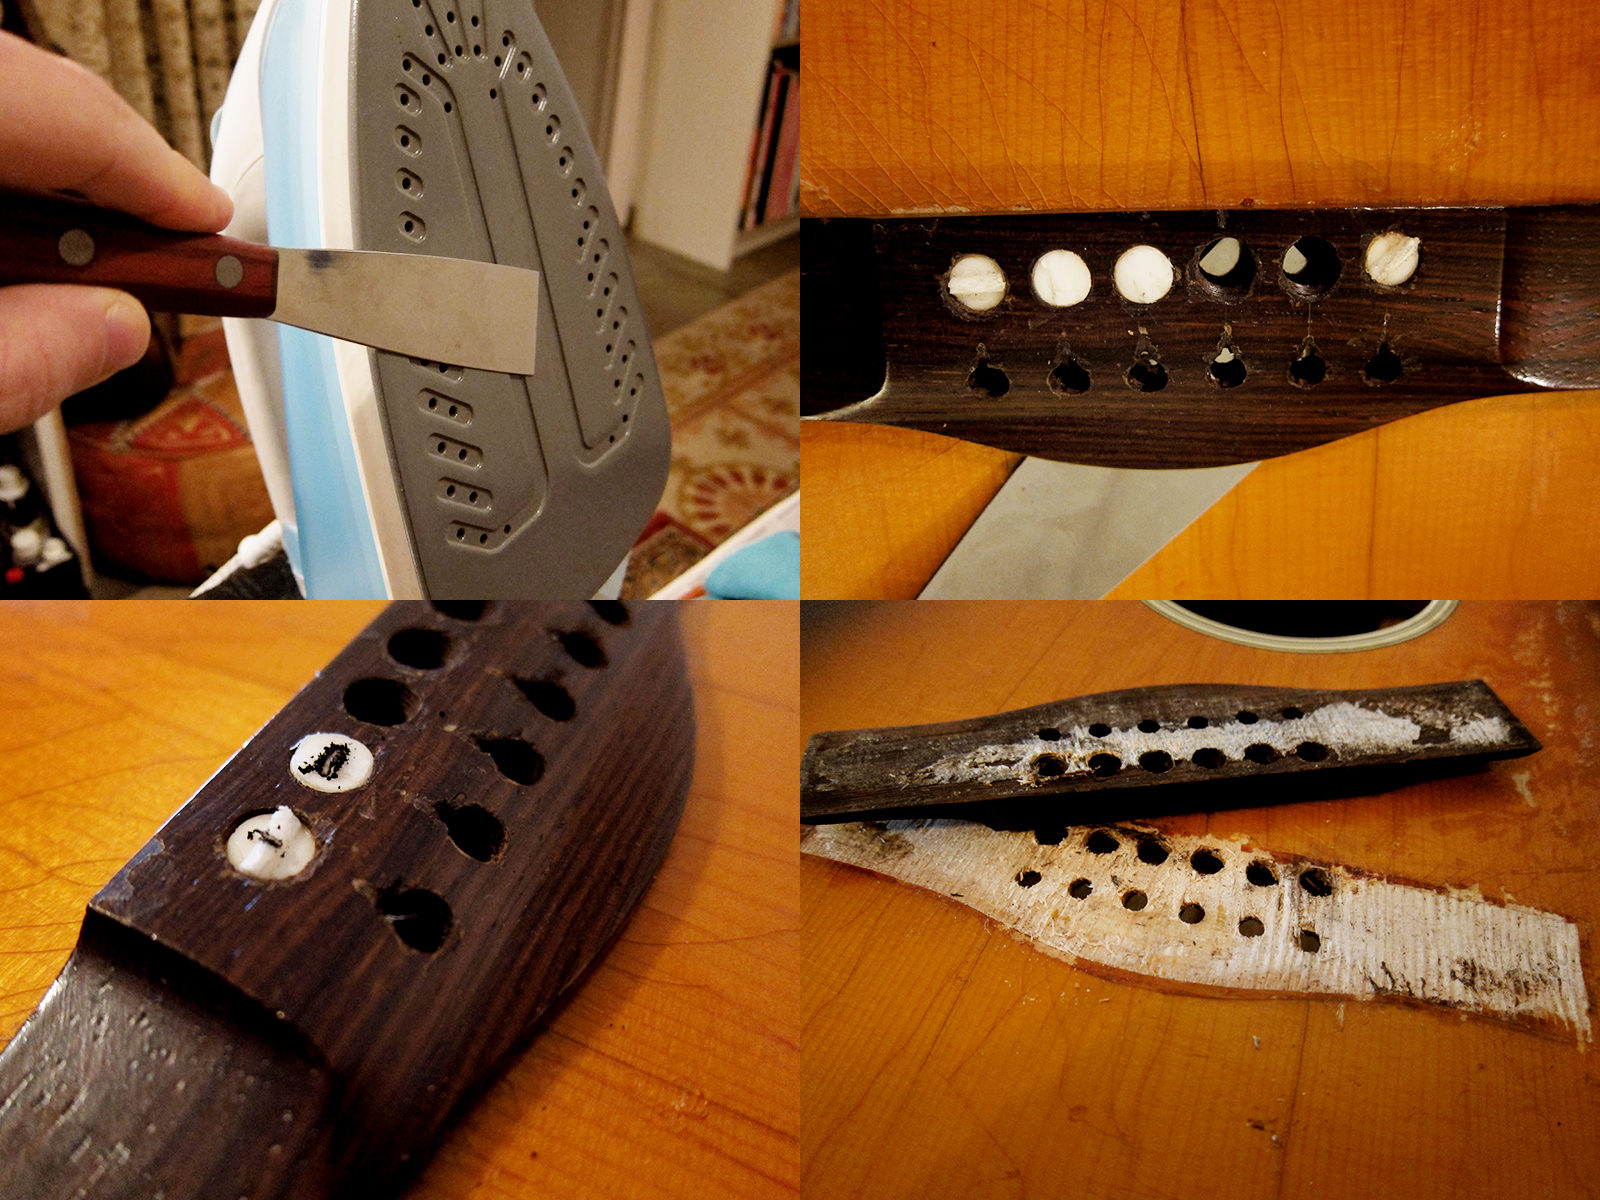
I heated up the spatula on a normal clothes iron and touched it with my fingers to make sure it didn’t get too hot, I was scared to scorch the lacquer. As soon as you loosened the corners and worked your way around the whole bridge you can keep the tip of the spatula quite hot if you are quick to get it in under the bridge and not resting it on the lacquer. This could have been such a smooth and and easy job if I would have realised earlier that that saddle screws went all the way through and was actually screwed in to the top as well, something that kept the bridge secure even when all the glue was loosened. I tried over and over and even managed to damaged the lacquer in two places in my desperate attempts to get the bridge off. Since I couldn’t get a grip of the saddle screws, two was filed down smooth and the others were too low to hold on to with any pliers. I had to heat up a screwdriver on a candle, I should probably have used the clothes iron, and then melt the tip in to the saddle and that way get a grip and unscrew them. Once all the saddle screws were out the bridge came off straight away. It could have been a cleaner removal if I had realised that the saddles were attached to the top but still, I’m pretty pleased with the result for being my first time.
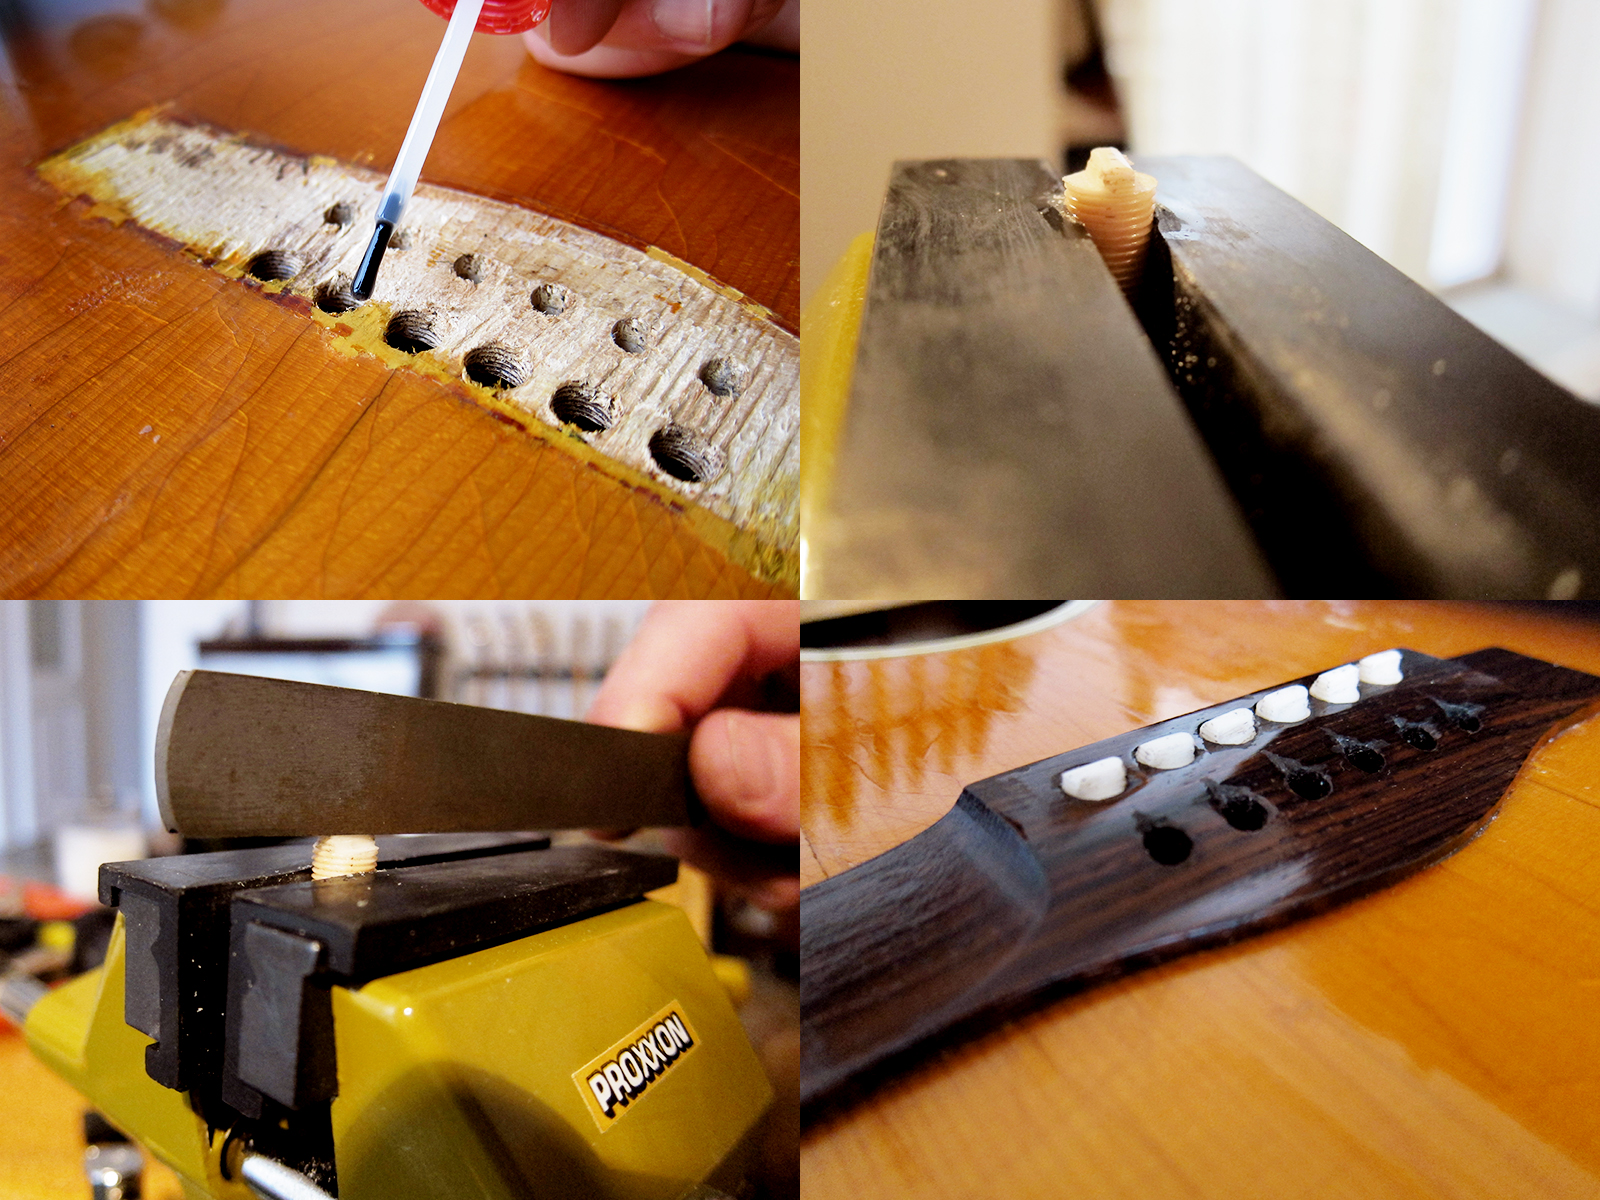
I painted the wood where the finish had come off and then added a bit of nitro lacquer to seal it. Since I had to burn the tip of the saddles to get them out I thought the best I could do in order to save as much material as possible was the flip them over and reshape the bottom instead. I used a normal hand file to shape the saddles, I made the tip both higher and wider to get a better grip with the pliers when I adjust them. Once the shape was good I rounded them off with my fret crowning file. I glued the bridge back in place with fish glue and a couple of clamps and let it set for 24 hours. It worked pretty well, the tone is better and I can now easily adjust the string height like Levin intended 46 years ago.

[…] done, actually quite a lot. First I had to reset the neck to get the action down and then I had to remove the bridge and redo the saddle screws. I cut a new pickguard over the weekend, well it’s not perfect […]
[…] in my little DIY series, How to…, like me previous post about How to… reset a Levin neck or remove a bridge. I did carve a little floating bridge for my Levin 65 over a year ago but now it was finally time […]