Harmony H-162, Made in Chicago, USA in the late 1960’s
This is a project that could have been done in two days but has taken two years. I guess it’s partly my fault, I wasn’t really sure how to reset a neck so I kept putting it off. I also have a 1.5 years old daughter and she is like a black hole when it comes to making time disappear. Anyway, now it’s done and everything worked out pretty great. I steamed off the necks back in April and then I had a lot of gigs and moved house in the middle and then last week I finally managed to get the guitar back together.
I drilled a small hole under the 14th fret and tried to steam it off that way but it worked really badly so in the end I got frustrated and just removed the fretboard and got the neck off that way instead. I glued the fretboard back straight away so I wouldn’t mix the parts between the two late 1960’s Harmony H-162 that I had lying around at home. Once the neck angle was corrected I glued the neck back with Titebond 506/4 classic wood glue.
The late 1960’s Harmony H-162 in parts, it was actually quite easy to reset a neck. It’s pretty worn but the solid woods are really nice, mahogany back and sides with a two piece spruce top.
I cleaned up the dovetail and heel with a chisel and then adjusted the neck angle with a file, it felt less risky than doing it with a chisel. I didn’t have to remove much for getting the action down and making it playable again.
I decided to carve a new bridge for my 1968 Levin LT-18. The old bridge needed to be re-glued anyway so I thought it was a good time to create a new one in ebony instead. I did this once, I carved a new bridge for my 1973 K. Yairi YW-1000. This was a pretty similar job, both ebony and roughly the same shape. I’m really happy with the sound of this guitar now, so much richer than with the original bridge.
First step was to remove the old bridge with a heated spatula and then copy the bridge and drill the holes.
Then shape it as close to the original as possible using my Japanese saw rasp and different files.
Last step, fit the bridge and glue it down. Once the bridge was in place I could check the intonation to get the saddle slot in the perfect spot. Unfortunately I cut the slot 1 mm too wide so the bone saddle got a bit fatter than I had planned. Perhaps that gives tonal qualities I would have missed with a thinner saddle, let’s hope so. I also installed a LR Baggs M1A so I can use the guitar for gigs.
Before: with the original rosewood bridge and the individual height adjustable plastic saddles
After: with the ebony bridge I carved and a bone saddle
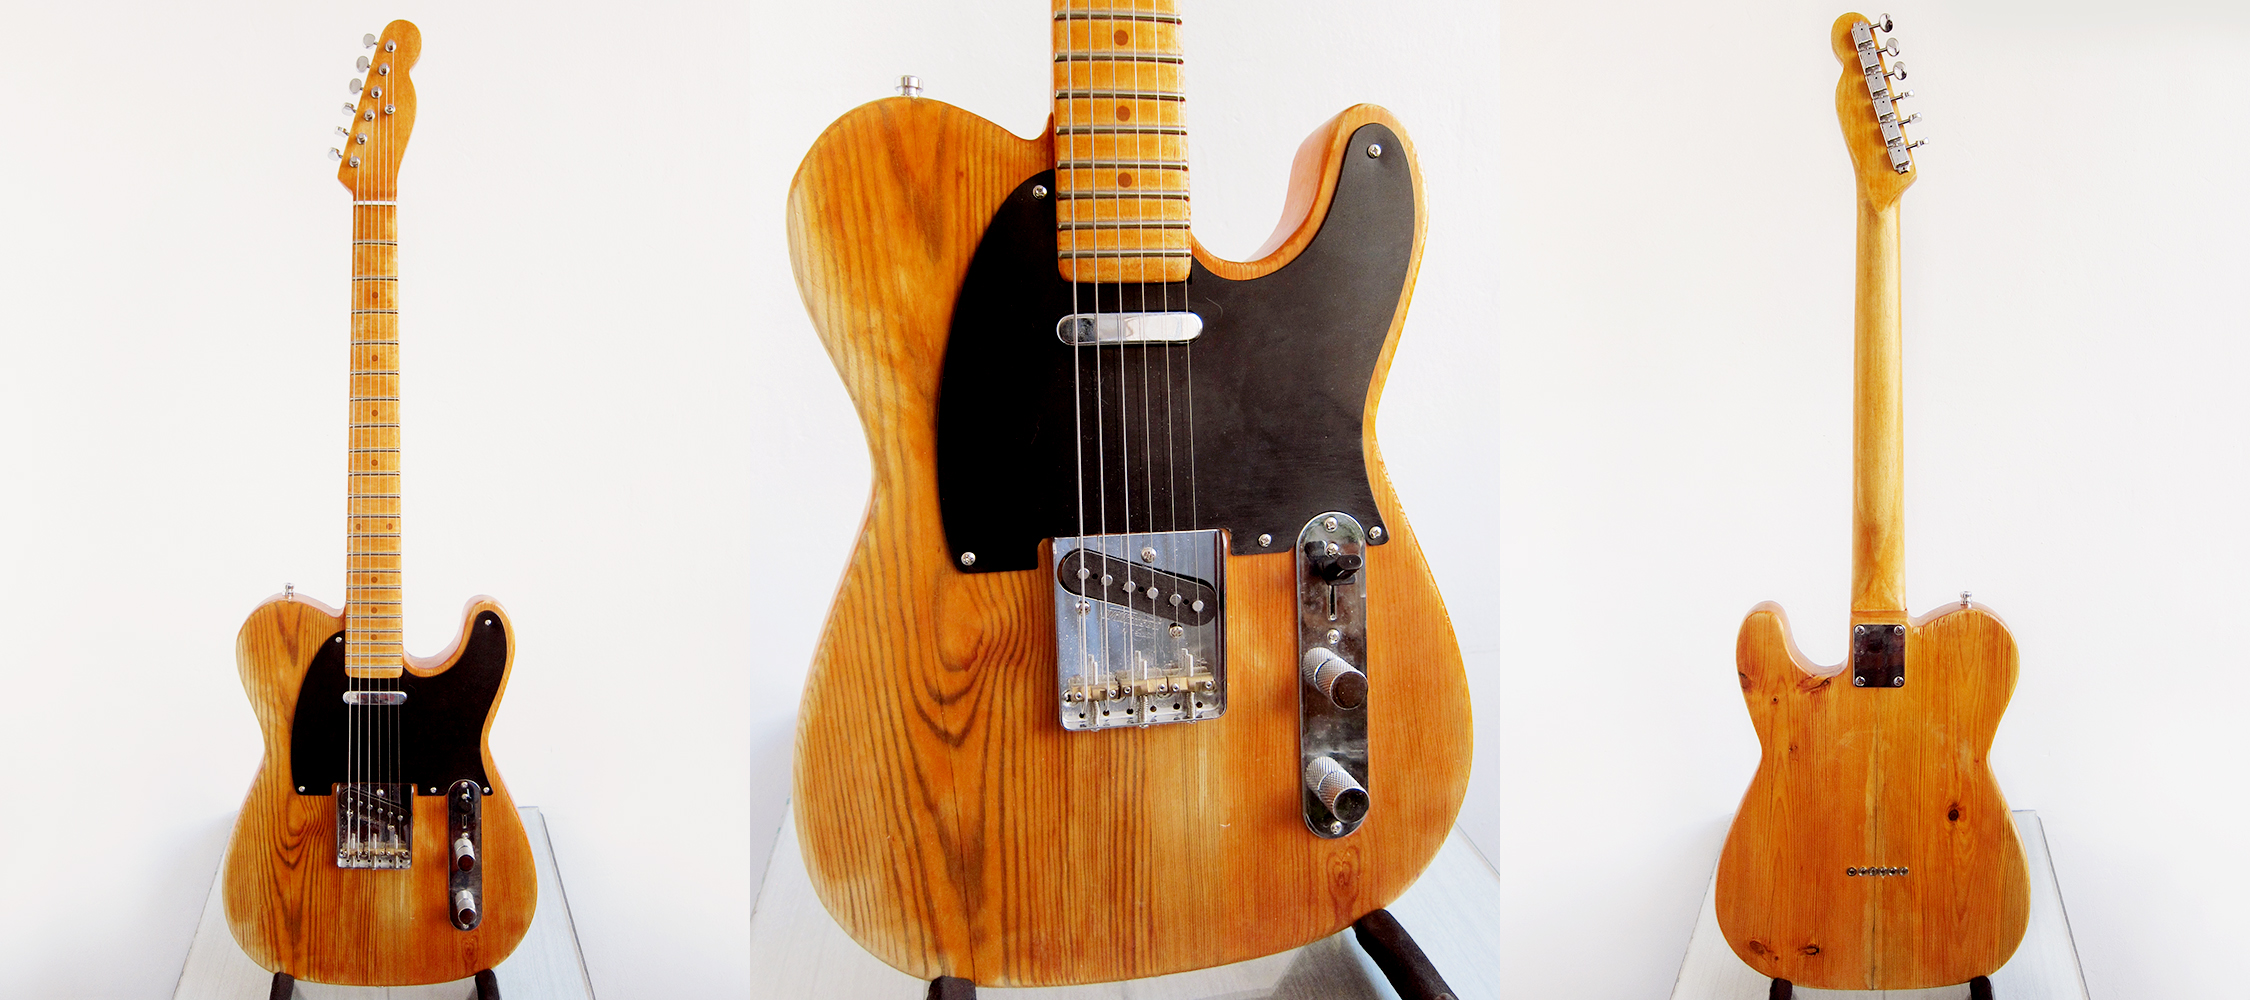
The new Claescaster, my second attempt at building a guitar
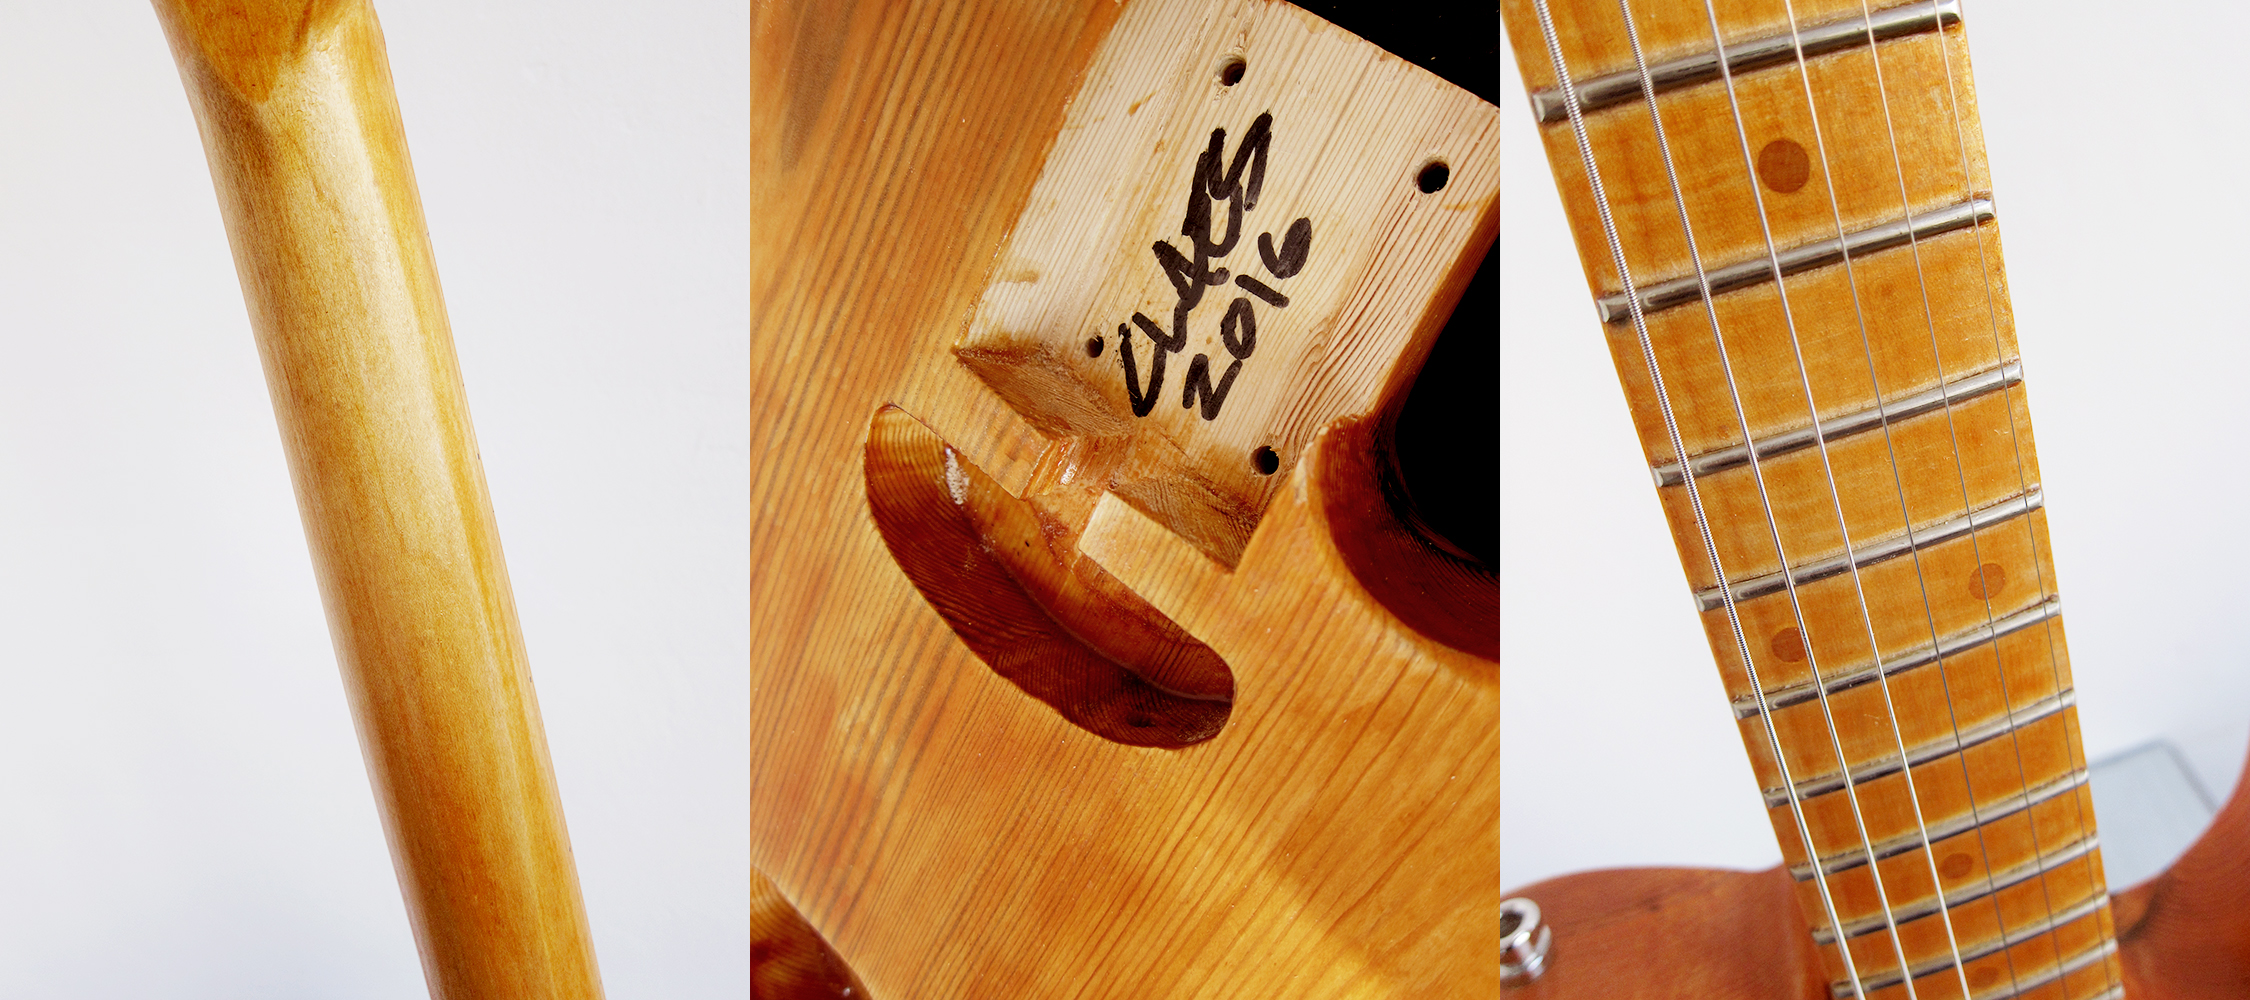
Back in 2014 I built myself my first Claescaster, it was not just my first guitar but pretty much the first anything I ever built. It wasn’t great, but it wasn’t terrible either so I decided to give it second try and here is the result, the new Claescaster. The truth is that two years ago my wife was pregnant and I thought that was a great opportunity to build myself a Telecaster to mark the occasion. Unfortunately we lost that child half way through so I named the first guitar Greta after the daughter we never had. Two years later we tried again and were blessed with our little Frida, and just before she saw the light of day in early May I had my second Claescaster ready and gave it her name. My wife asked if I was going to build a guitar every time she gets pregnant and I might very well do that, it’s a great way for a man to keep himself busy during the nine long months of waiting. I will try to find some more pictures of the building progress, if not there are some more on my Instagram.
Claescaster – Frida, is not the best Telecaster I’ve ever played but it’s still pretty damn good guitar, and ten times better than the first one I built. My plan was to build a 1952 copy so I could be like Bruce Springsteen, Keith Richards or Roy Buchanan with his Nancy. Unfortunately that never happened, or at least not as close as I hoped for. Everything was going great, I had an awesome baseball bat neck with a 7.25 radius, it was actually so fat that I had to reshape it twice, great grain running along the top, everything felt smooth and the edges were pretty straight for being cut and shaped by hand, then I got to the lacquer. I managed to use the wrong lacquer and even though I tried to scrape it off and try again I never got perfect after that. I decided to give up on the brand new look and went for some form of old and worn 50’s vibe instead, which was my secret plan all along, I just wanted to have it perfect before I made it look old. Anyway, I’ve learnt a lot for my next Claescaster.
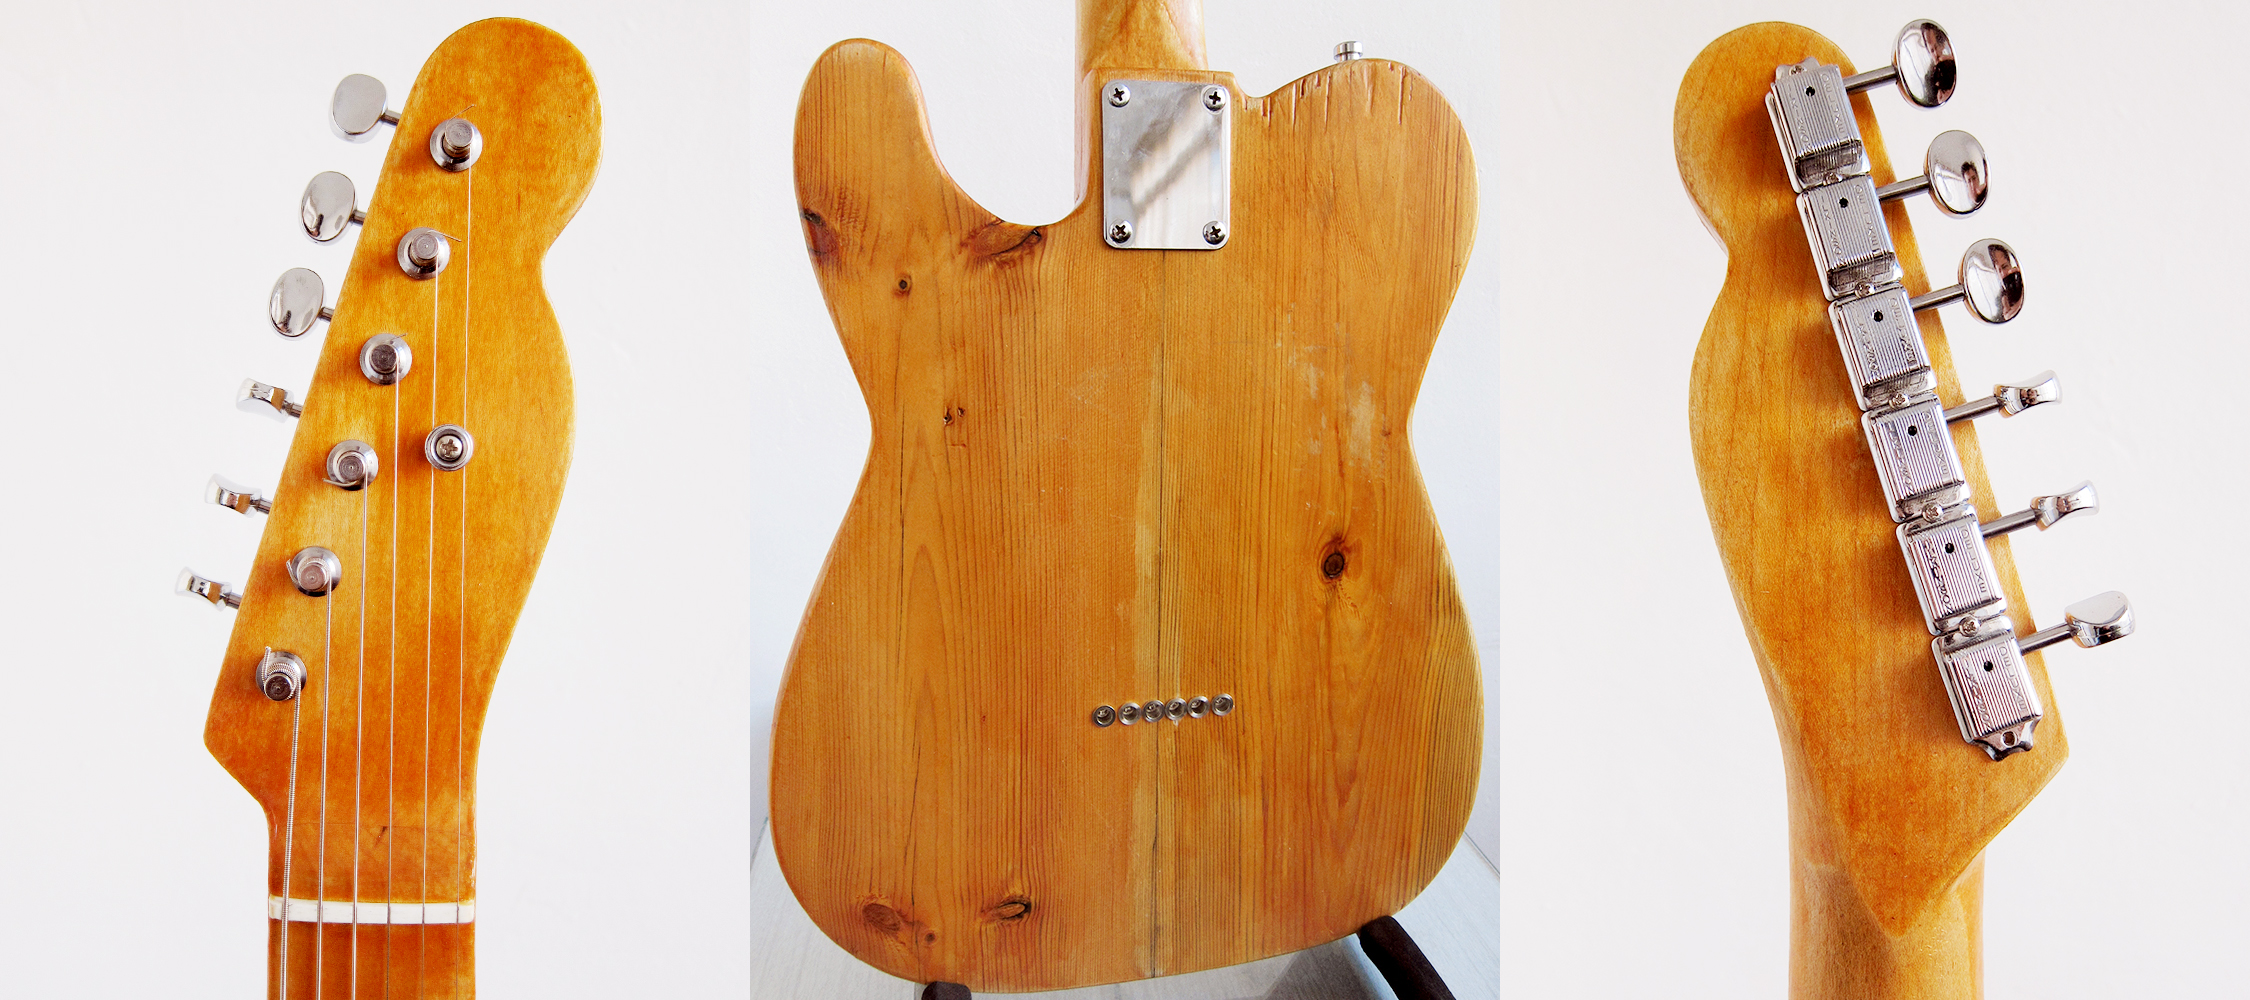
The body comes from a wood pile I found in the streets of Barcelona and most likely pine. If I remember correctly it was a beam or a bed frame, that I cut in half on the length and glued together to get the width. The neck was from a block of North American maple that I bought in a wood shop here and that I had to saw by hand, which took forever. I used a 6 mm stick of wood for the fretboard markers and jumbo frets from Jascar. The pickups are Artec and the hardware is all from Wilkinson. I will try to get video up so you can hear what it sounds like.
Last weekend I tried a trick that I had seen some old luthier in the US doing on Instagram, replacing the first three worn frets with the last three, instead of re-fretting the whole guitar. This seemed like a really good solutions for my 1978 Hagström Western 6 which had terrible wear on the first three frets.
It seemed a bit pointless to do a complete re-fret when it was just the first three that was worn, I also like to keep things as original as possible. I just pulled out the first three and the last three and replaced the first three with the last three and then added three new frets where the last three used to be, easy peasy. I just had to nip off the edges with some pliers, file them down and round them a bit to get them smooth. Since you don’t play on the last three frets, or at least I don’t, you don’t have to level and crown them too much.
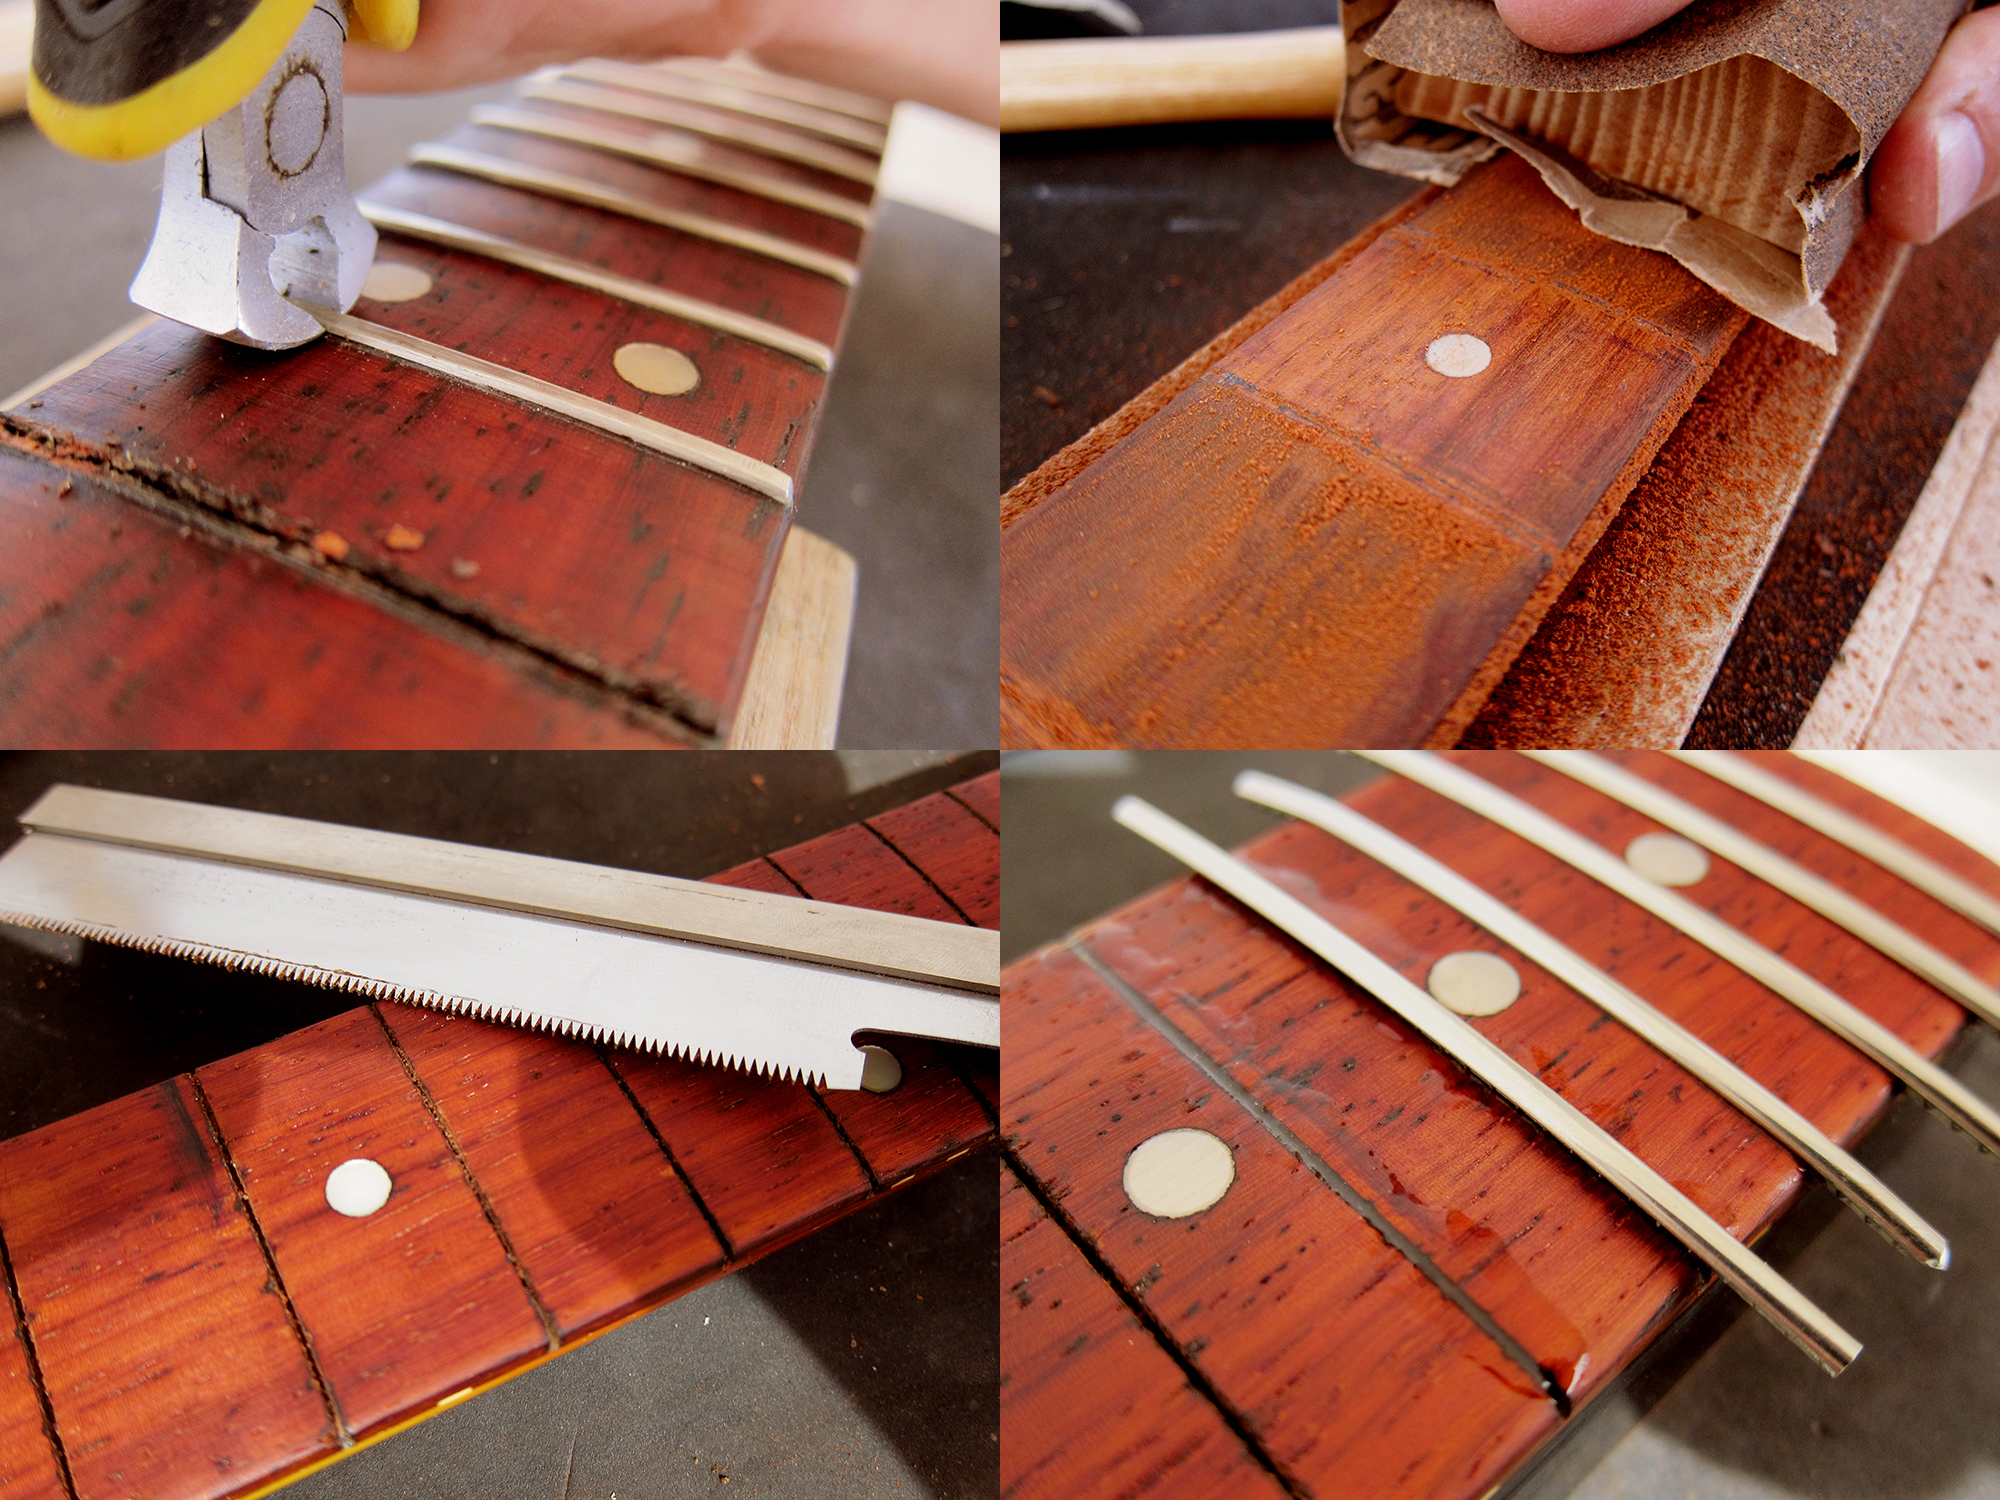
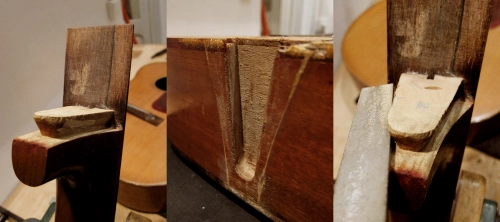
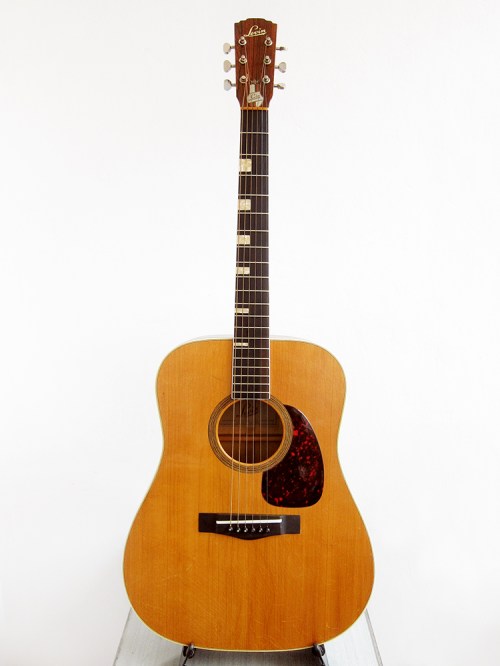
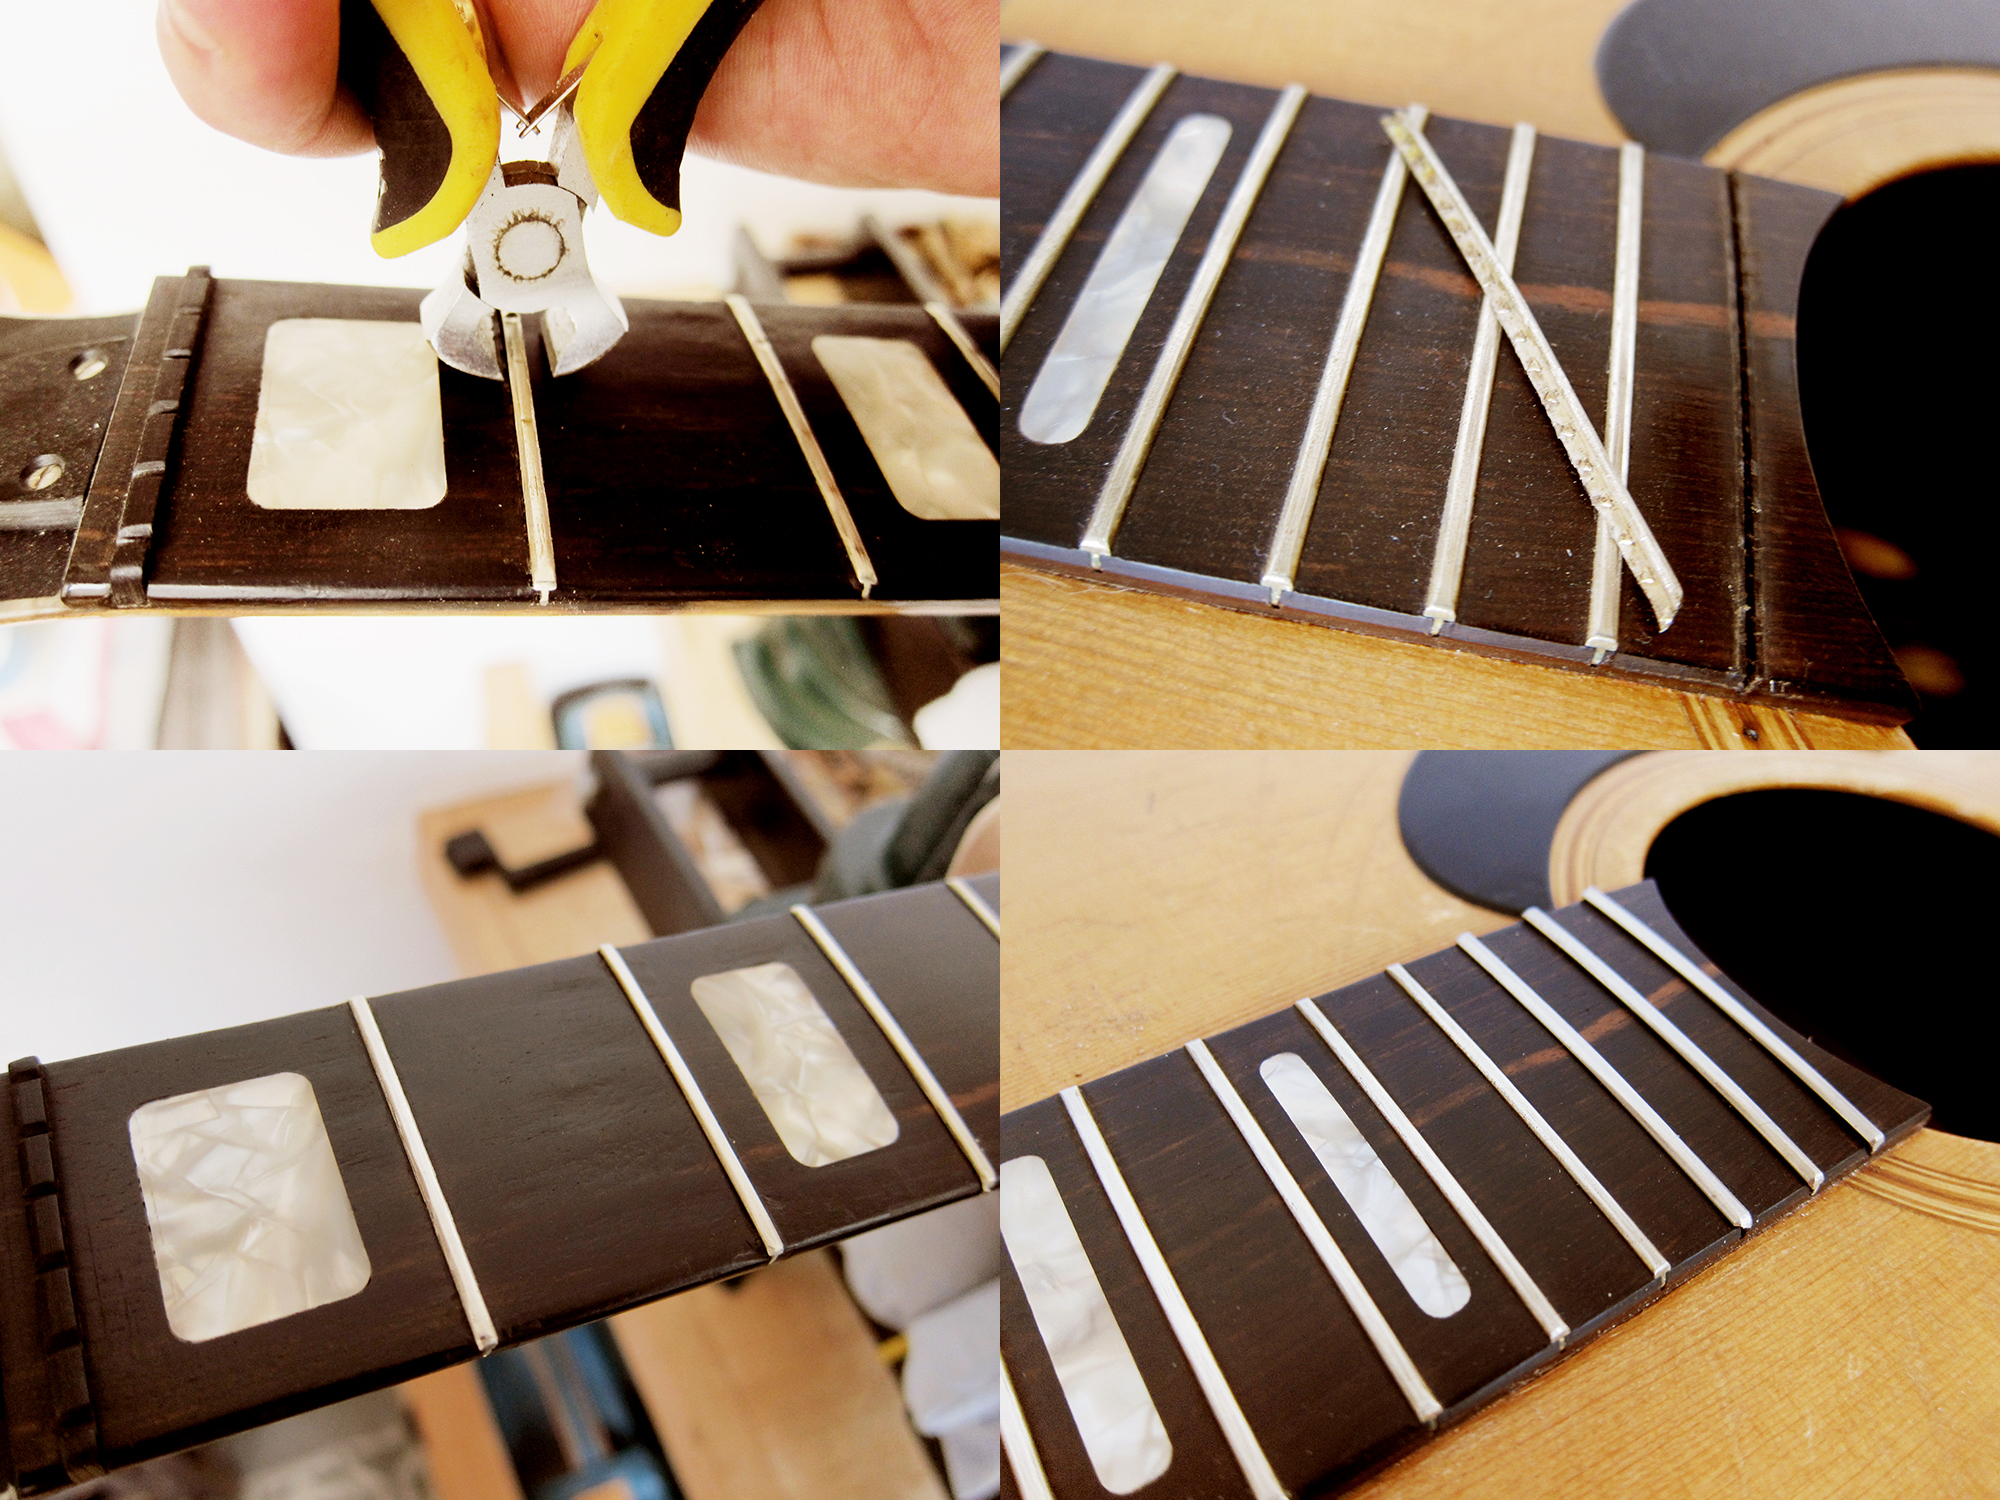
I’ve recently managed to do some more work to the Sonora parlour. I decided to reset the neck to try to get rid of the banana neck and high action and it worked pretty well. I also redesigned the fretboard and added some wooden dot markers. Now the action is low and the guitar is easy to play.
The new Sonora parlour and here is what she looked like before
My initial plan was to steam the neck off by drilling two small holes under the 13th fret and that way get steam straight in to the dove tail. That didn’t work, I think it was too much old glue stuck in the joint and also the needle tip I used for my home built steamer was too thin. I decided to remove the whole fretboard instead, I used a spatula heated on a normal clothes iron which worked like a charm. Once the fretboard was off I could just steam the hell out of that joint and eventually the glue softened and then neck came off.
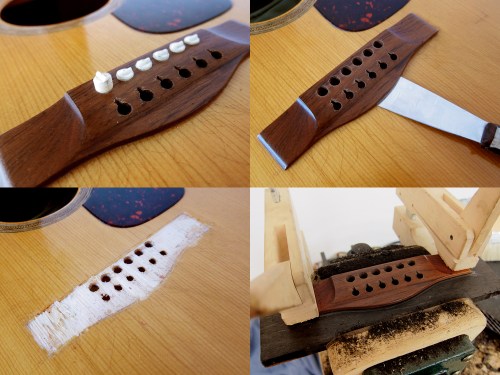
Next I had to try to remove the hump on the fretboard where the neck and body meet. I removed all the frets, and kept them in the correct order to make it easier to reinstall them later. To get rid of the hump I had to remove almost 6 mm of the overhang and then sand the rest to get the fretboard straight.
I re-cut all the fret slots, reinstalled the frets and added four wooden dots in different grain directions as position markers. I gave the fretboard a coat of lacquer and then painted everything black except for the 3rd, 5th, 7th, 9th and 12th fret. I added a layer of lacquer on top and then sanded it smooth and polished out the frets again.
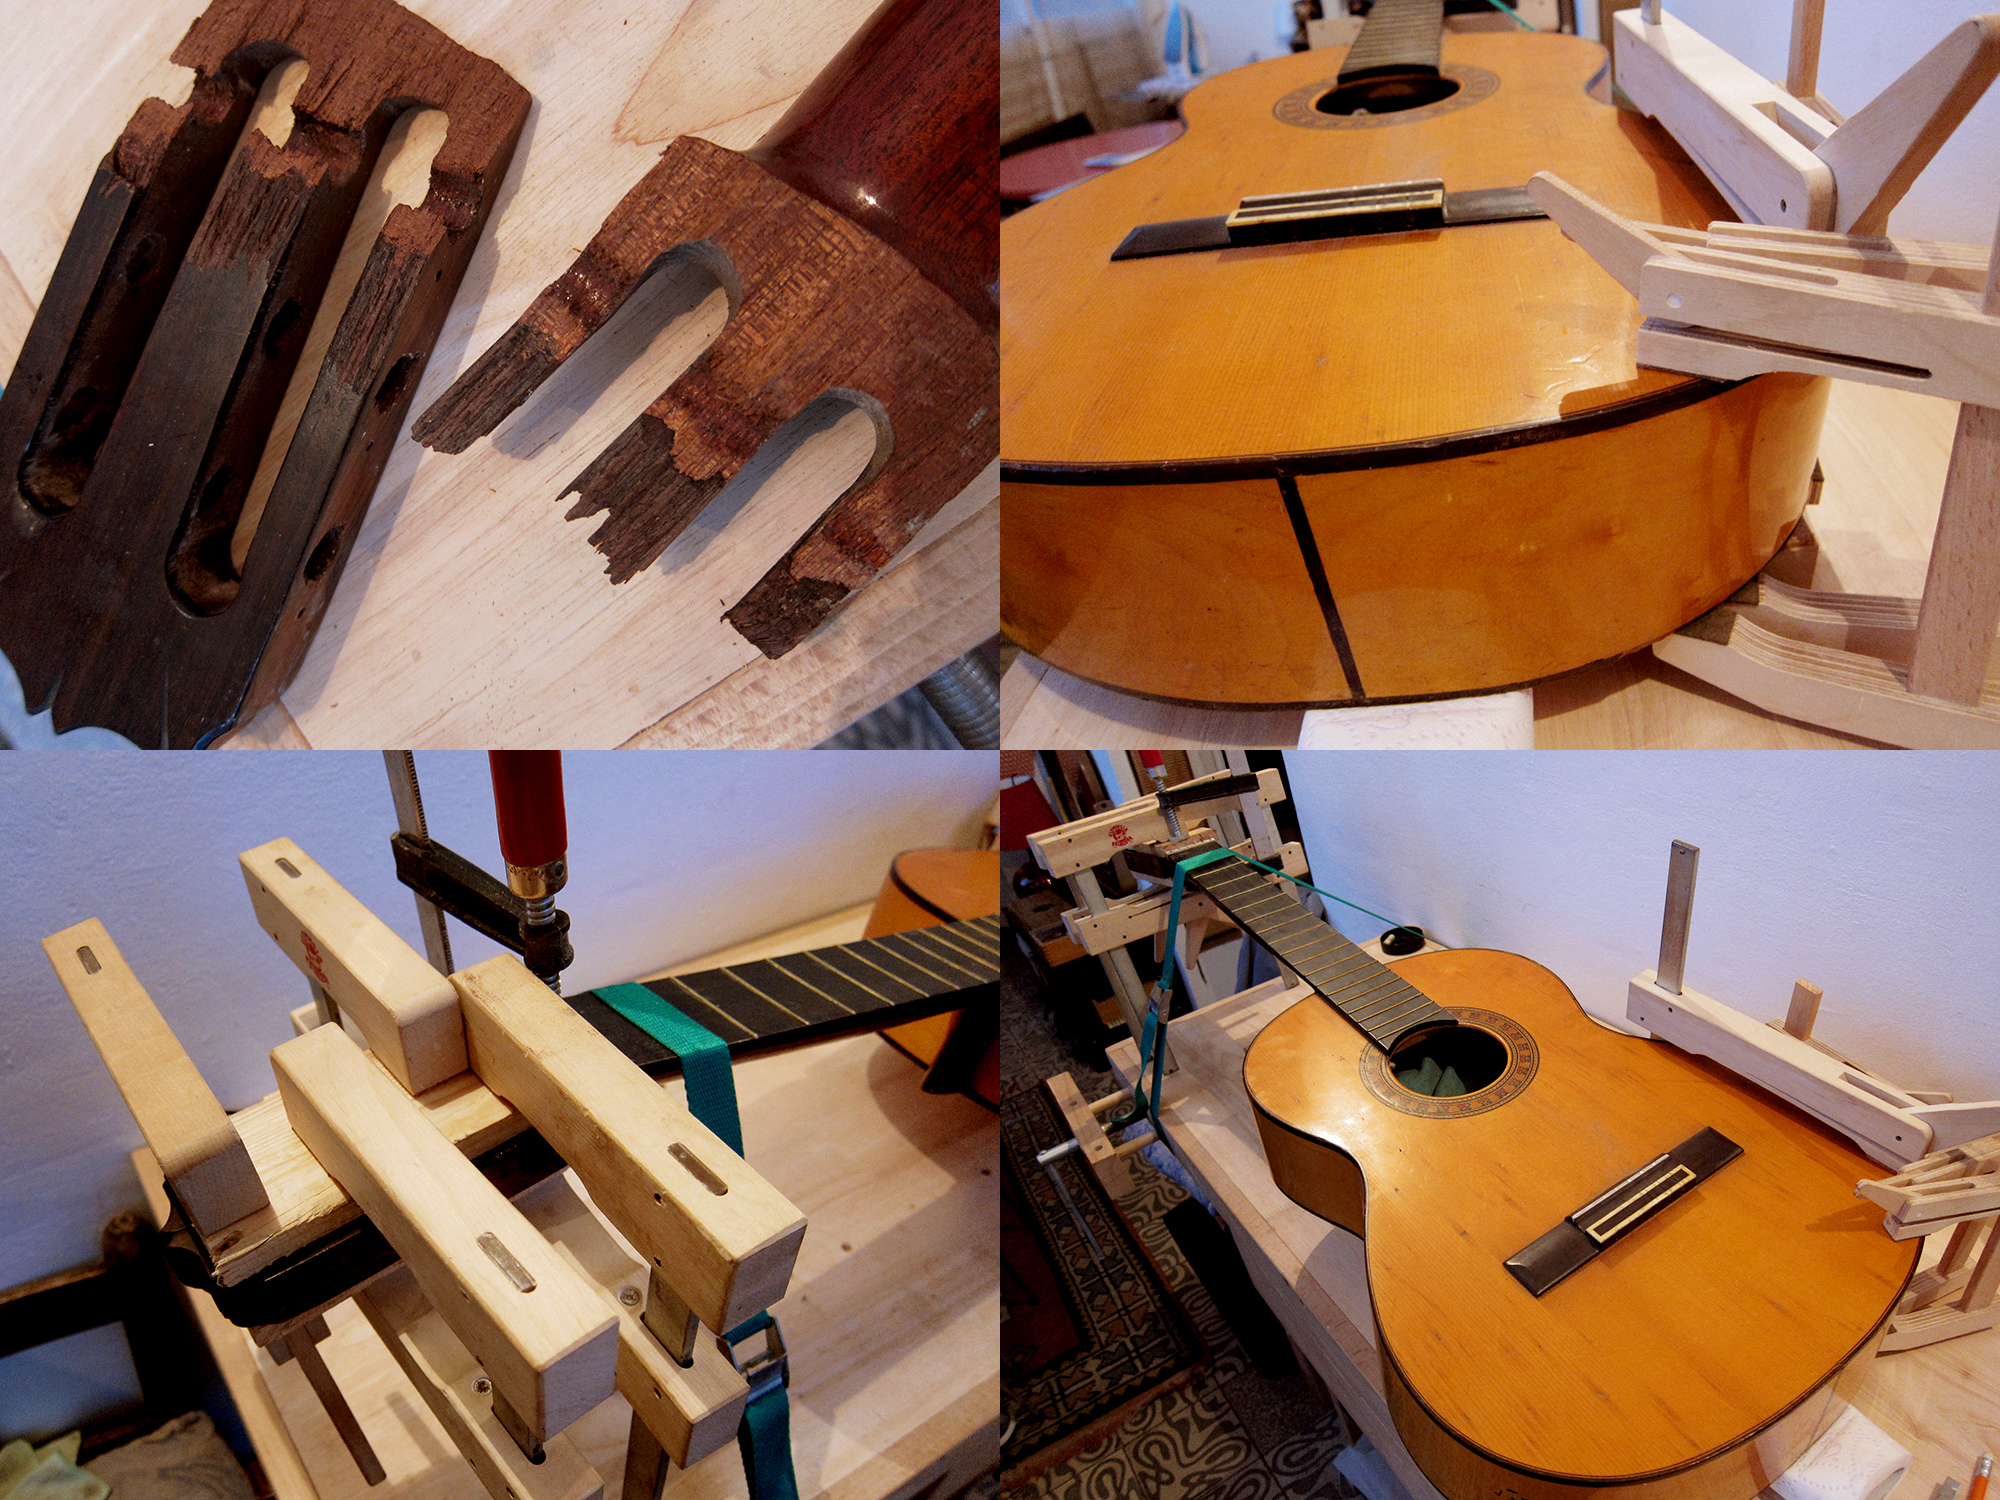
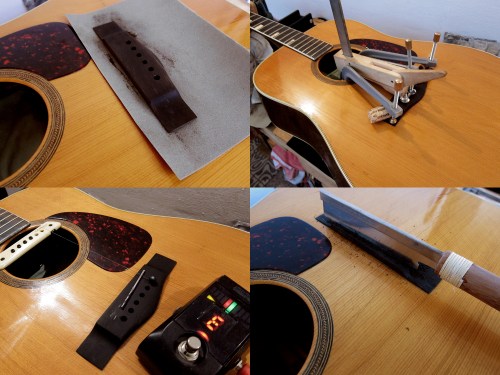
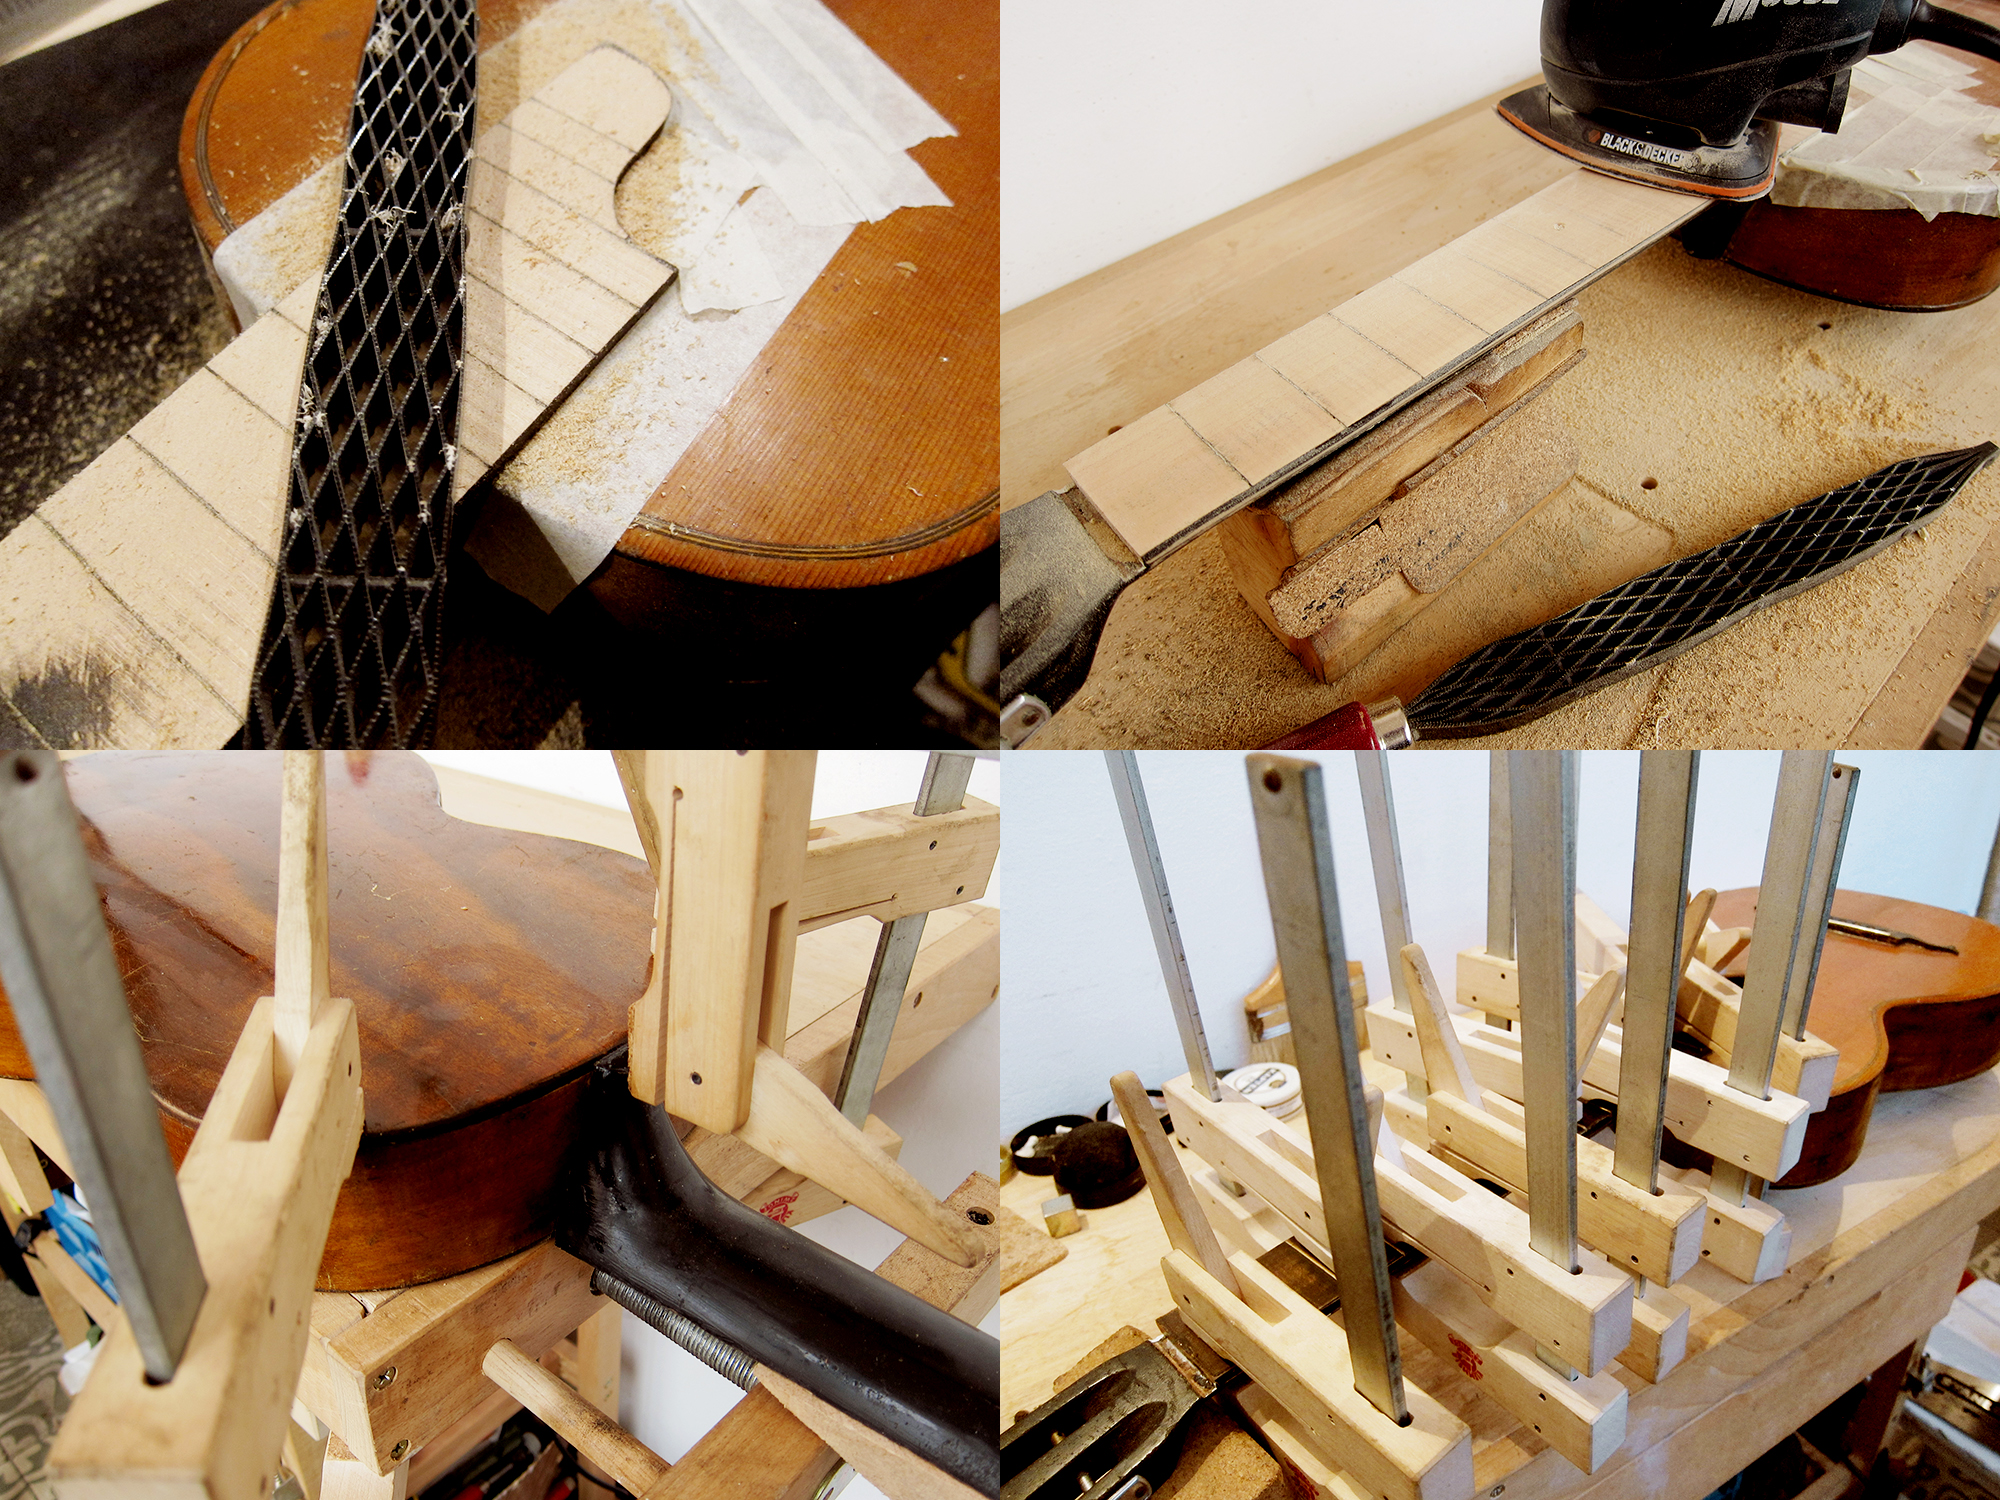
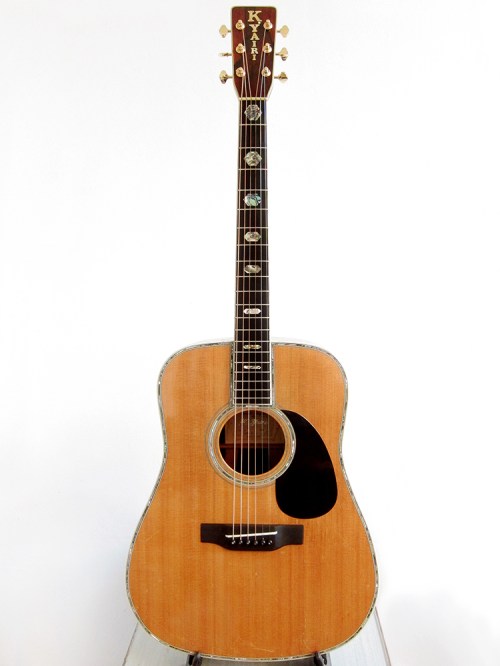
It’s been a while since I posted anything in my little DIY series, How to…, like me previous post about How to… reset a Levin neck or remove a bridge. I did carve a little floating bridge for my Levin 65 over a year ago but now it was finally time to carve a proper ebony bridge for my K. Yairi YW-1000.
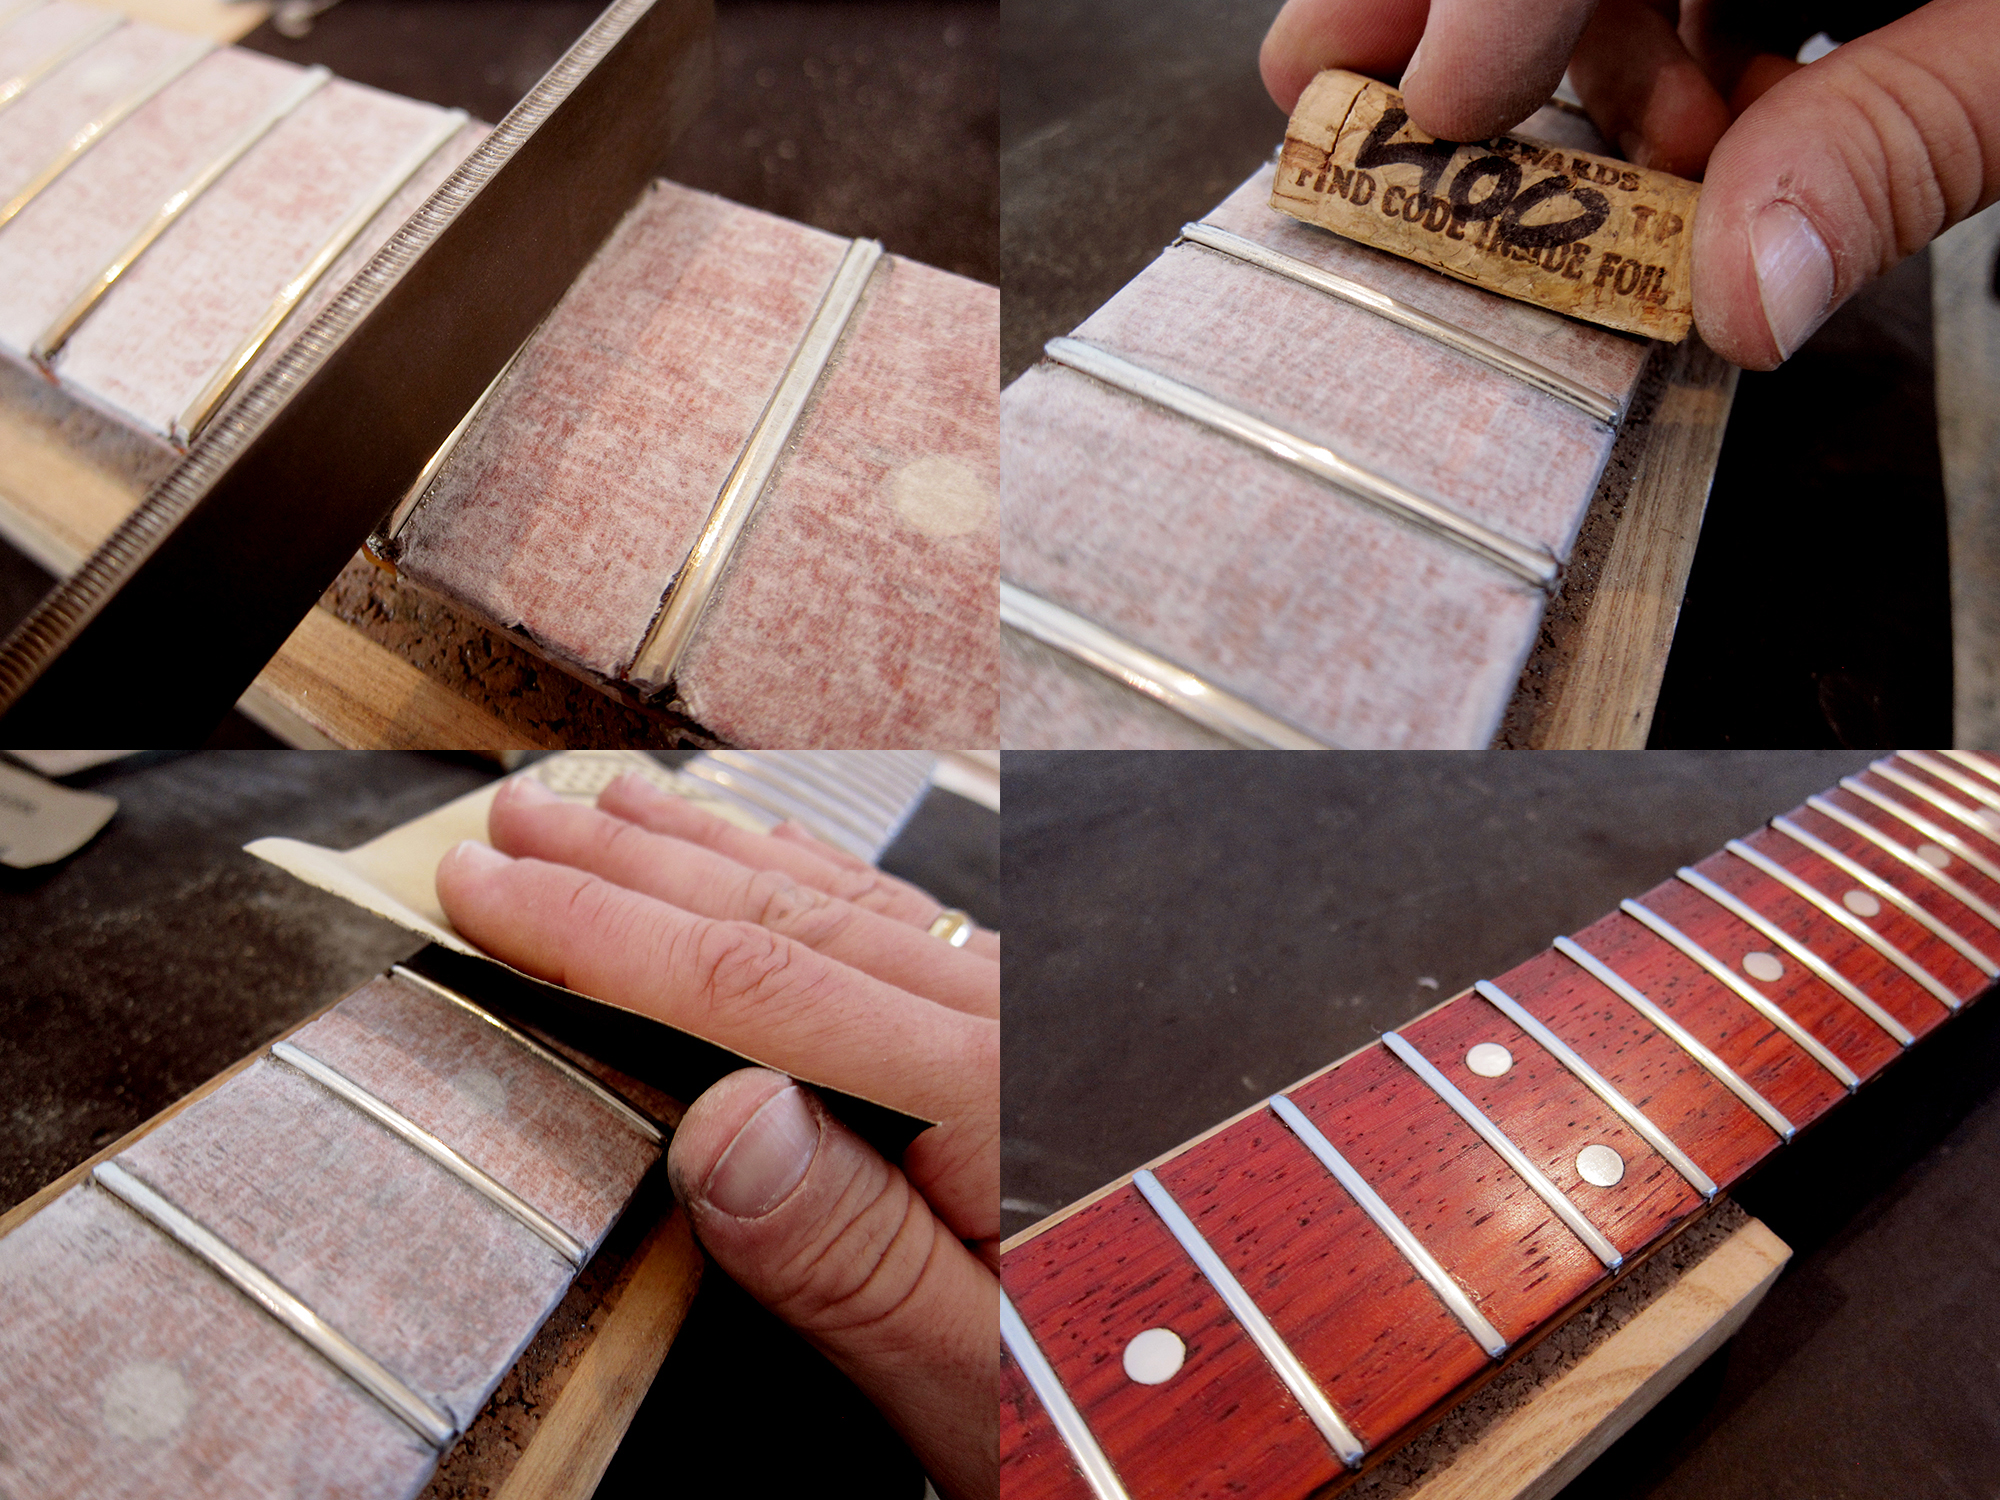
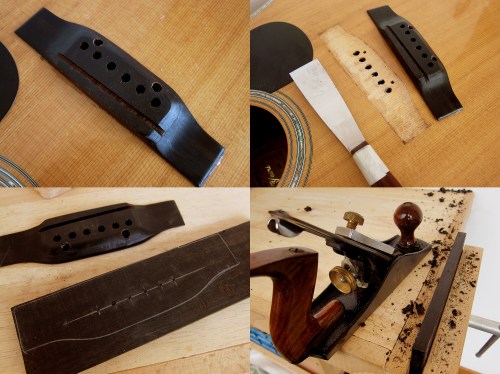
I thought about getting a pre-made Allparts ebony bridge at first but felt that it would be more fun to make one myself from scratch instead. I ordered some rosewood and ebony blanks from Madinter, it thought it could be good to have some extra at home, and got started. First I removed the old bridge, it had two screws that was a bit tricky to get out but eventually I figured it out. I removed the bridge with a spatula that I heated on a normal clothes iron, it works like a charm every time. Start in a corner and work yourself towards the middle and be careful when it starts to loosen up so you don’t break it off and chip the top, it should come off slowly and without force. I planed the ebony blank and then used a cabinet scraper to get it even. I copied the old bridge and drilled the holes straight away. It felt easier to do this before the bridge was shaped, it would also have saved me a lot of time in case I messed up the holes and had to start all over again. Luckily everything went fine.
Once the bridge was sawed in to a good size, I made it a couple of millimetres bigger on all sides, I drew the outlines of the final shape. I mounted the bridge blank on a piece of scrap wood with two screws so I could more easily work all around with the bridge firmly secured. I used a chisel to carve out the shape on the sides and from the top down towards the wings. I got a good round shape with a half round rasp and then it was just a hell of a lot of sanding to remove all the lines from the rasp and to get it smooth and nice.
I glued the bridge on and after 3 days I strung up both E-strings and used a drill as a saddle so I could move it around until I got the intonation right, I forgot to take a picture of that. I marked out the saddle and then sawed a 3 mm slot. Next step was to create a bone saddle to match and string it up. Easy peasy, well it was a hard days work but it was easier that I thought.
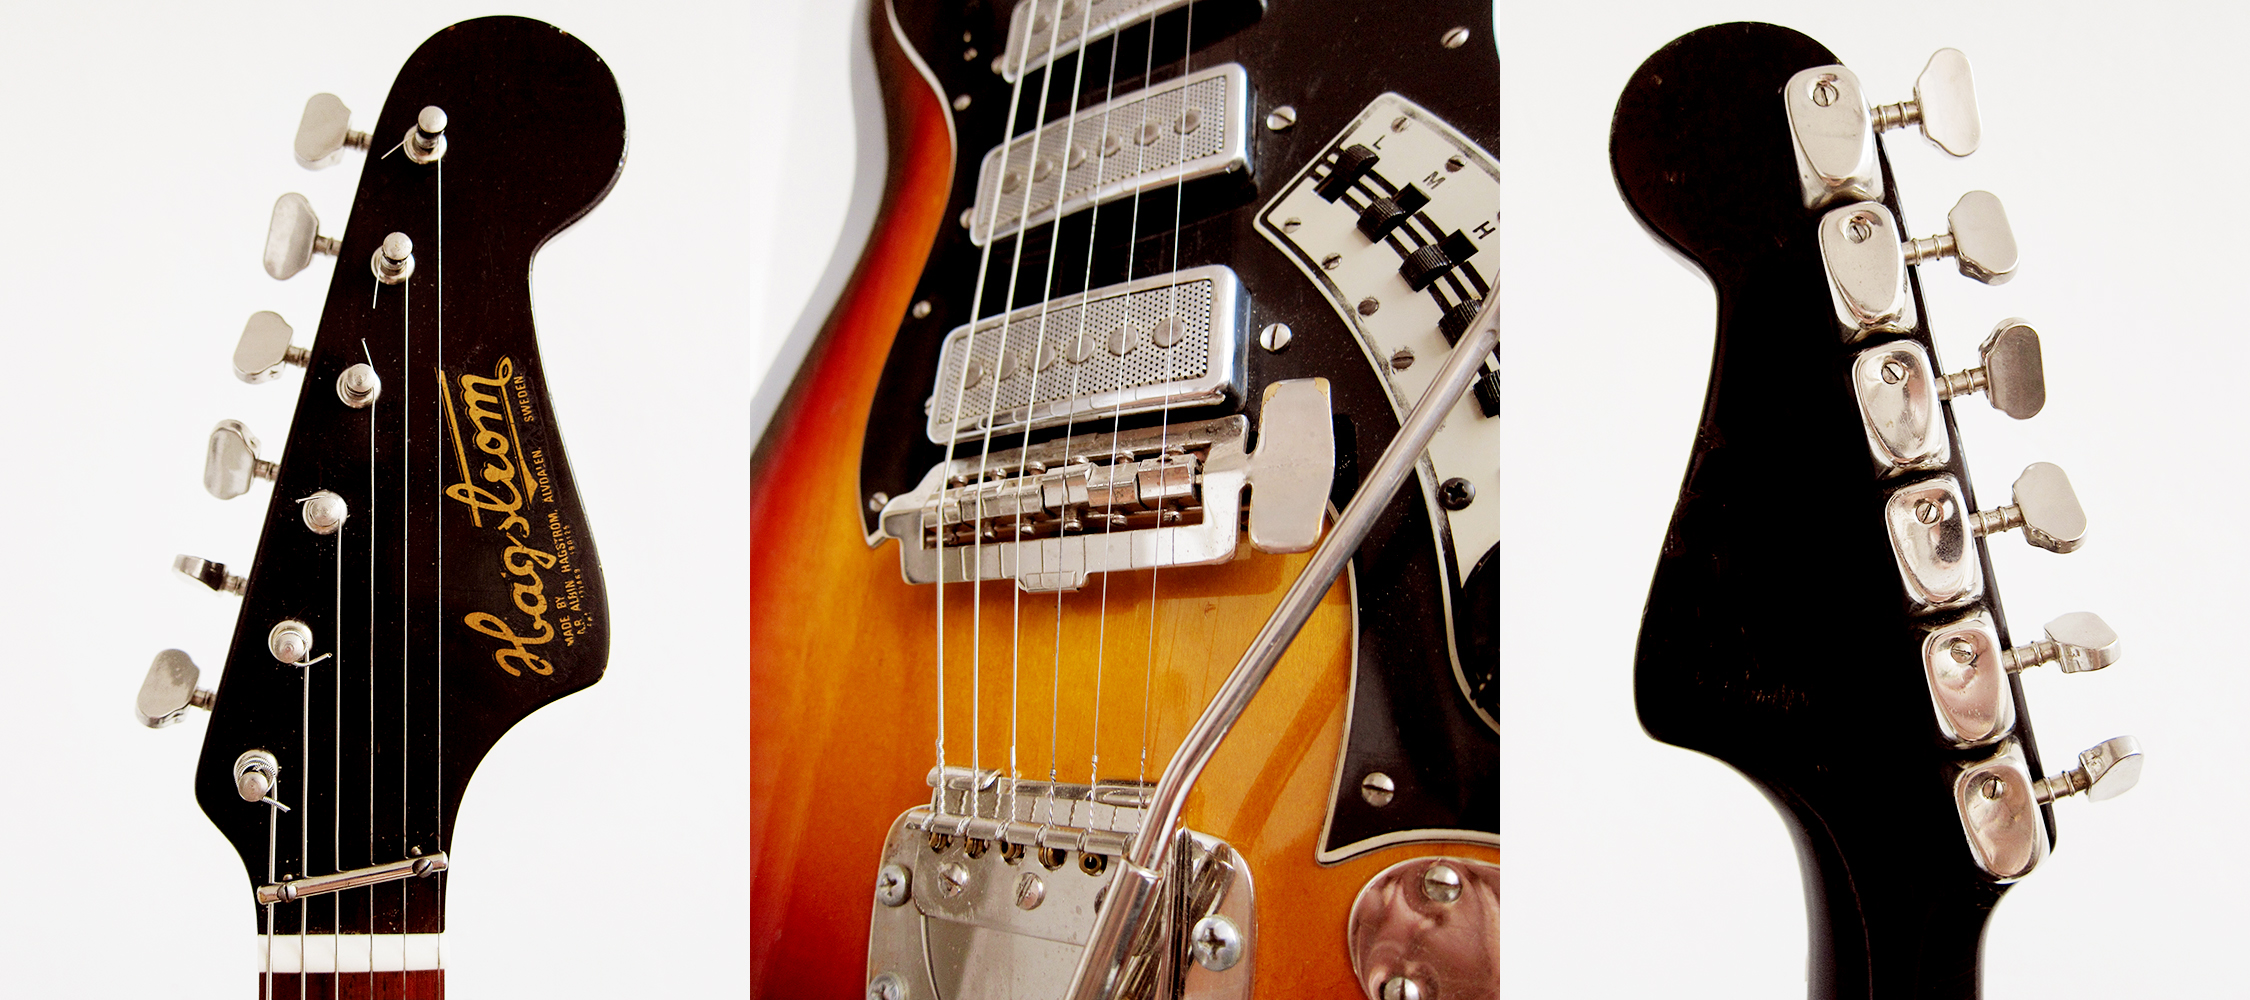
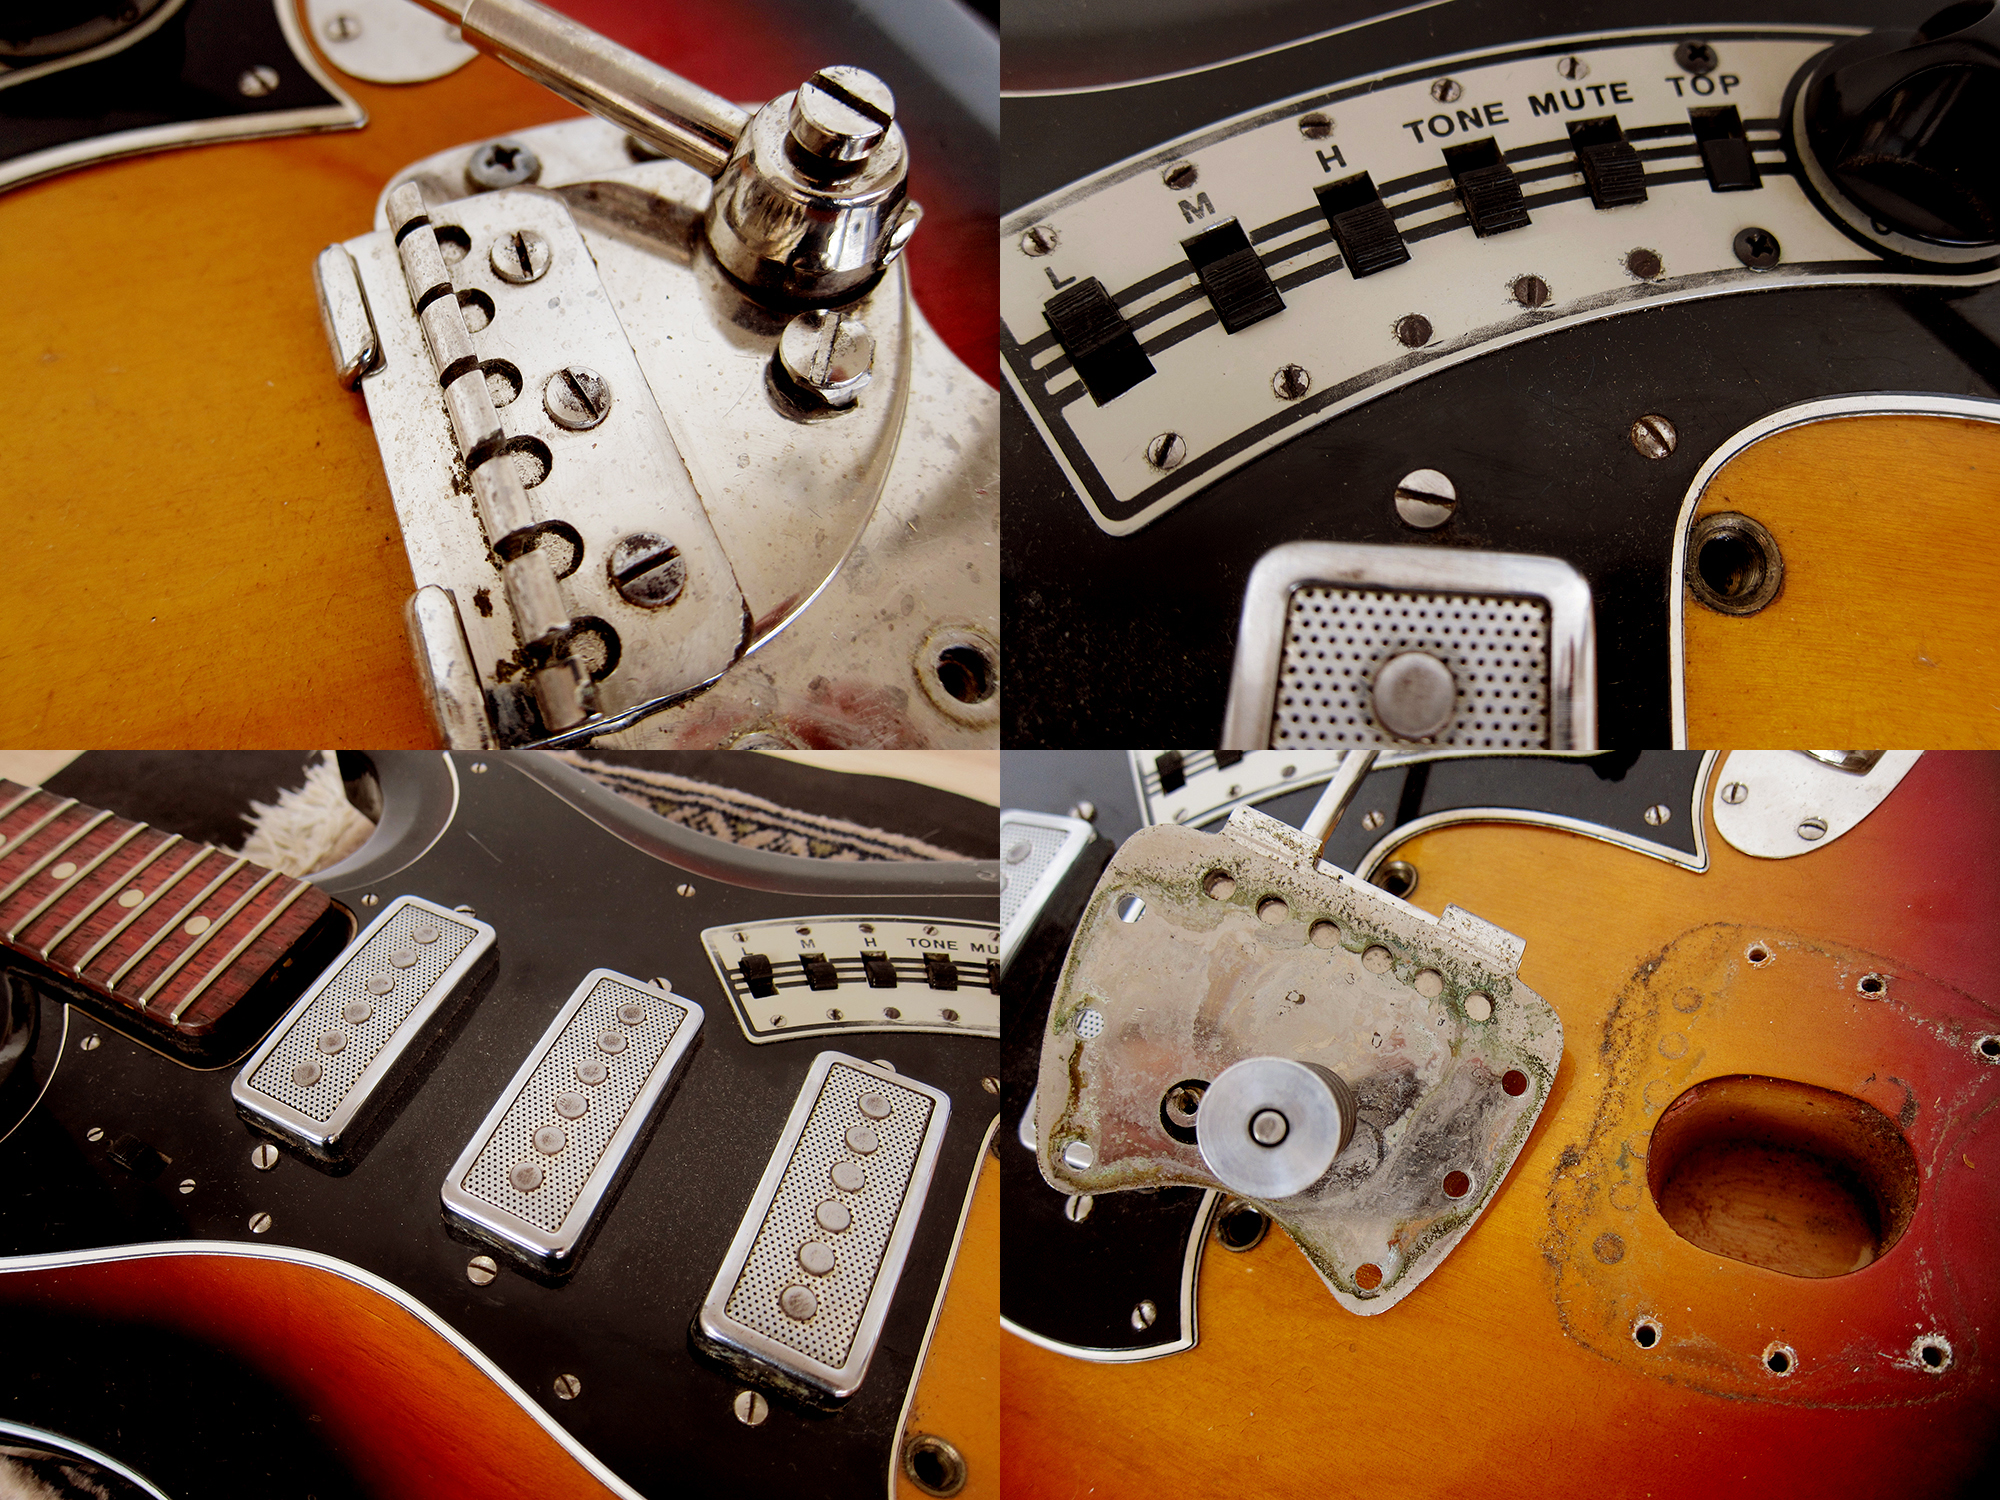
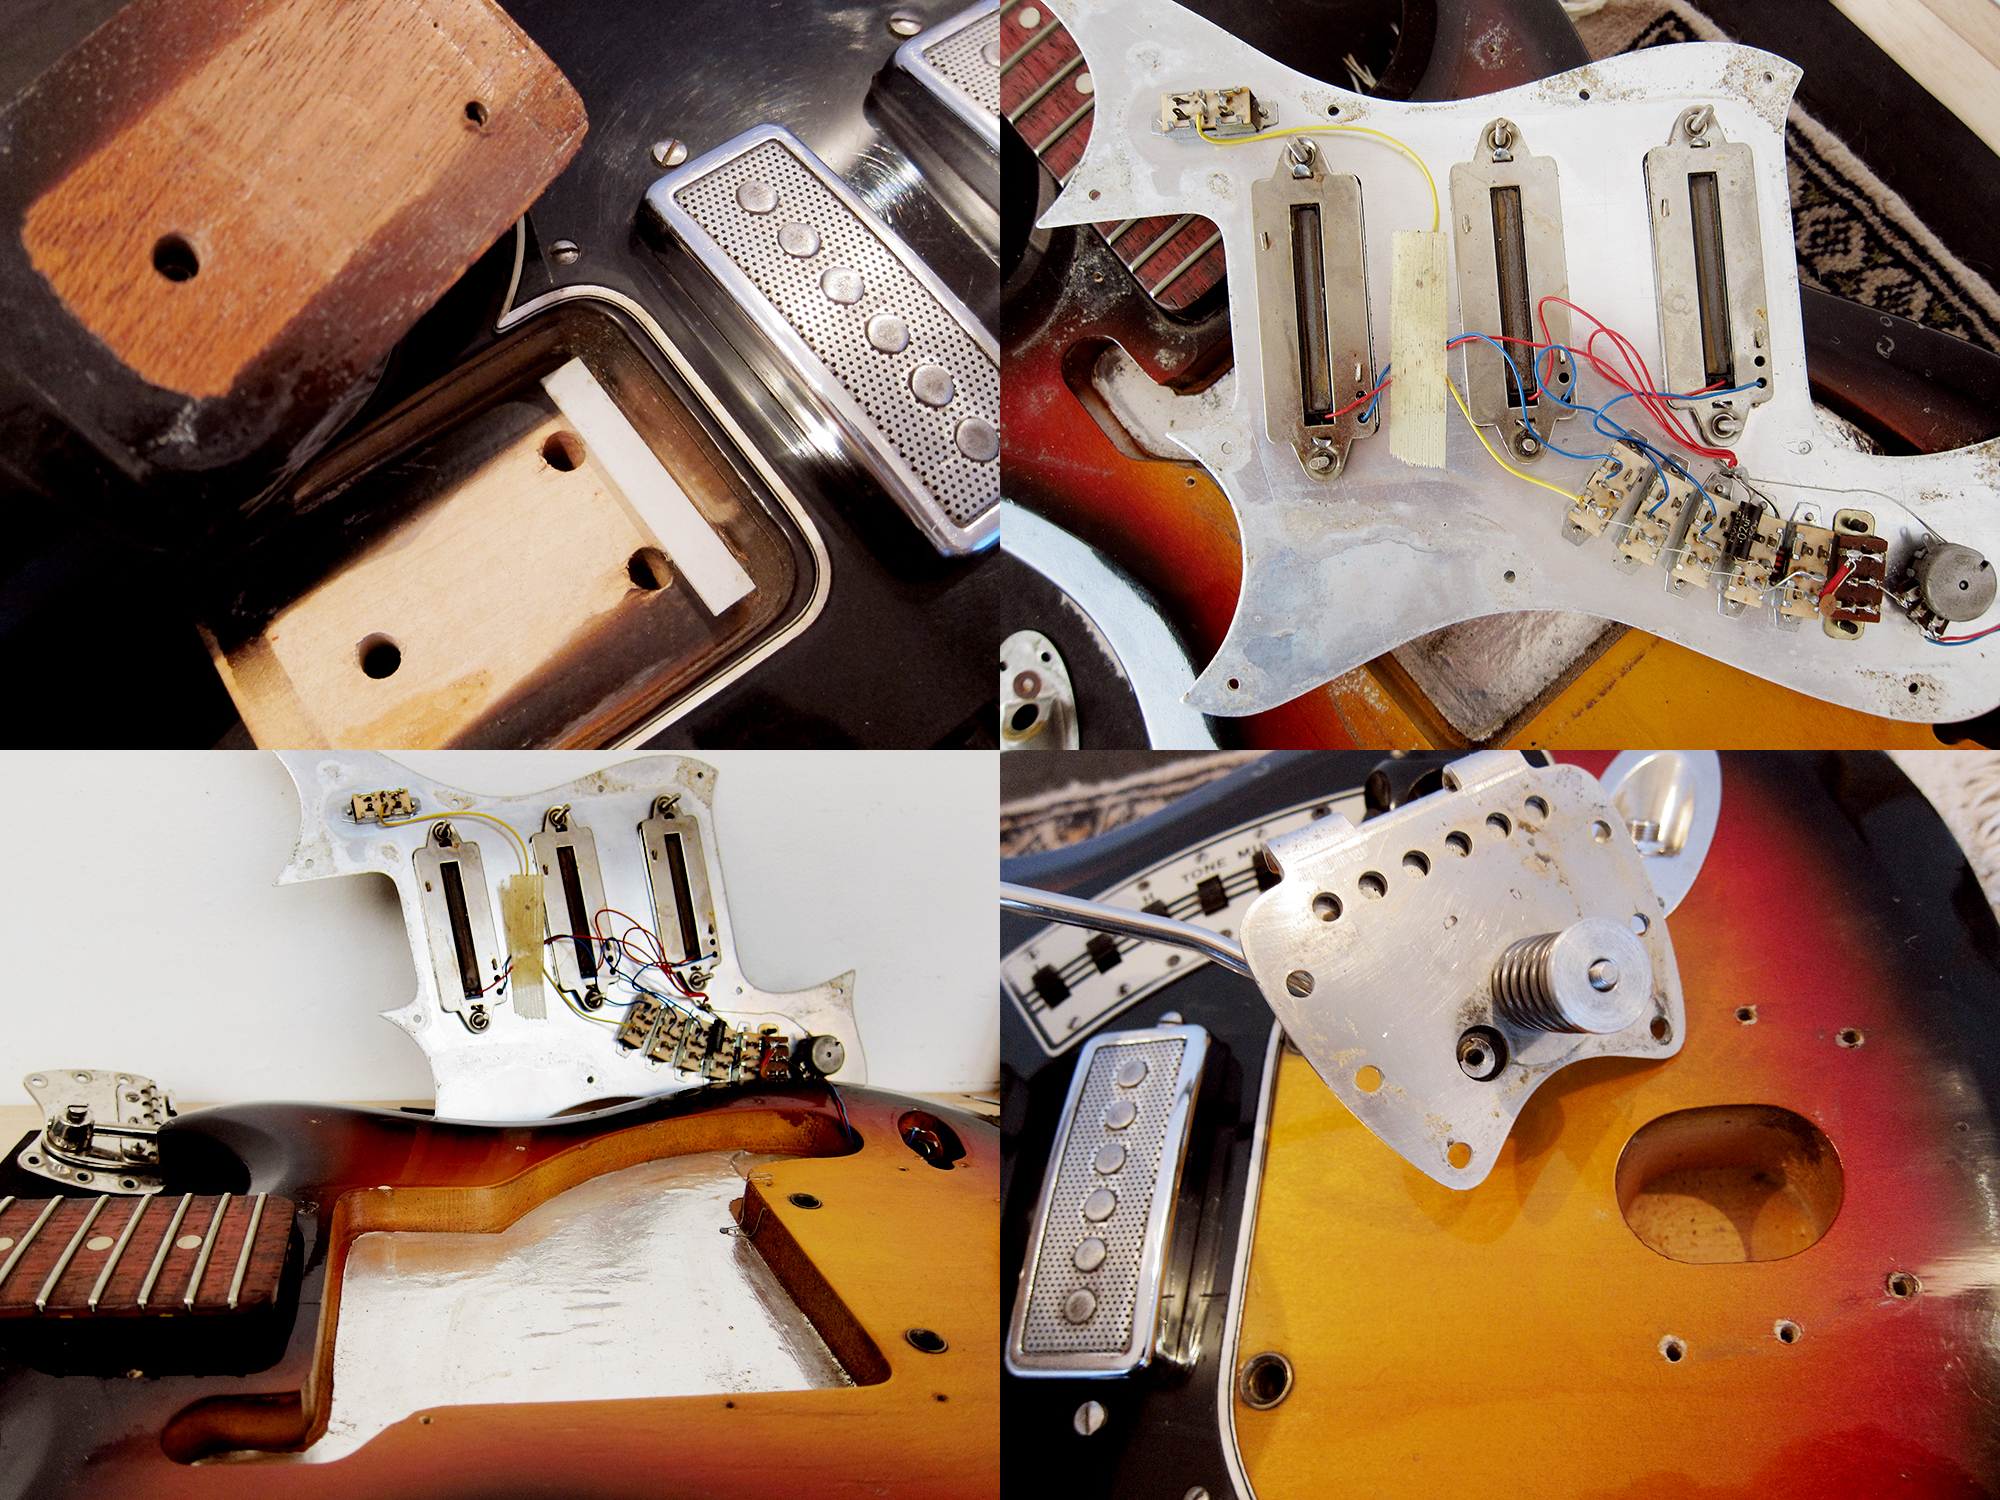
I found a Hagström HIII back in April that I felt really sorry for and had to rescue, or rather save it from being slaughtered and sold for parts by someone else. Unfortunately it wasn’t a bargain and I probably wouldn’t have bought it if I wasn’t drunk at time, I need to stop browsing eBay on Sunday evenings. It had all the parts but the fretboard and frets were in a terrible state and the electronics weren’t working properly, basically a nice guitar and worth the price if it was working. All the hardware cleaned up nicely, I love the Van Gent machine heads, a complete set tend to go for 100€ on their own, and it had the original tremolo, pickups and pickguard. I had to remove the old frets, even out the fretboard and then refret it to get it playable. After waiting for over a month I finally got the switch needed from Hong Kong here we are, a fully restored and working 1970 Hagström HIII. Even though I love the look and sound of this guitar I can’t seem to get used to the fast Hagström neck, the fastest neck in the world, and therefore it’s for sale.
Hagström HIII made in Älvdalen, Sweden between 1970-1972. It’s the 491st HIII made in a series of totally 708 guitars, this was the last run ever of this model since it was replaced by the more 1970’s looking Hagström HIIN
I started with taking the guitar apart and cleaning everything with a toothbrush and some soap and then polish up all the hardware.
The electronics was in fairly good state but needed to be grounded properly. Also the on/off wasn’t plugged in and the bridge pickup’s switch wasn’t working properly so I had to wait a month for a new one from Hong Kong. Now everything is soldered up properly and is working fine.
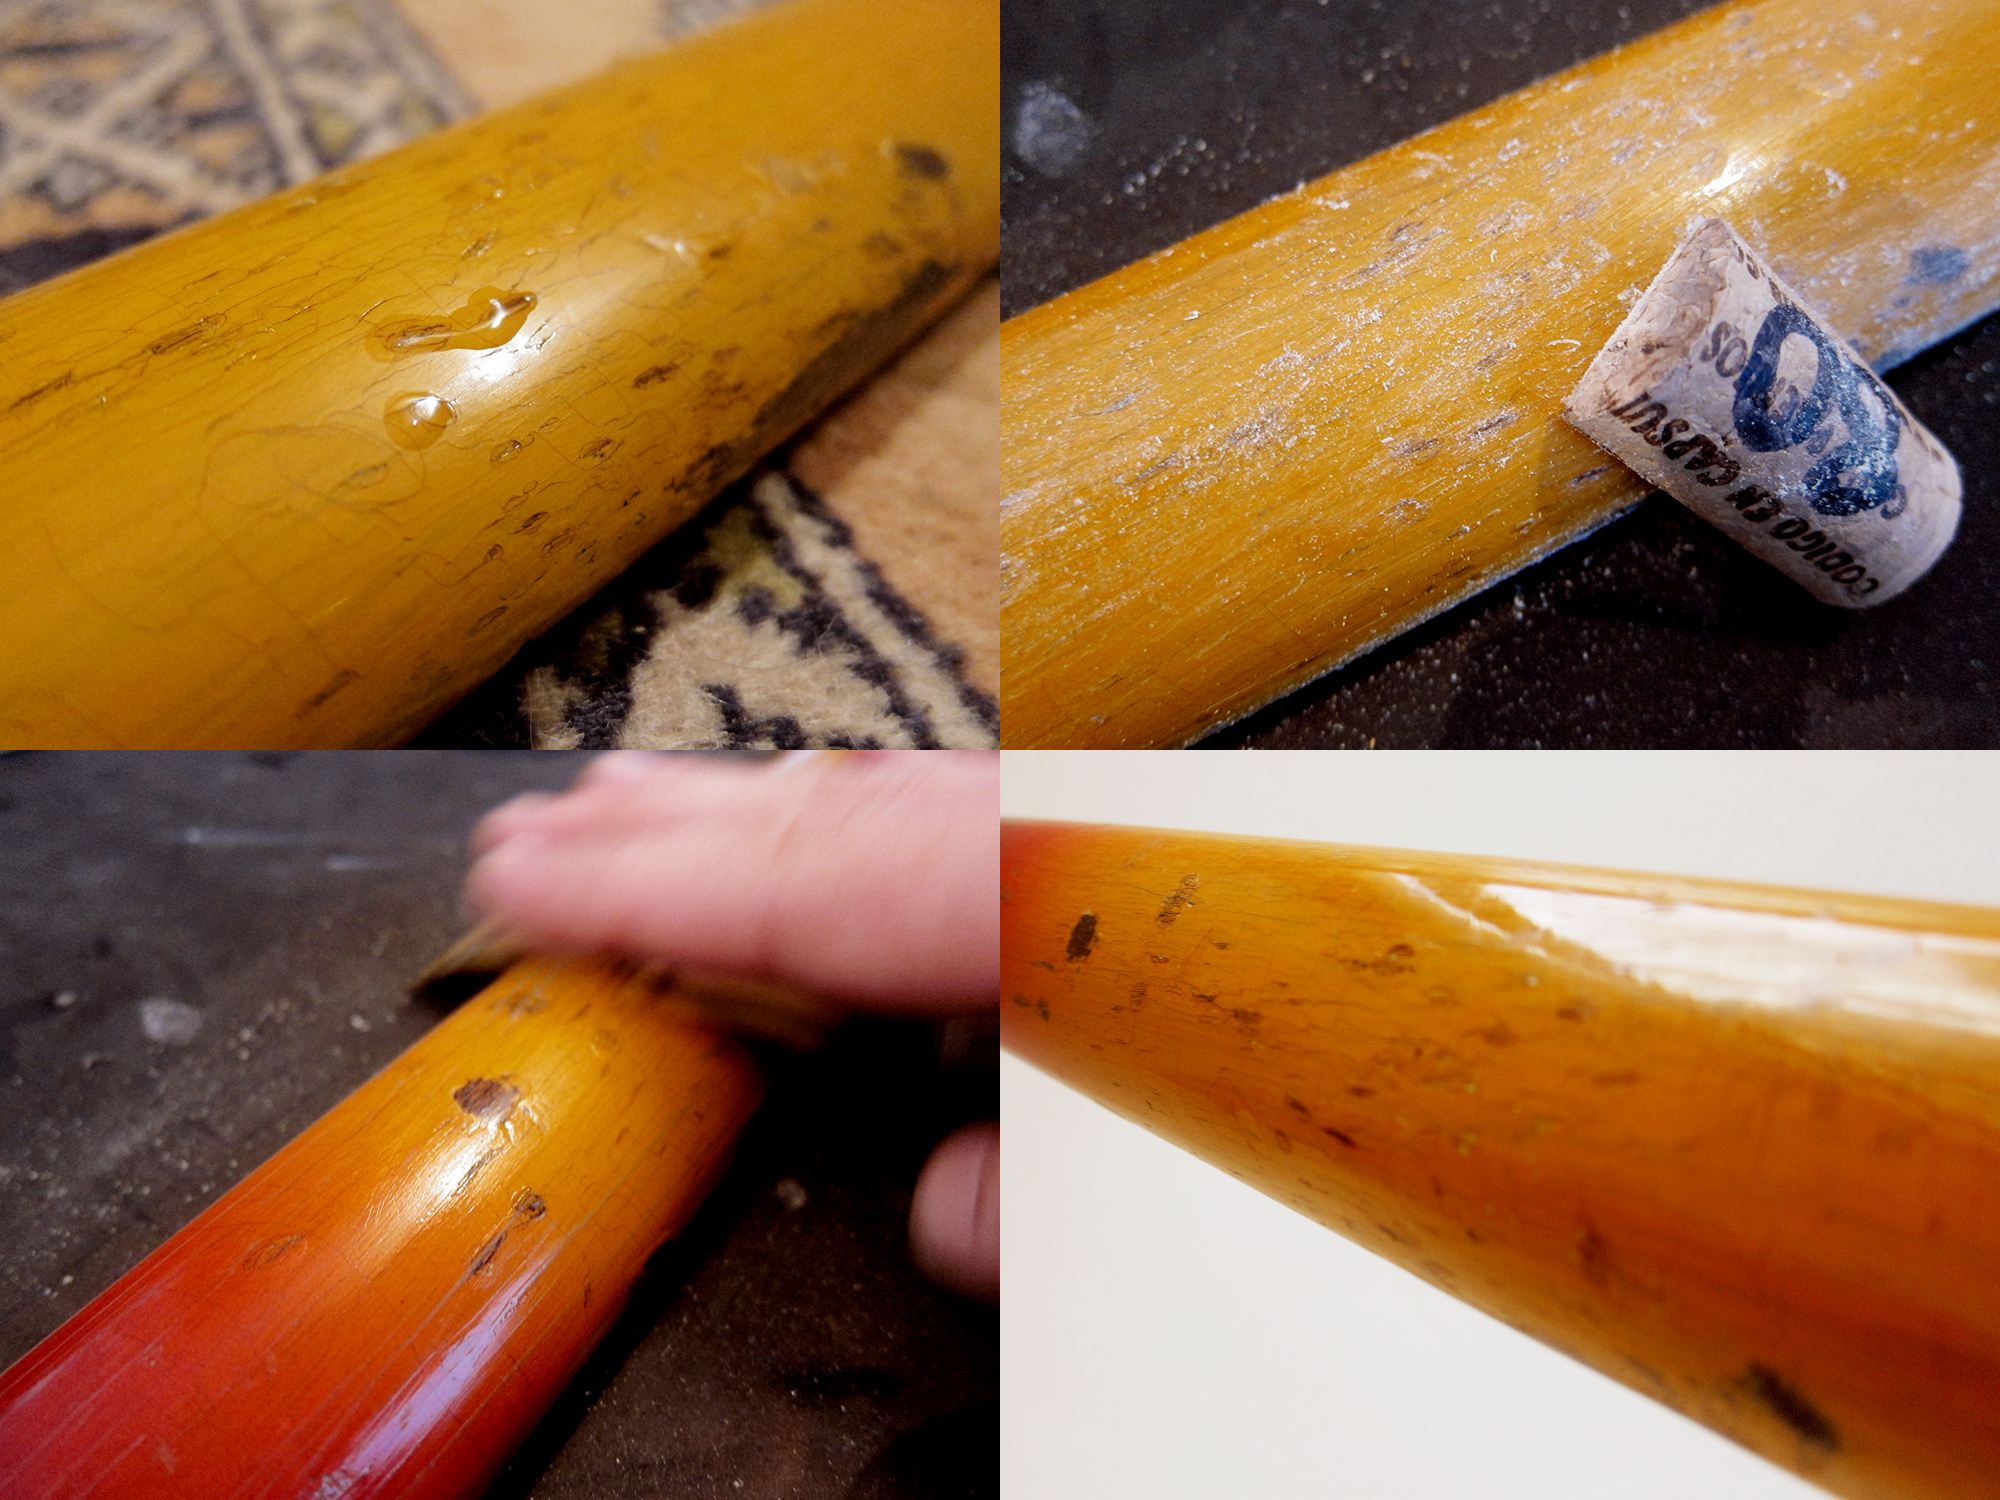
The back of the neck was a mess, dents and groves everywhere so I filled them with Nitro and sanded everything smooth before I buffed it up with metal polish so now you can’t feel it.
The main problem with the fretboard was the deep groves in it, it almost looked like the first 5-7 frets had been scalloped. The original frets were really uneven too so I decided to refret it completely. I pulled out the old frets, sanded the fretboard even and then gave it 10″ radius before I re-cut the fret slots and installed new Jescar jumbos.
I levelled, crowned and polished the frets and in the end the fretboard looked pretty damn good if I may say so myself.
Hagström HIII and my friend Rafa’s Hagström HIIN, both Made in Sweden in 1970, same body but different pickups, electronics and head shape
This video was shot before I changed the bridge pickup’s switch so it’s cutting out occasionally, that has been sorted now with a new switch. I posted these two videos so you can here the difference between Hagström’s fat single coils and their humbuckers.
Here is a new video of the Hagström III with all the switches working, unfortunately my amp is acting up and is making hell of a noise
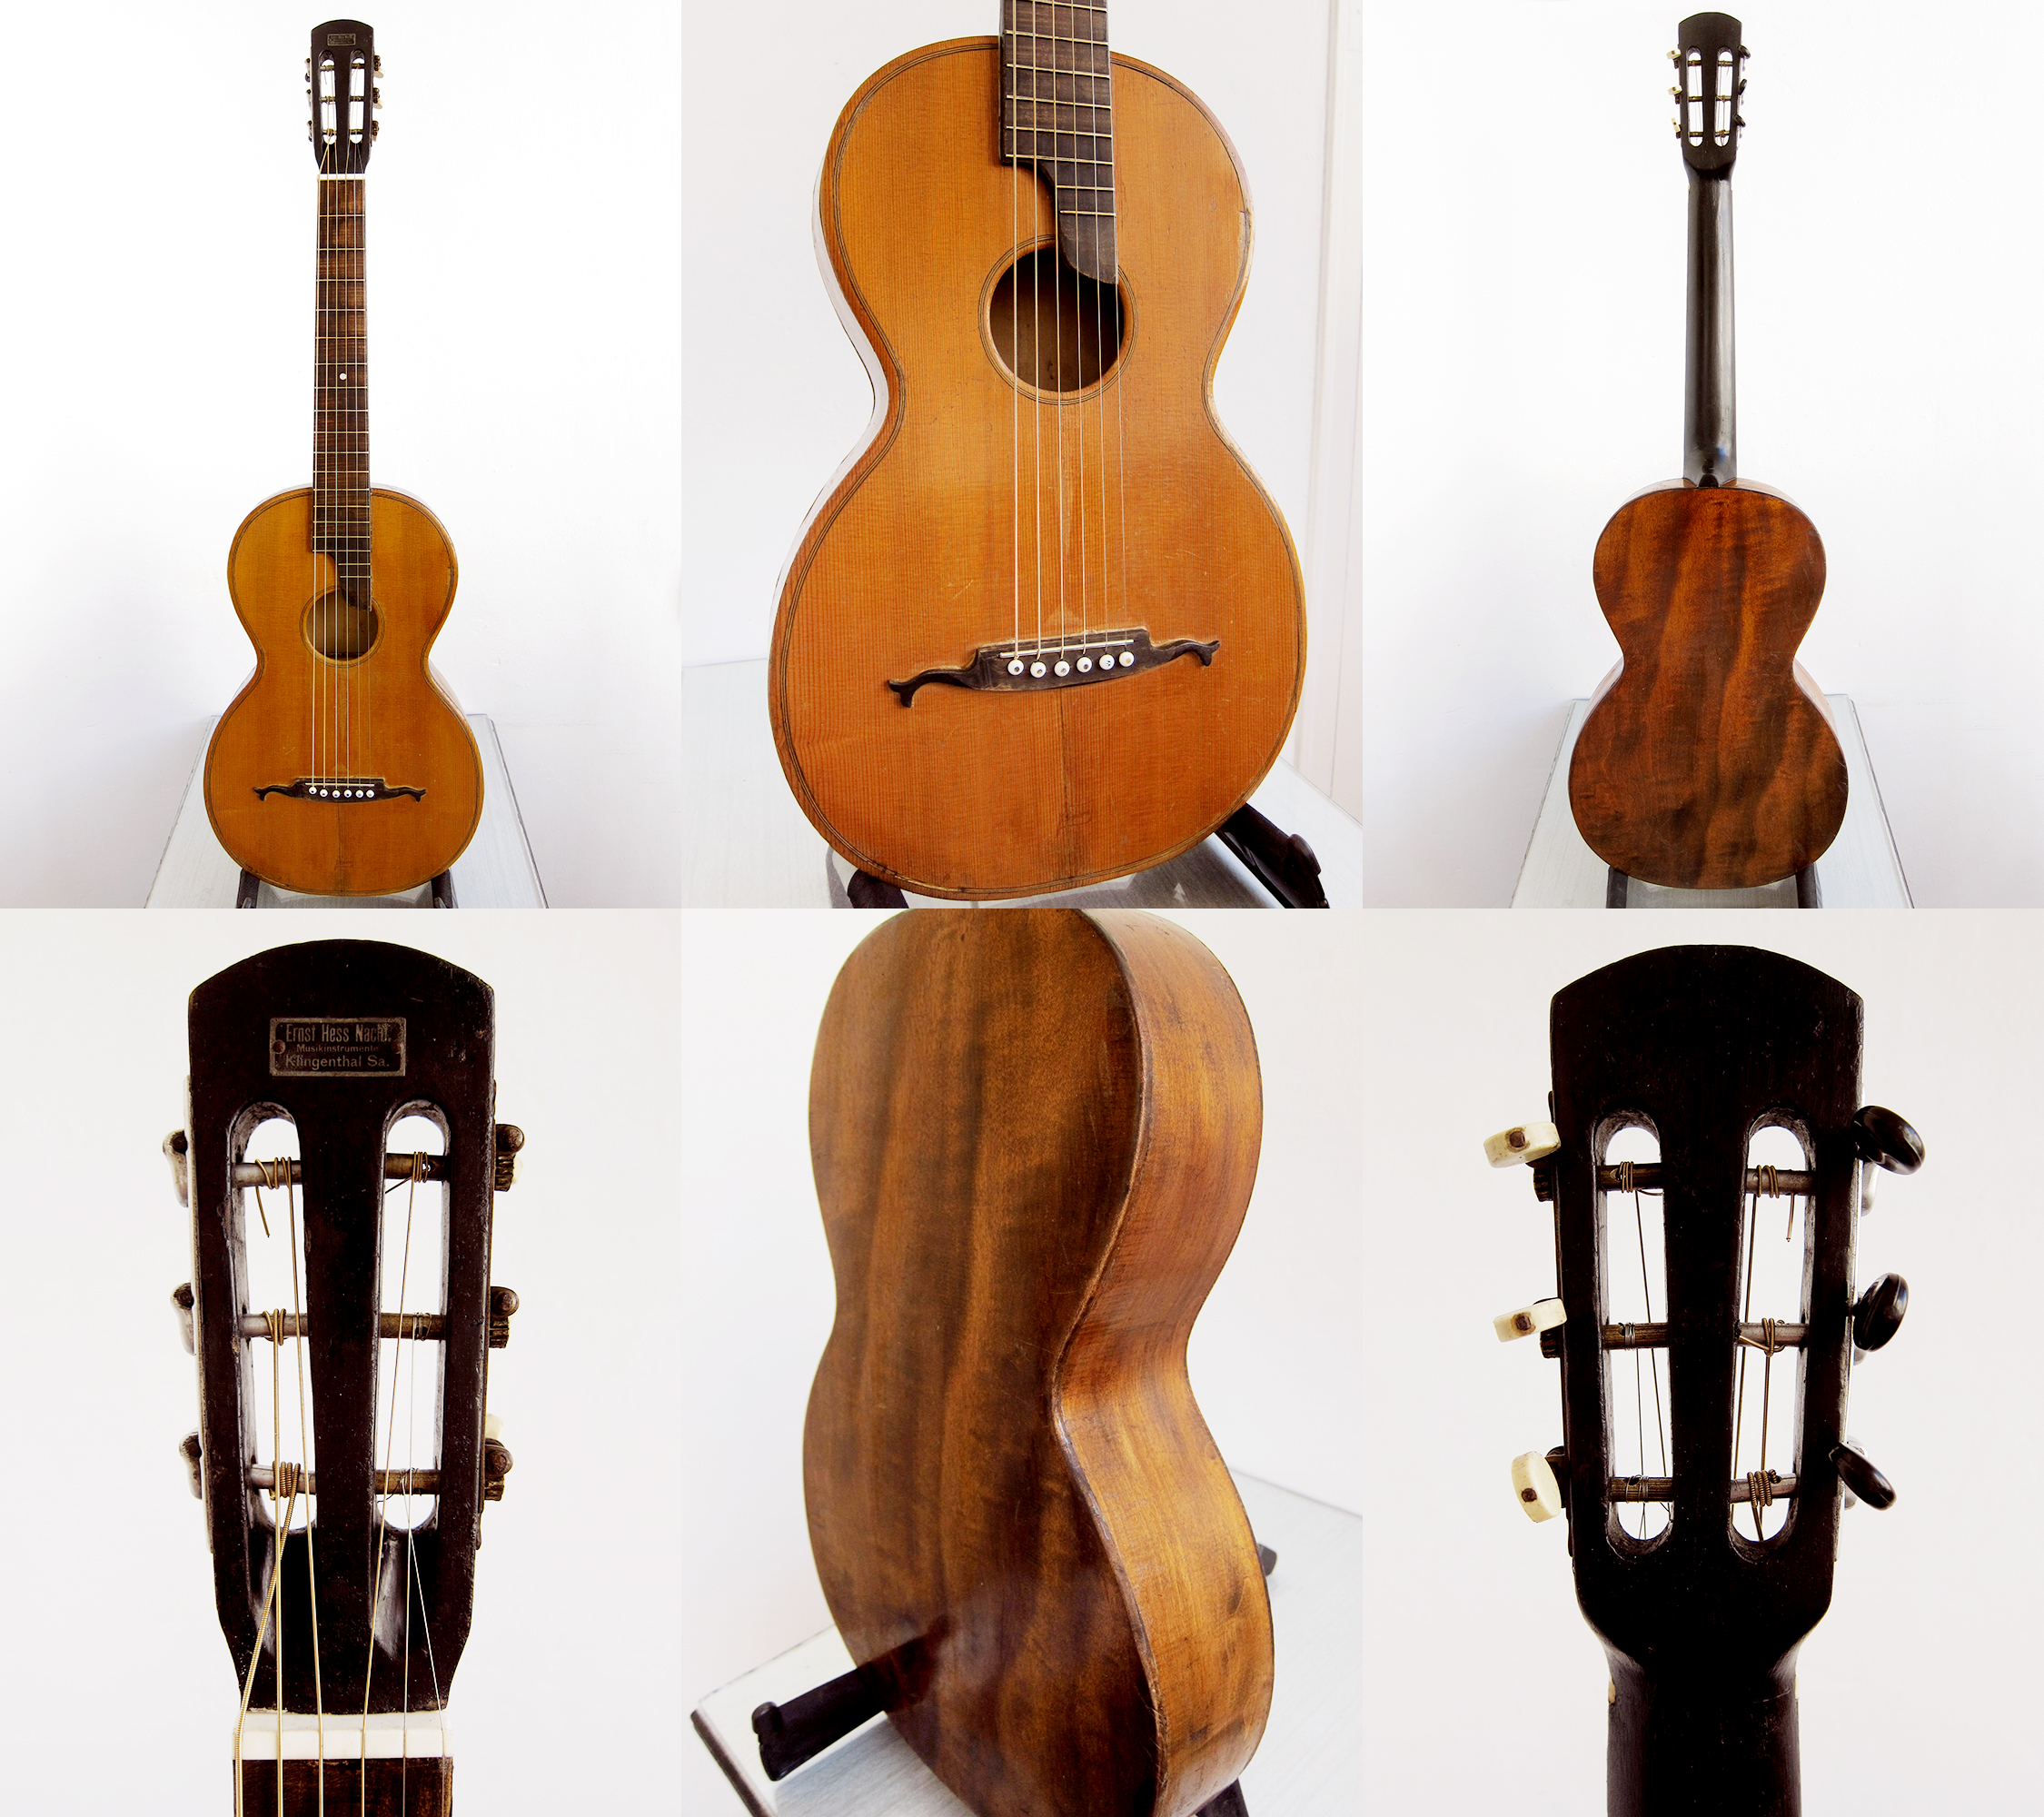
I recently restored a little German parlour that I unfortunately don’t know anything about. The only info the seller gave me was that it was made in Vogtland in perhaps the 1920-30’s. If this would have been a Japanese acoustic or a Levin I would have had a bit more of knowledge but I really don’t know anything about old German parlours. I just bought it to practice my guitar repairing skills and for that it was pretty good, I’ve learned a couple of new things. The idea was to give it to my wife but now we found another one for her so if anyone is interested in buying this then send me an email.
The action is a bit high so it’s ideal for slide playing but you can still play it like a normal guitar if you have light gauged strings on it. It sounds pretty awesome, really clear and loud for being so small. It’s made of all solid woods, spruce top, walnut back and sides and perhaps pine or some other light coloured wood in the neck, I’m not that great at guessing woods. One set of machine heads looks original and seems to be from 1920-30’s and the other is perhaps DDR made from the 1960’s, but both works fine. Overall a pretty nice sounding little guitar with a beautiful patina and the most awesome looking one piece walnut back.
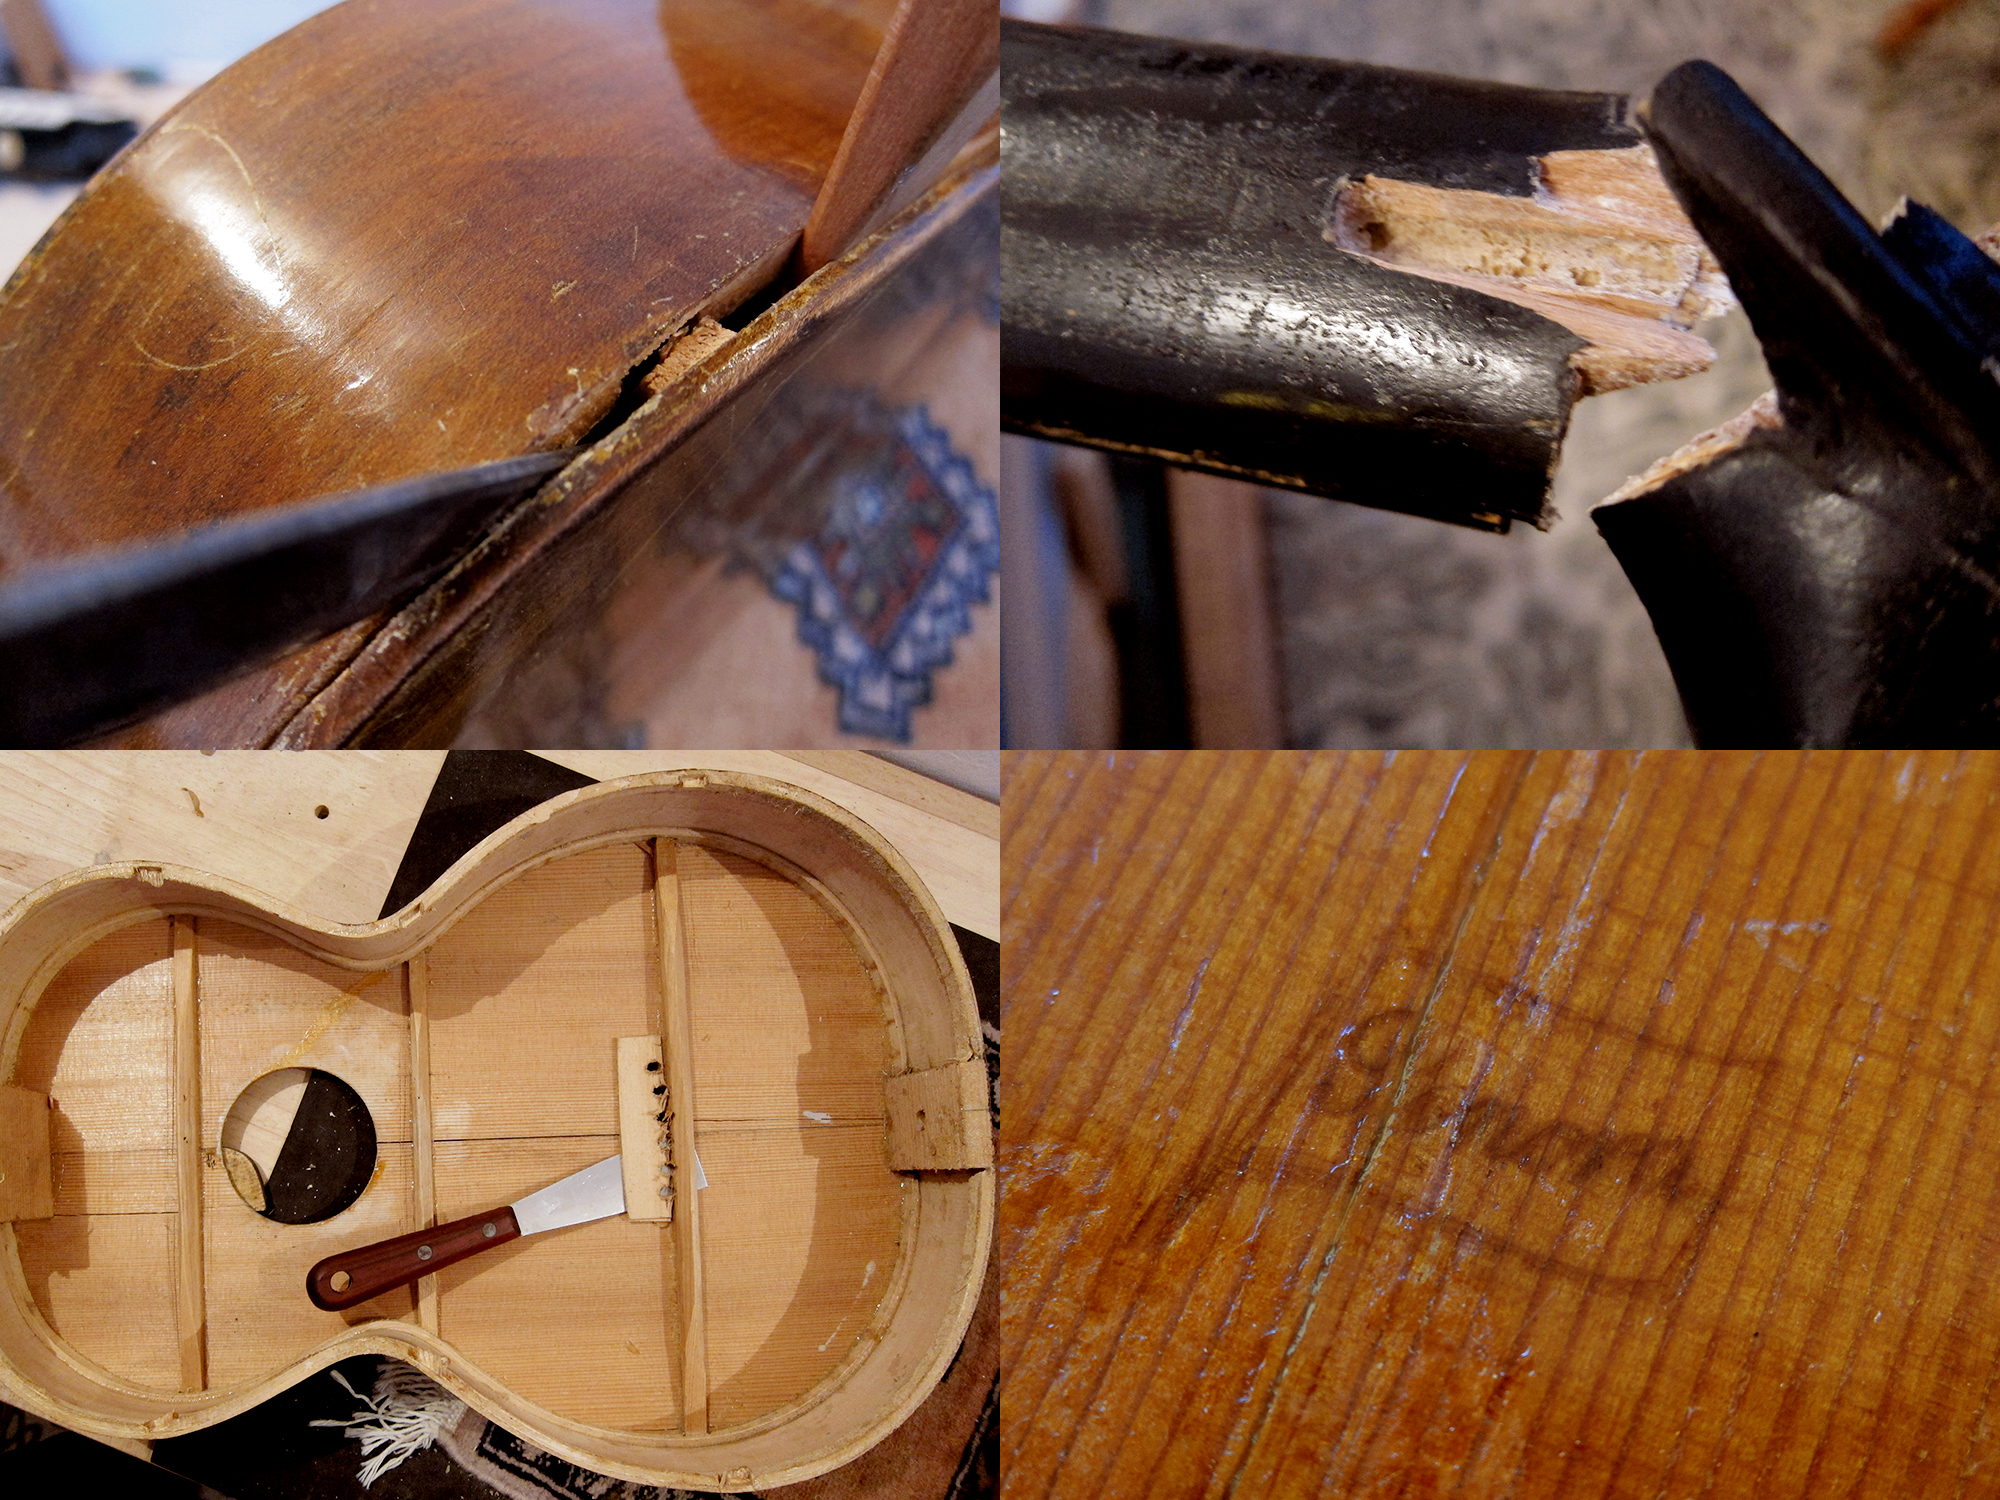
I started with taking the back off so I could re-glue all the braces. It was pretty straight forward to open it, I used a heated spatula and a knife, it worked like charm, I removed all the braces in the same way. The head was broken and pretty much everything that could be lose was lose on it when it arrived. It has a small makers mark under the bridge but I can’t really figure out what it says, if anyone has any ideas please get in touch.
Update: August 27, 2015: The brand is Sonora
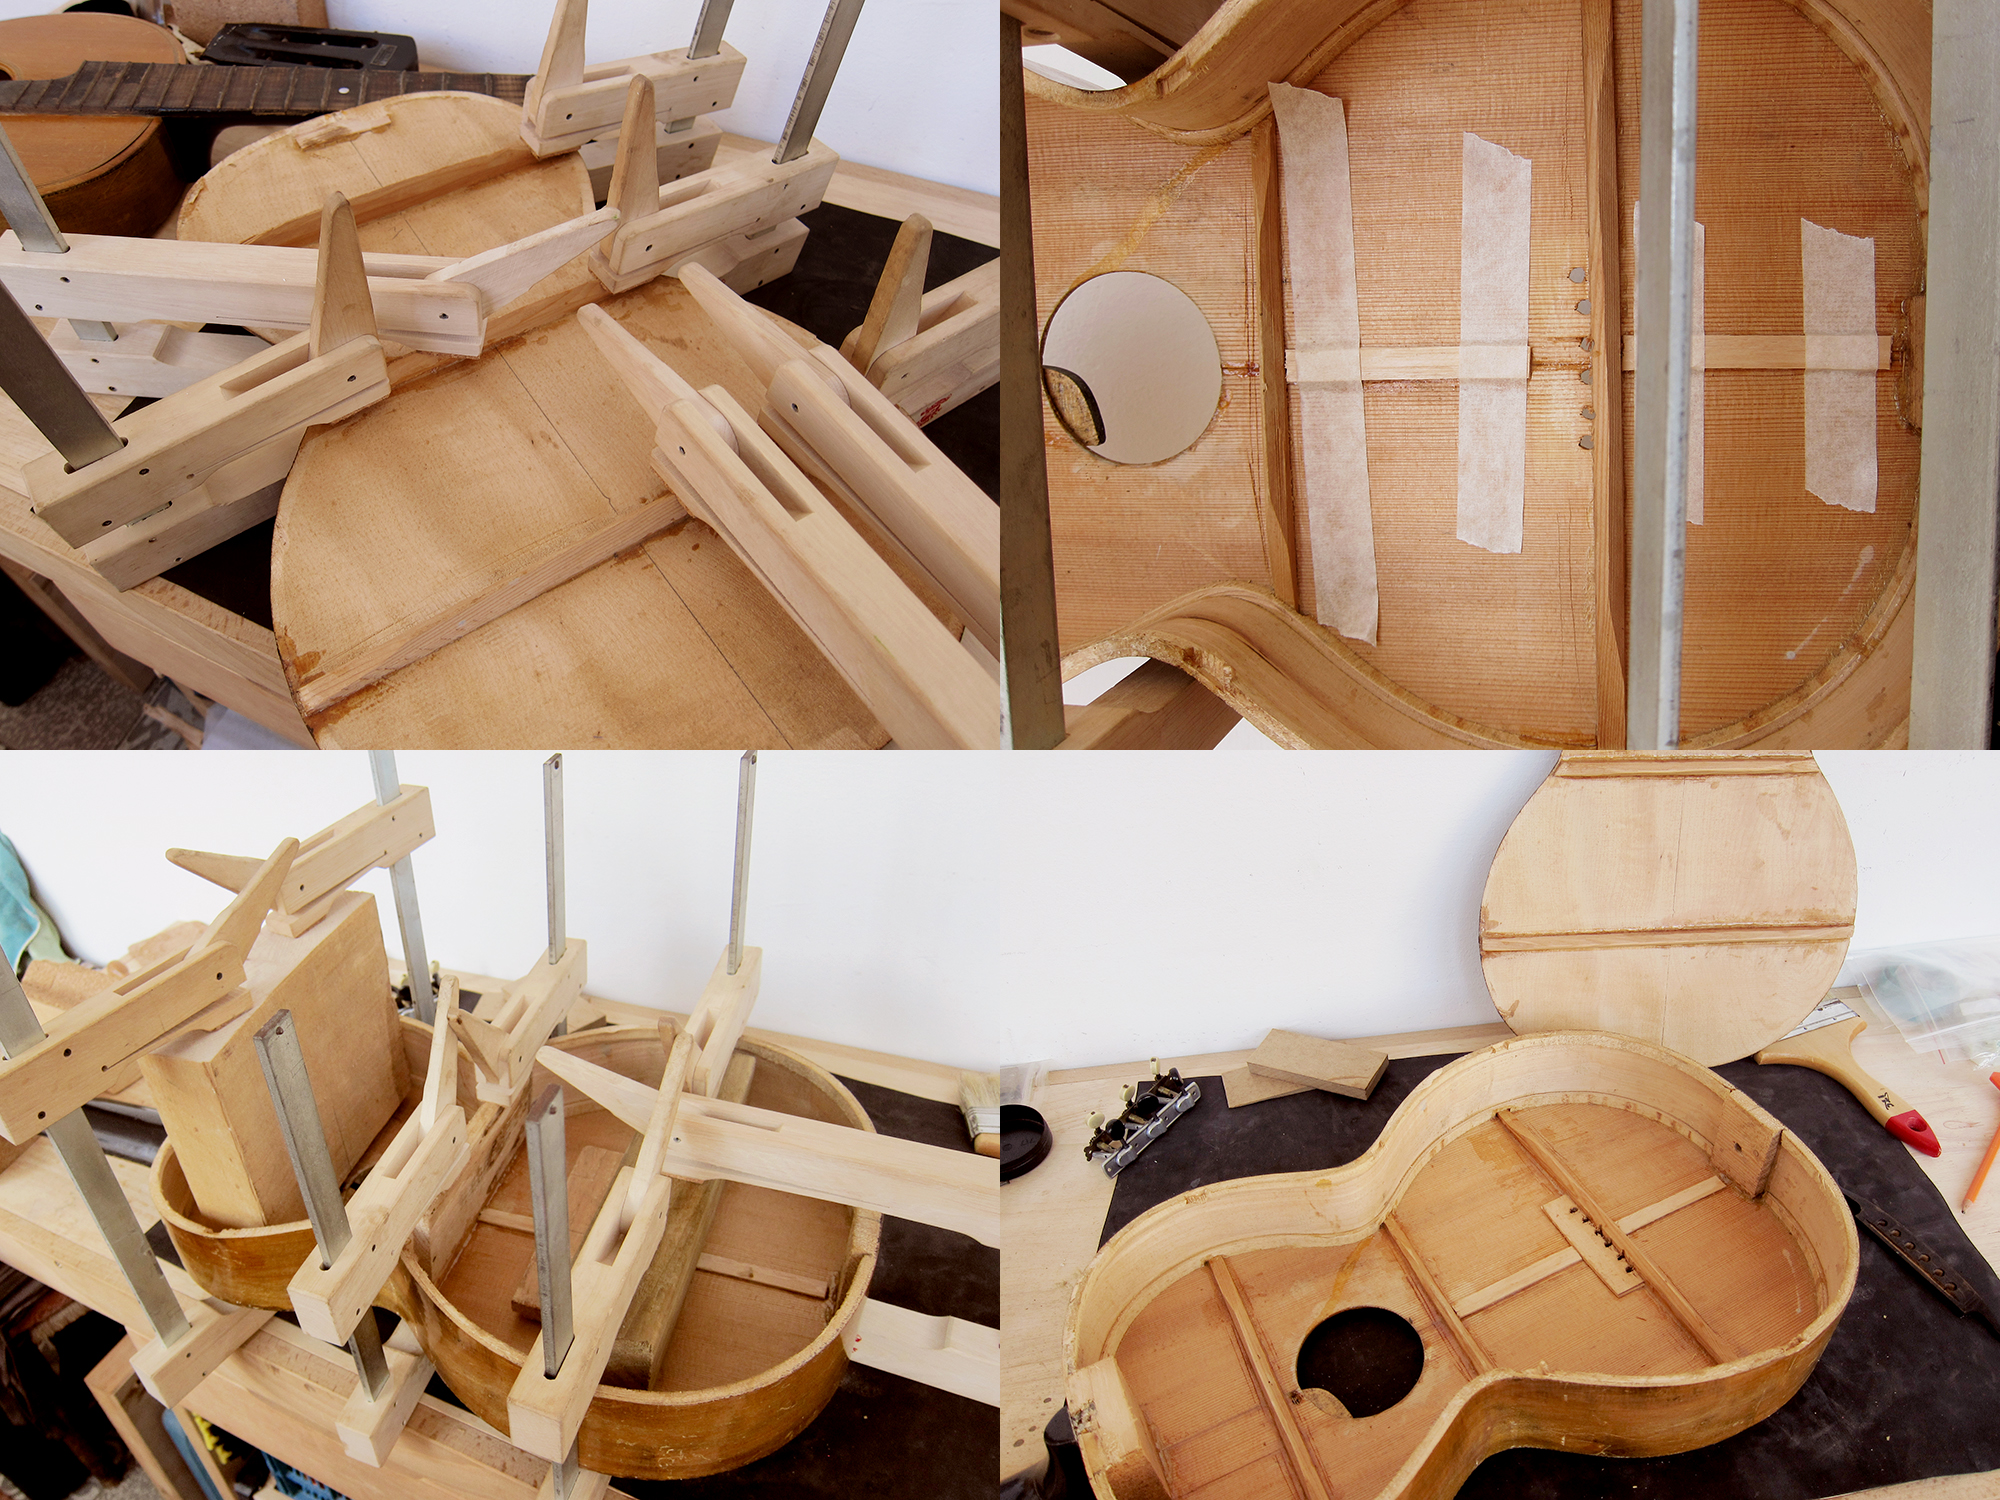
I re-glued all the braces and the two cracks in the top with fish glue. Unfortunately the top had been cracked for so long so I couldn’t get it to close perfectly but at least now it’s solid with two cleats running along the cracks.
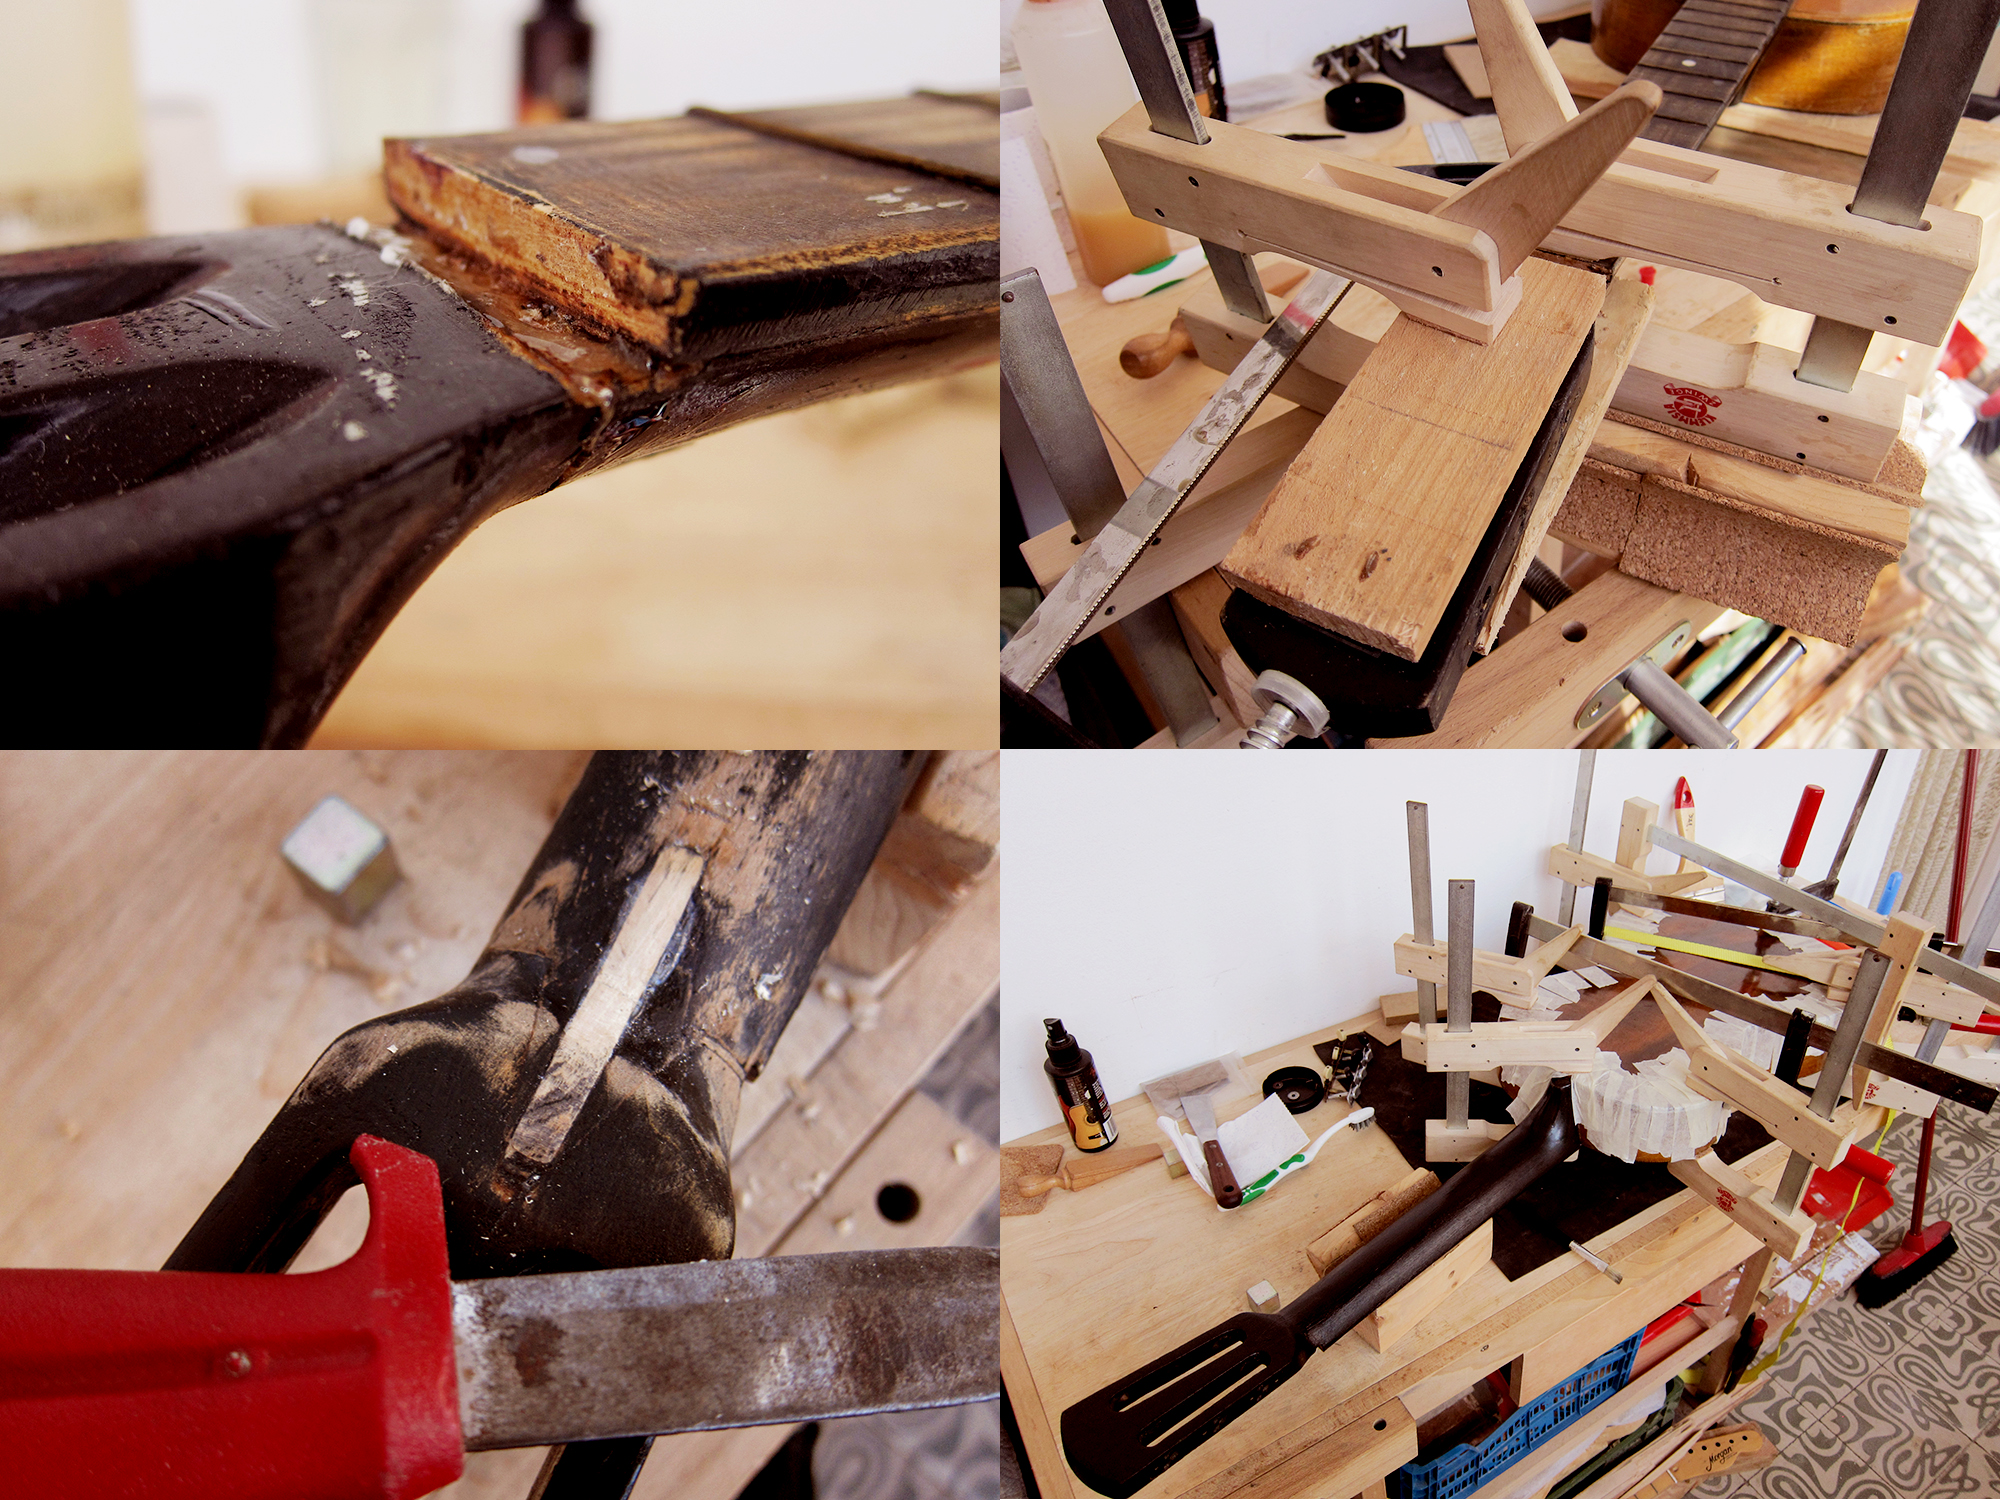
The next step was to glue the head back on. This was a bit harder than the Spanish guitar I glued the head on the week before since the break this time was just under the nut and therefore a lot harder to clamp. I left it for 48 hours and it seems to have worked pretty well so I carved and sanded the back smooth and then painted it black again. I glued the back on and closed the guitar with tape and clamps and this was pretty tricky too, as I’m sure everyone that has ever closed a guitar would know. The sides tend to move outwards so you have to push them in place sideways at the same time as you clamp the top down to the body. A bit fiddly but it worked fine in the end.
Now I just had to make the guitar playable. These old parlours are known for having banana necks since they lack any form of reinforcement in the neck. On top of that they tend to have a hump where the fretboard meets the body. First I heated and steamed the neck under pressure which worked quite well for straighten it out a bit. Then I took out the last 5 frets, sanded down the fretboard, put the frets back and lowered them as much as I could. I painted the fretboard brown and sanded over it to match the rest. After that it was just to level, crown and polish the rest of the frets.
Guitarras de artesanía, Artículos J.A.R. Spanish guitar made in Mataró outside Barcelona 1970’s
I found this guitar in a Cash converters last week and felt so sorry for it. It had a broken head, a cracked brace, loose back and looked so sad that I felt I had to save it and bring it back to life. A week later she is up and running and sounds pretty damn sweet.
I couldn’t find any info about the brand so if anyone knows anything more about it then please get in touch. It has a solid spruce top and what looks to me like solid maple back and sides. It says “Guitarras de artesanía” which should indicate hand crafted but I’m not sure, quality wise it feels pretty much like the Juan Estruch I got for my friend Rafa’s birthday. Perhaps all Spanish guitars were more or less hand crafted back then, the big business guitar factories hadn’t really kicked in yet. I have put this guitar up for sale since I mainly play steel string acoustic guitars and on top of that I have a Francisca Montserrat that I really like.
First I had to try to clean her up, I have never seen a top with that much grease and grime. I used a normal furniture spray and a toothbrush, it worked like a charm. When I had cleaned the fretboard I polished the frets and oiled up the fretboard with lemon oil. She came out looking pretty descent after that.
Now I just had to take care of the broken head and glue the back. I have actually never glued a head on before but I assumed that you do something like this. I used to thin pieces of wood on each side to stabilise it and keep things in place, and also for not damaging the head any further with the force of the clamps. I guess it could have worked with normal wood glue too but I used my trusty old fish glue that I use for pretty much everything when it comes to guitars. It came out looking very solid after being clamped for 48 hours. I also glued the open back and a cracked brace, which was pretty straight forward. The machine heads was broken on one side so I replaced them with the leftovers from the Juan Estruch I fixed last year. They don’t match exactly but at least they are from the same time and region, that’s close enough for me. Compared to the state I found her in I think she is looking pretty good. More images can be found here.
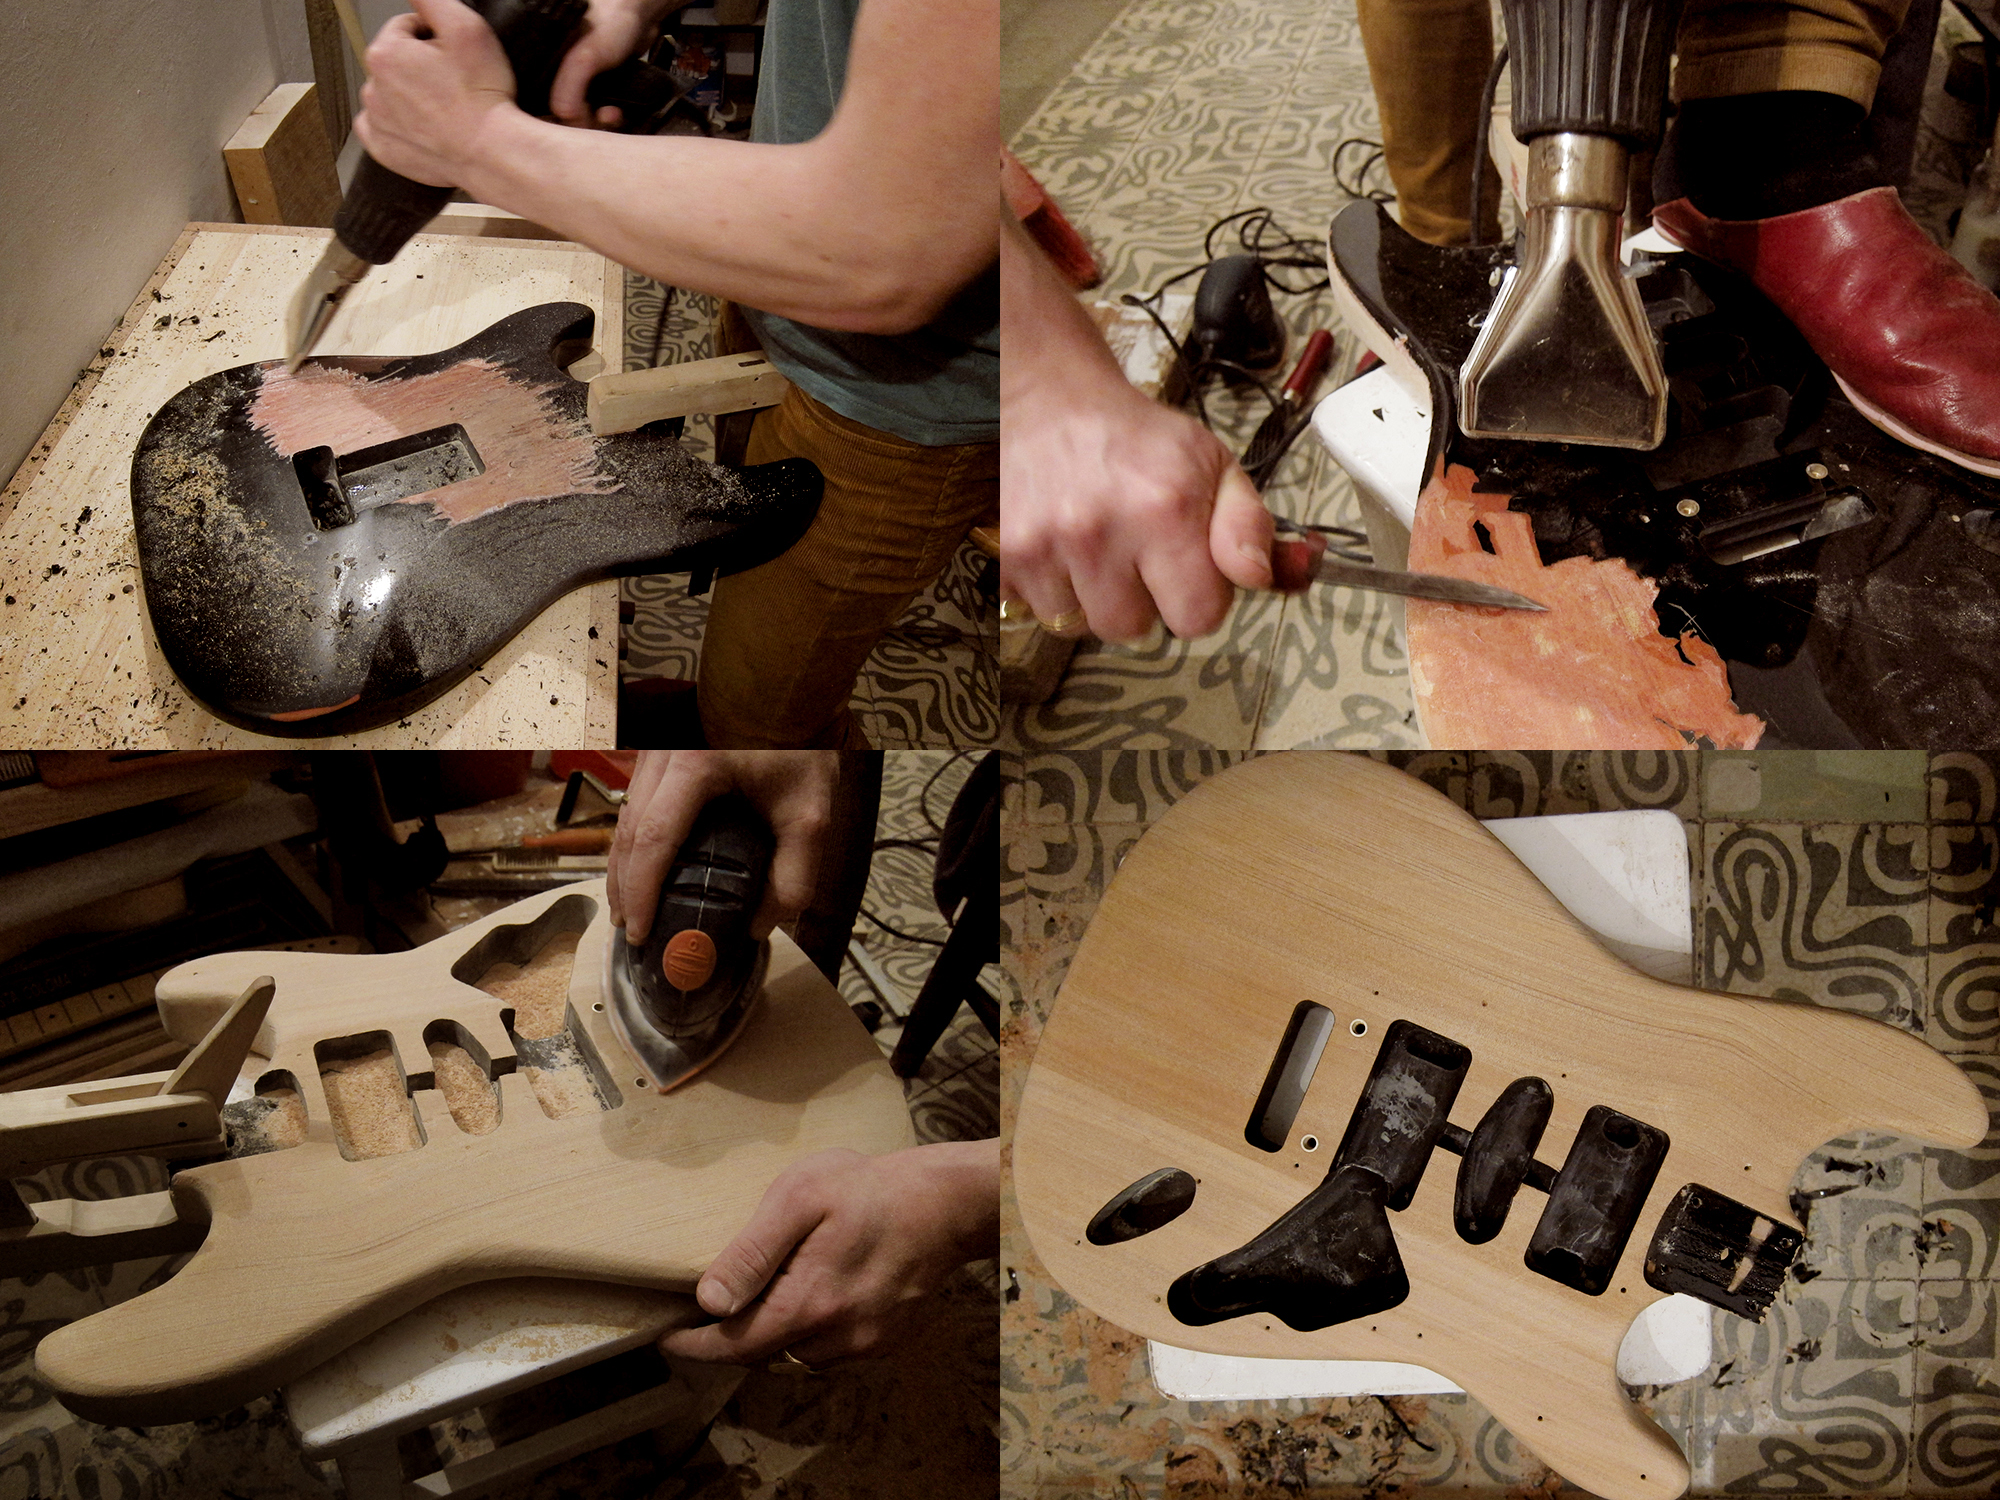
I never got around to mention this but a few months ago I helped my friend Wolf to strip his black Fender Squier Strat body. Everything went fine and it wasn’t too hard, well to be honest it was rather tedious and time consuming but the result was at least good in the end. We were pretty surprised that the body looked so good stripped with nice grain and all, I expected 8 pieces glued together and a lot of knots and crap and that’s why they chose to lacquer it black, but clearly not. Now he is going to burn in some nice country inspired patterns and then we will just ad a coat of clear lacquer.
The heat gun worked pretty well for the black top coat, but there was a red coat under that was almost impossible to get rid of. In the end I used my Japanese Shinto saw rasp for getting through it, especially on the sides, no other rasp or file seemed to bite on it. Once we got rid of all the lacquer it was just down to a lot of sanding and reshaping the edges a bit that I occasionally went a bit hard on with the saw rasp. If you are tired of the colour of your guitar body it could be an idea to strip it but please be aware of the effort involved and that it will smell like burning napalm and toxic poly lacquer that will make you dizzy and freak out the cat. This way of using a heat gun and saw rasp works pretty well but it would probably have worked fine without the heat gun too and that way we would have skipped the unhealthy plastic fumes.
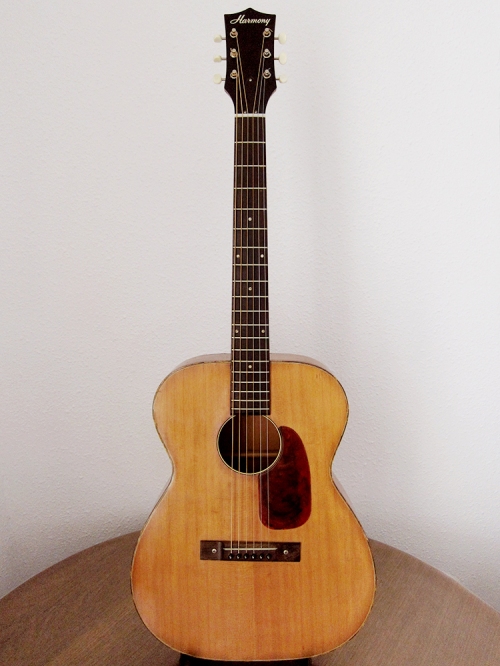 Harmony H-162, Made in Chicago, USA in the late 1960’s
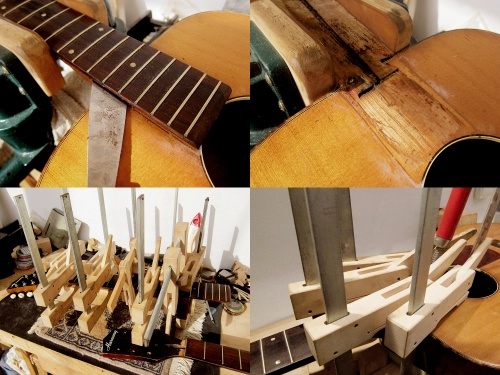


 I thought about getting a pre-made
 I glued the bridge on and after 3 days I strung up both E-strings and used a drill as a saddle so I could move it around until I got the intonation right, I forgot to take a picture of that. I marked out the saddle and then sawed a 3 mm slot. Next step was to create a bone saddle to match and string it up. Easy peasy, well it was a hard days work but it was easier that I thought.