Claescaster

Tag: Telecaster

EY Guitars

EY Guitars

I just received my package from Hong Kong, the guitar parts I ordered from EY Guitars for the old Claescaster. How cute is this, they have packed it in a lunch box to keep it safe. I wonder if that something they always do or if it was just a really considerate worker that thought that Spain was really far away and it might be a bumpy ride so he or she better pack it in a Tupperware. They were pretty quick too, I placed the order on the 6th, sent out on the 8th and here on the 25th, just two work weeks. It was holidays here in Catalonia this weekend so I bet no one was working on Friday or Monday, it might have been lying around here in the post depot since the middle of last week, it has happened before.

The Claescaster

Claescaster The new Claescaster has been my office guitar for the last month or so and I’ve really grown to love it. I guess all new guitars needs to be broken in by being played a lot so 30-40 min a day so should do the trick. There is nothing more relaxing than playing guitar after you have eaten, well maybe sex but that would be rather awkward in a office environment. I can strongly recommend everyone to get yourself an office guitar, if don’t already have one.

The Old Claescaster

I have just ordered a new set of pickups for the old Claescaster. Since the new Claescaster is done I felt I needed another project so what could be better than giving some love to the old Claescaster. I went for some cheap Artec ones, just regular Alnico V pickups but with a bit of luck they could be good. They only cost  $24.00 for both so I don’t expect too much. I bought them from a Hong Kong site called EY Guitars, I didn’t want to order things from USA since I had so much trouble with the customs last time. I also ordered a Wilkinson vintage bridge in gold since I took the old one and put on the new Claescaster. Let’s see how it goes, how long it takes and if I get charged any extra custom fees.

cropped-claescaster3.jpg The old faithful Claescaster

These are the Artec Hot Ceramic Telecaster Pickups, a bit fancier then the ones I bought but they were sold out in gold so I had to go for something else.

The Claescaster

Mighty Mite Telecaster The new Claescaster

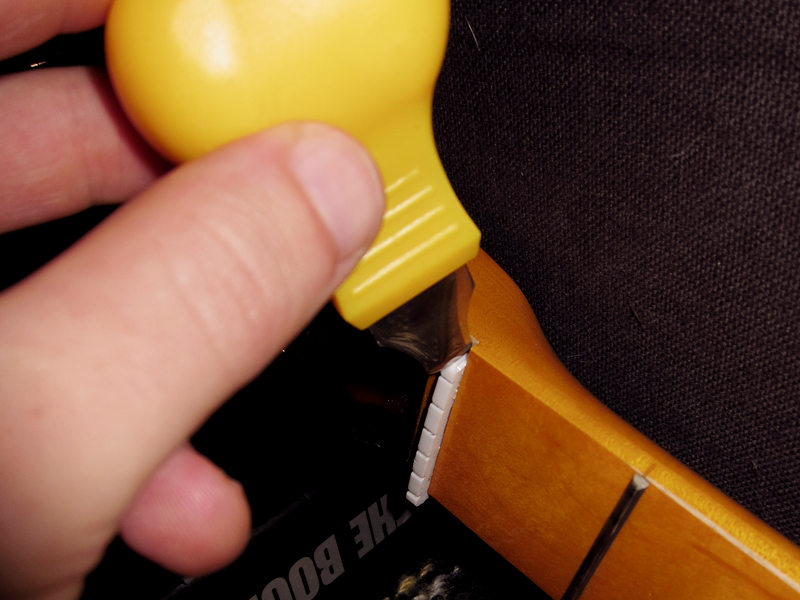
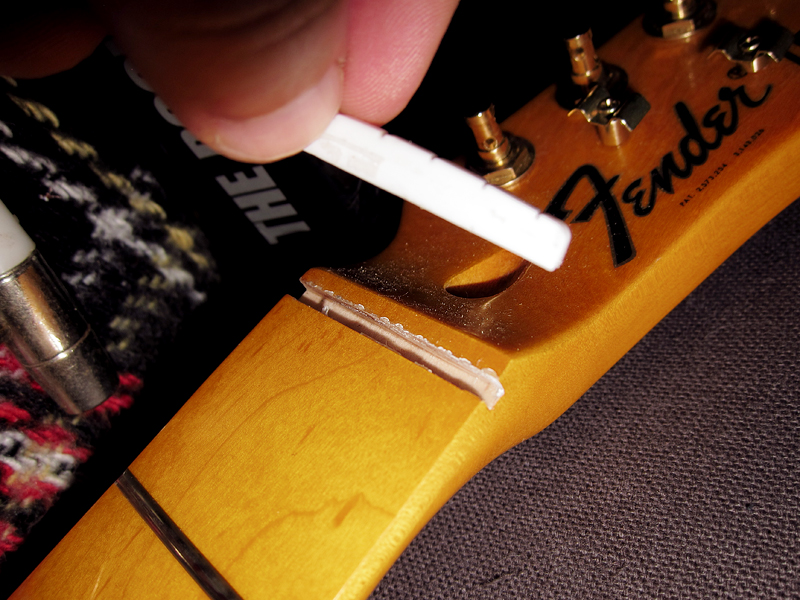
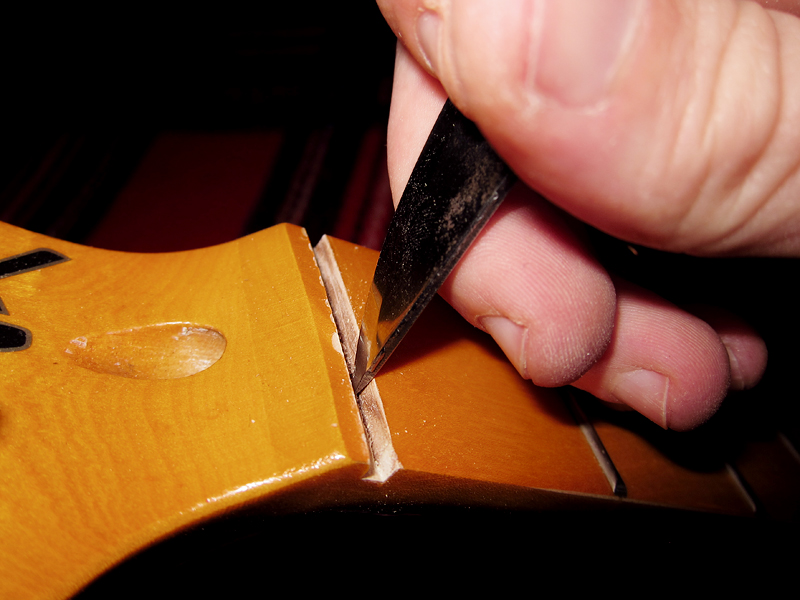
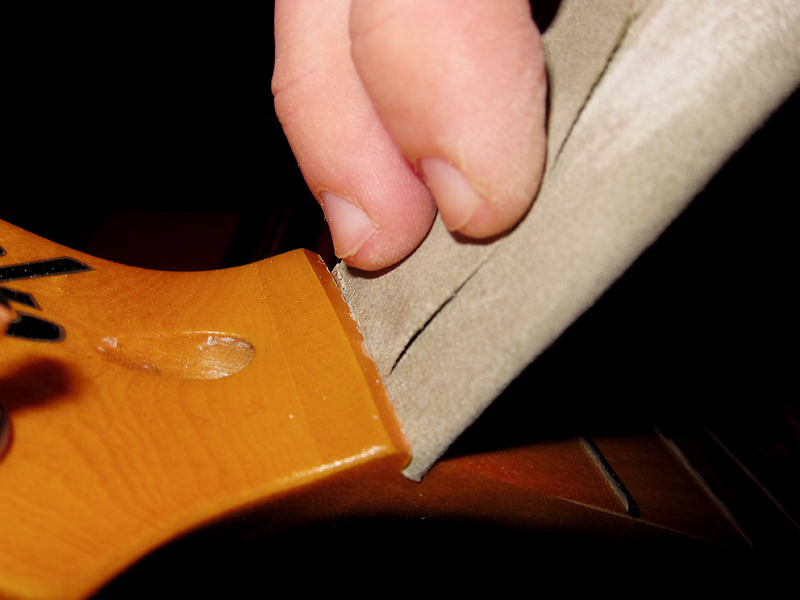
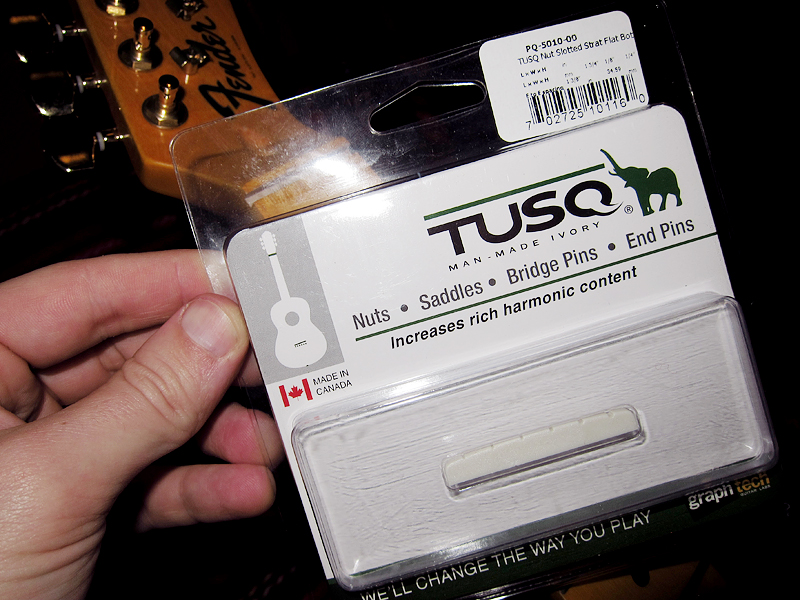
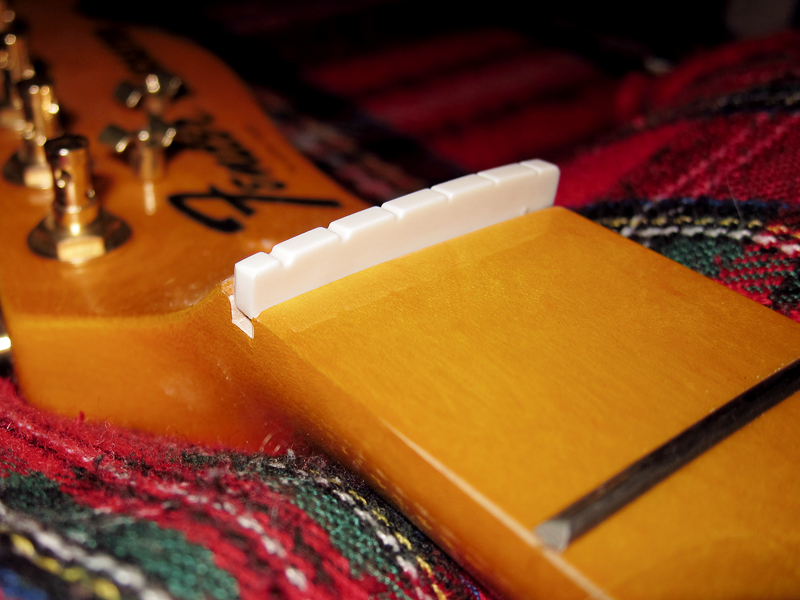
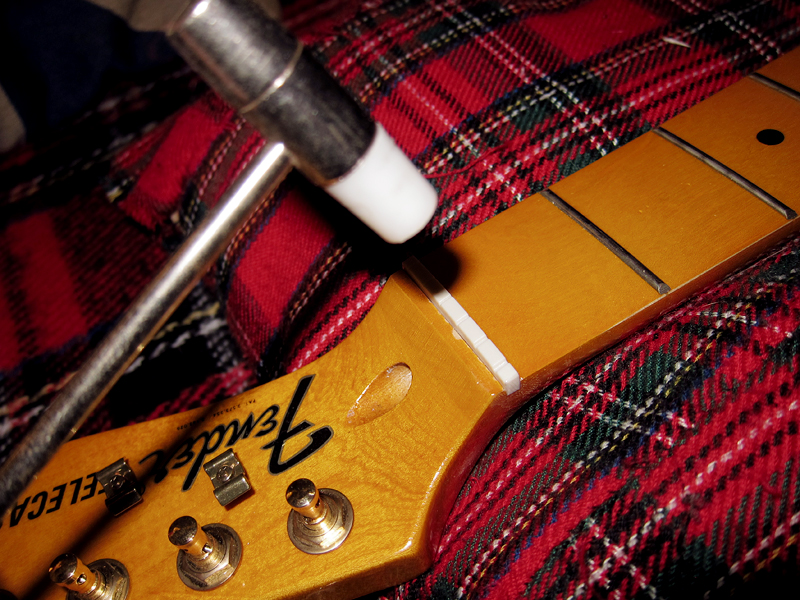
My new Claescaster is finally done. It was fun, rewarding and extremely annoying to build. If anyone plans to put a guitar together, make sure that you either stick to American parts or non American parts. To mix like I did was a nightmare since nothing fitted. I don’t think a single part fitted straight away, I had to make every hole bigger, or cut a bit here and sand a bit there. Anyway, now it’s done and I’m really happy with it. I just need to change the nut tonight for a Tusq and then we are all set.

Telecaster electronics 
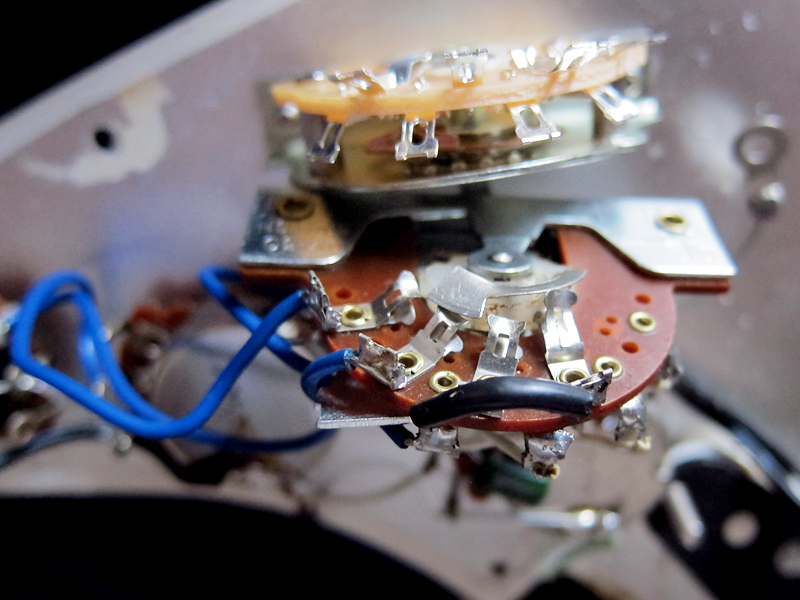
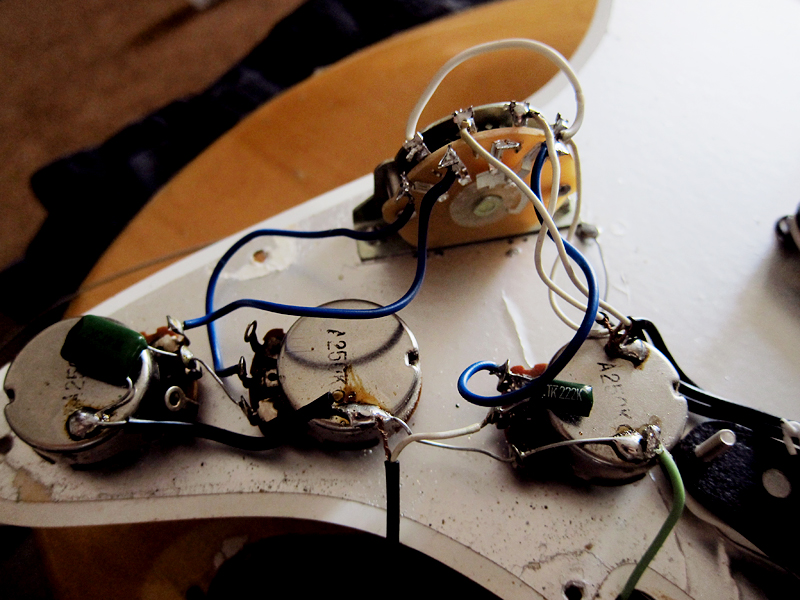
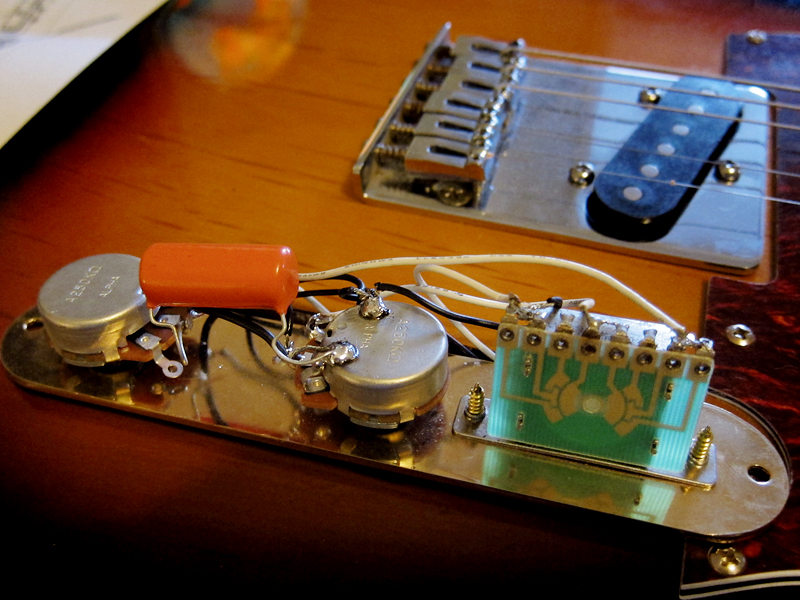
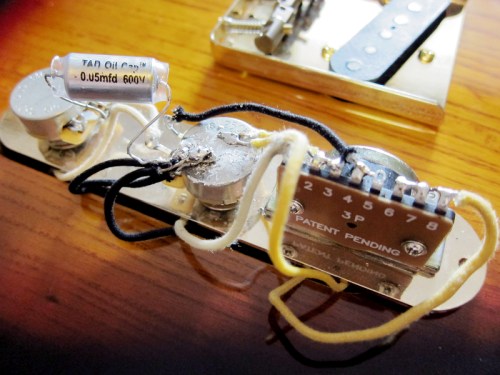
Not the cleanest soldering but at least everything works

I wish the ground cables would have stuck a bit easier to the pot so the soldering wouldn’t have been such a mess. I also realised when I first plugged it in that the switch didn’t work since I had soldered 1-3 and 6-8 together, apparently 1 and 8 shouldn’t be connected.

Kluson style machine heads 
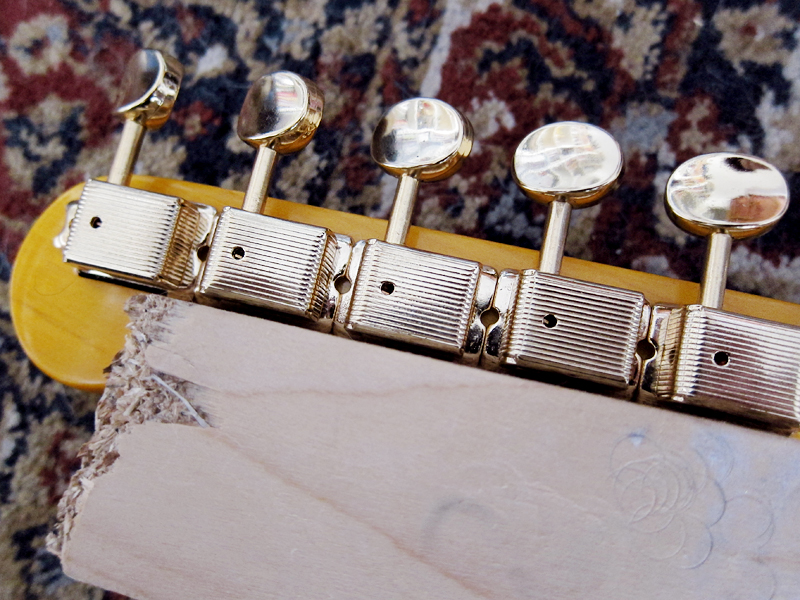
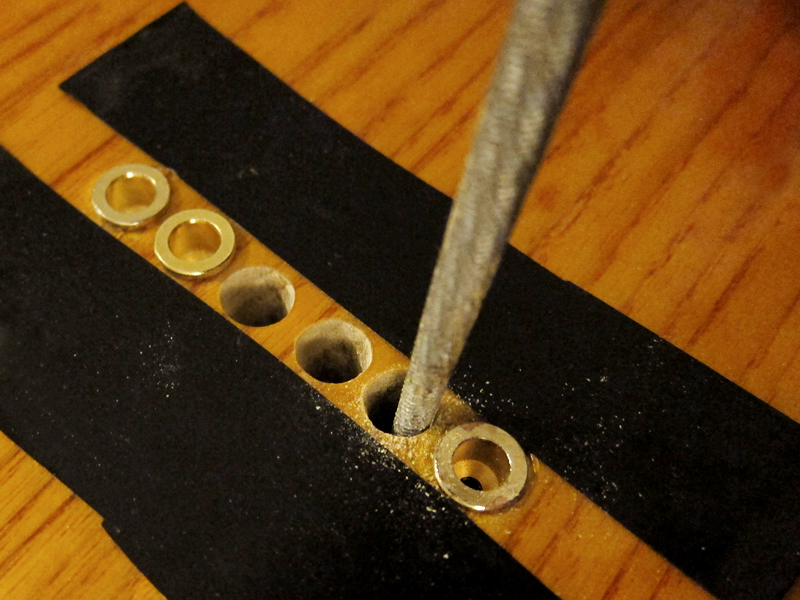
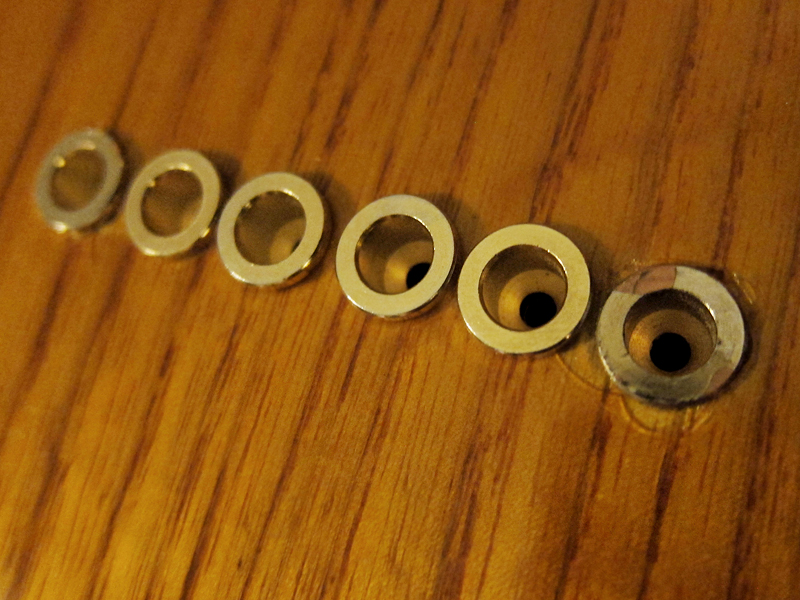
Kluson style machine heads from Northwest Guitars

To fit the machine heads was pretty easy. Of course I had to make the holes bigger since they were 8mm and not 8.5mm as I was first told. I used a piece of wood to keep everything straight and to make sure they lined up. Then a tiny little pilot hole with the drill and in with the screw.

Kluson style machine heads 
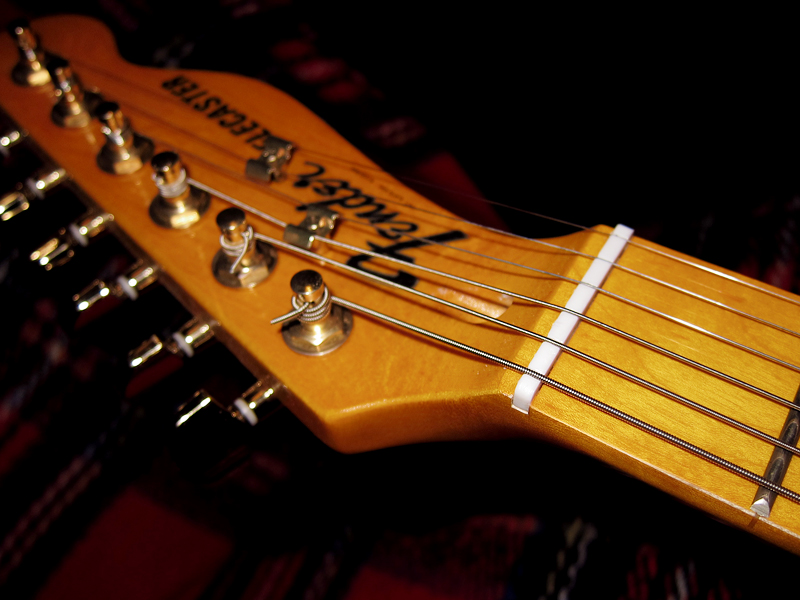
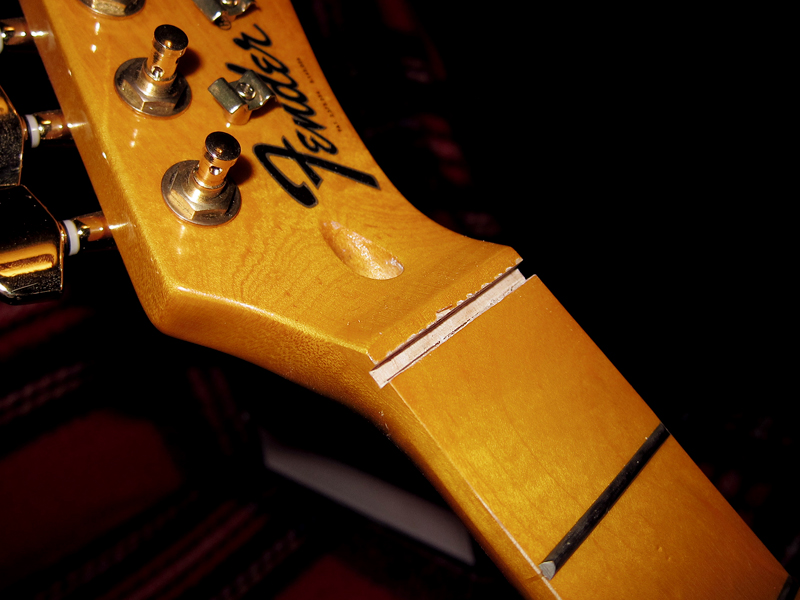
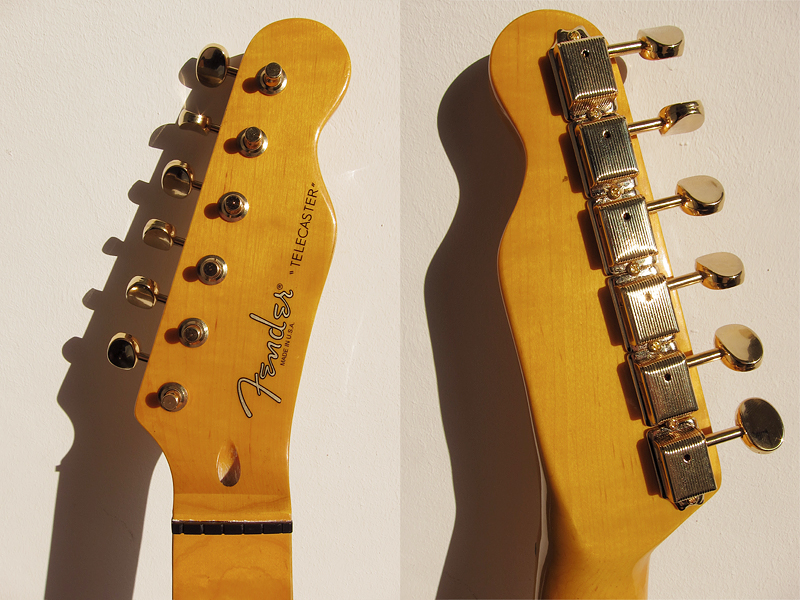
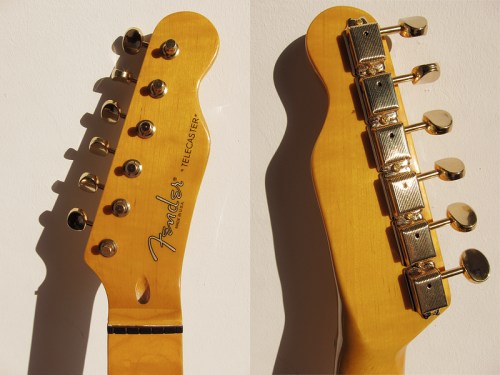
I originally wanted a 70’s decal and modern machine heads but I think I start to prefer the 50’s logo and the Kluson style machine heads

Mighty Mite Telecaster 
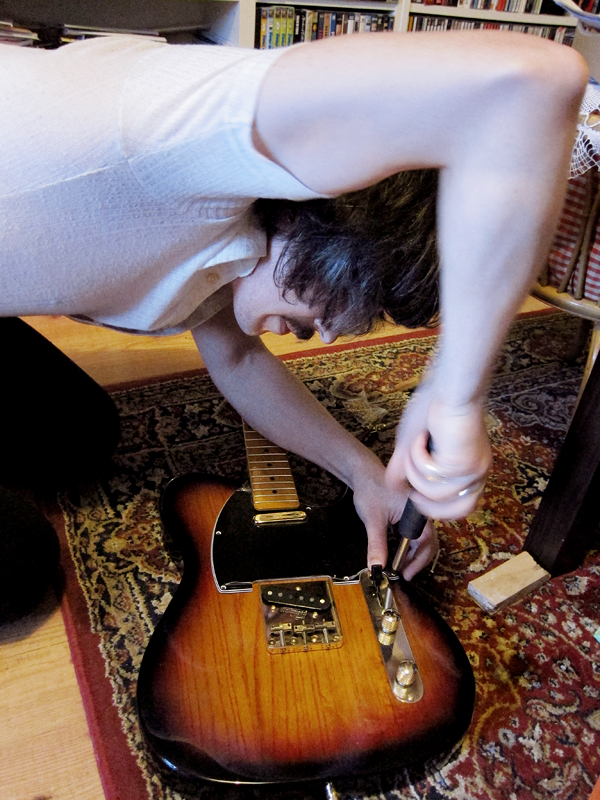
Time to fit the neck

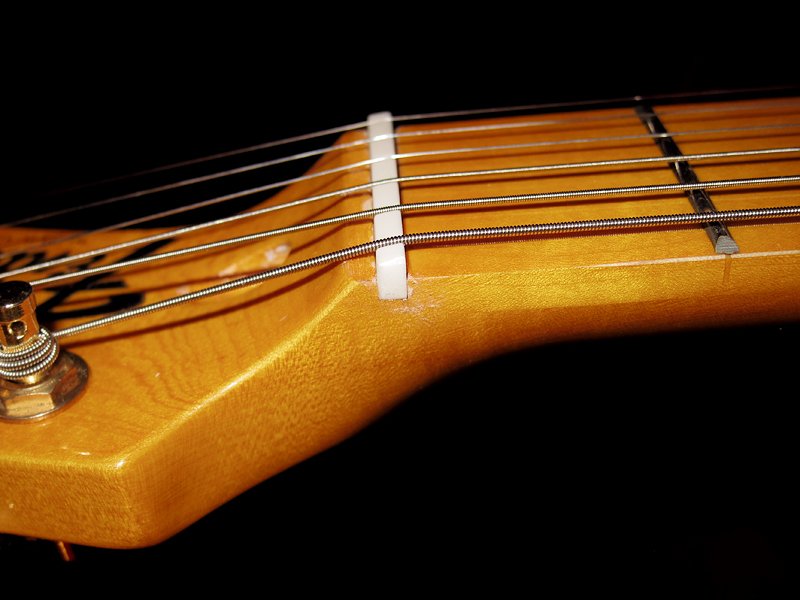
I read somewhere that this was a good trick to make sure you get the neck in the correct angle before you drill the holes. A piece of string through the body and around the two E strings to make sure that they are evenly spaced. I marked the holes with a hammer and a screwdriver before I drilled the pilot holes and then tried my best to keep the drill straight. A lot of people claim that you have to use a drill press but it works fine with a normal hand held drill.

Mighty Mite Telecaster 
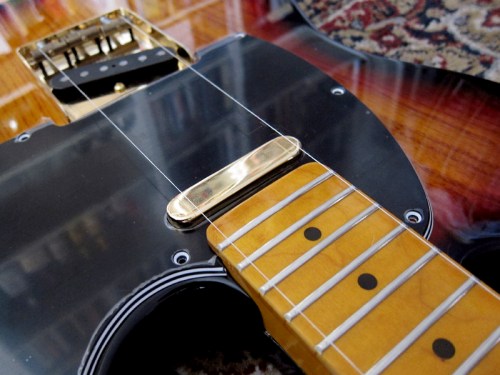
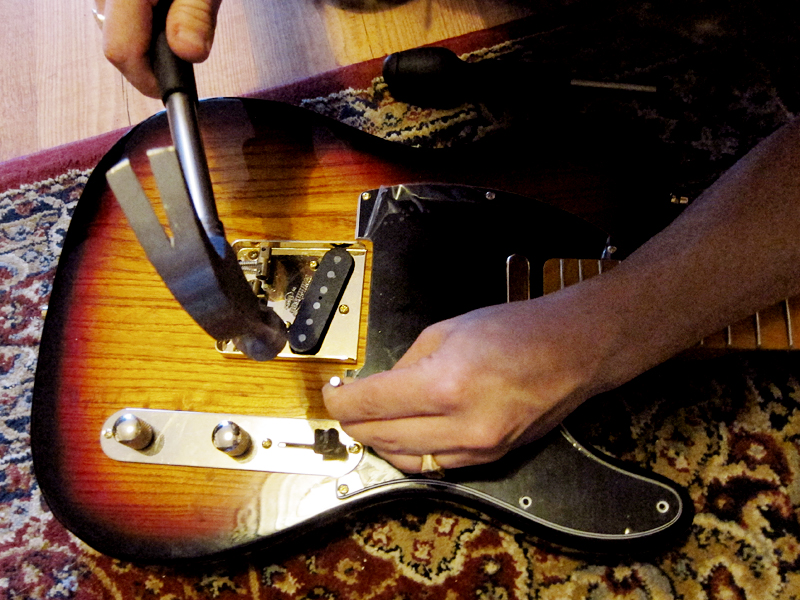
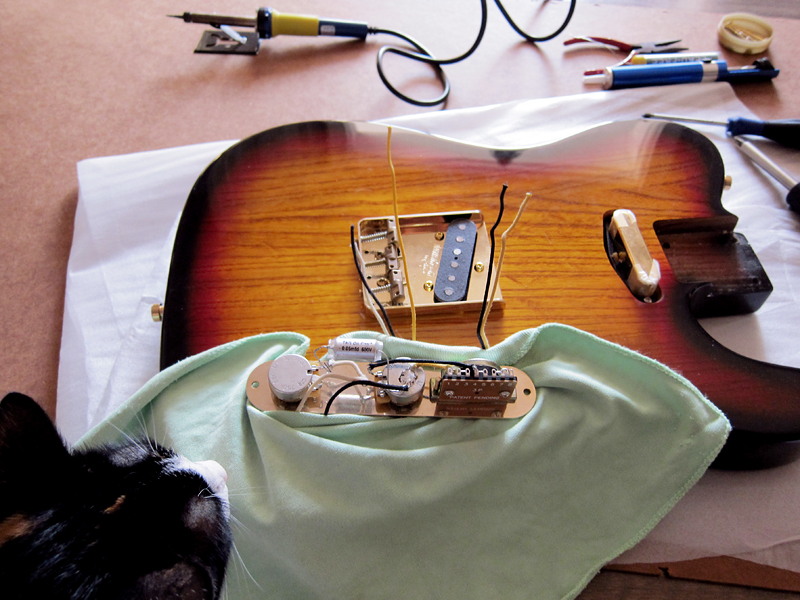
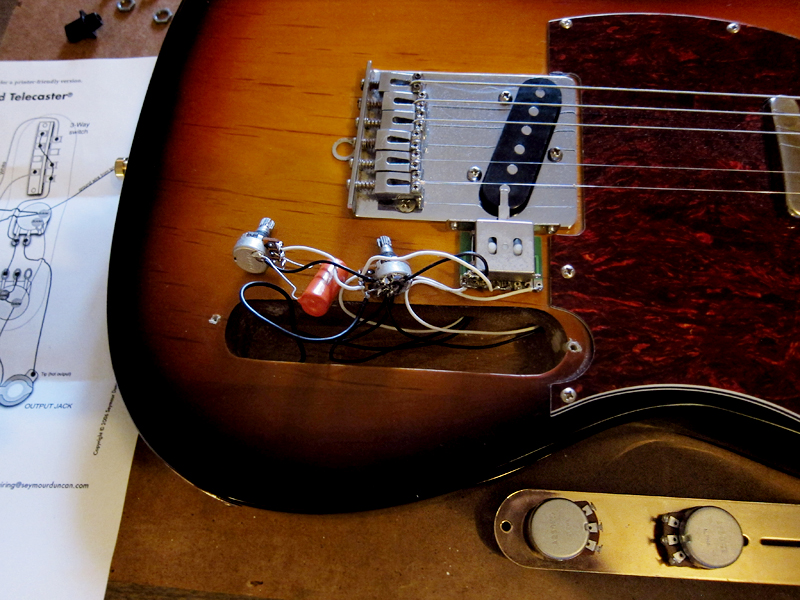
Last thing to do, fit the pickguard

Of course the pickguard didn’t line up perfectly in the end so I had to cut out a bit more around the control plate. I used a knife and then smoothed it out with sandpaper around fat marker pen. I probably should have used a drill to make the pilot holes since the old nail and hammer tended to crack the lacquer in some places.

Mighty Mite Telecaster Last screw being marked out with a hammer and a nail

Mighty Mite Telecaster 
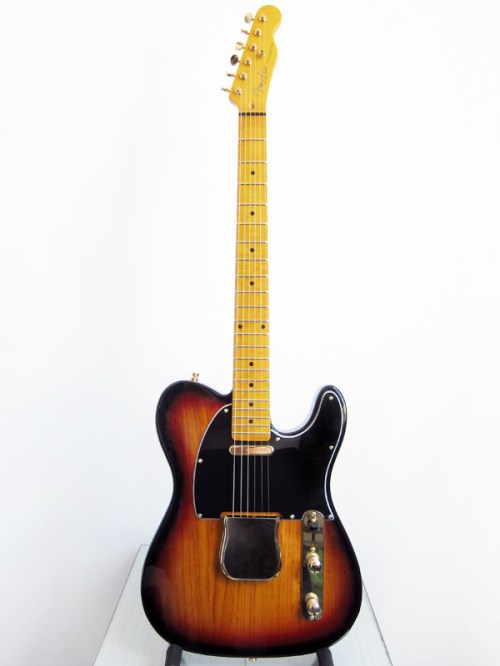
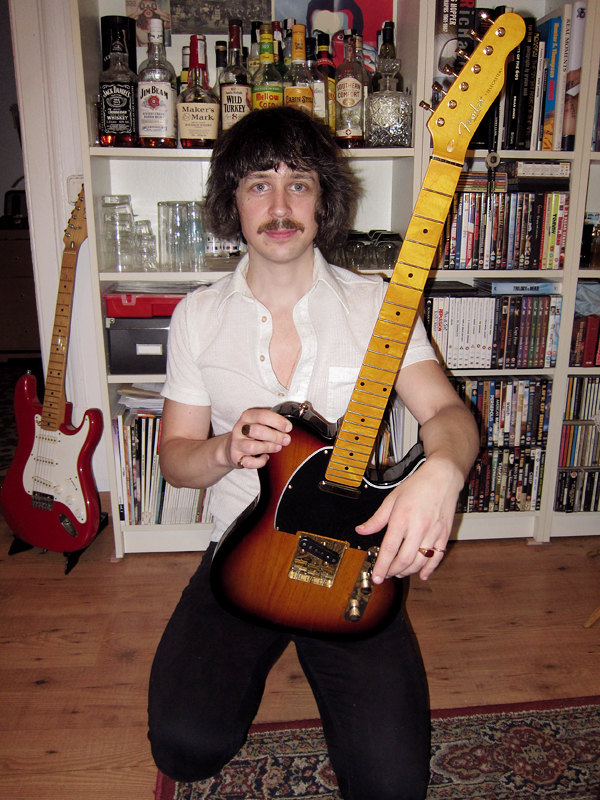
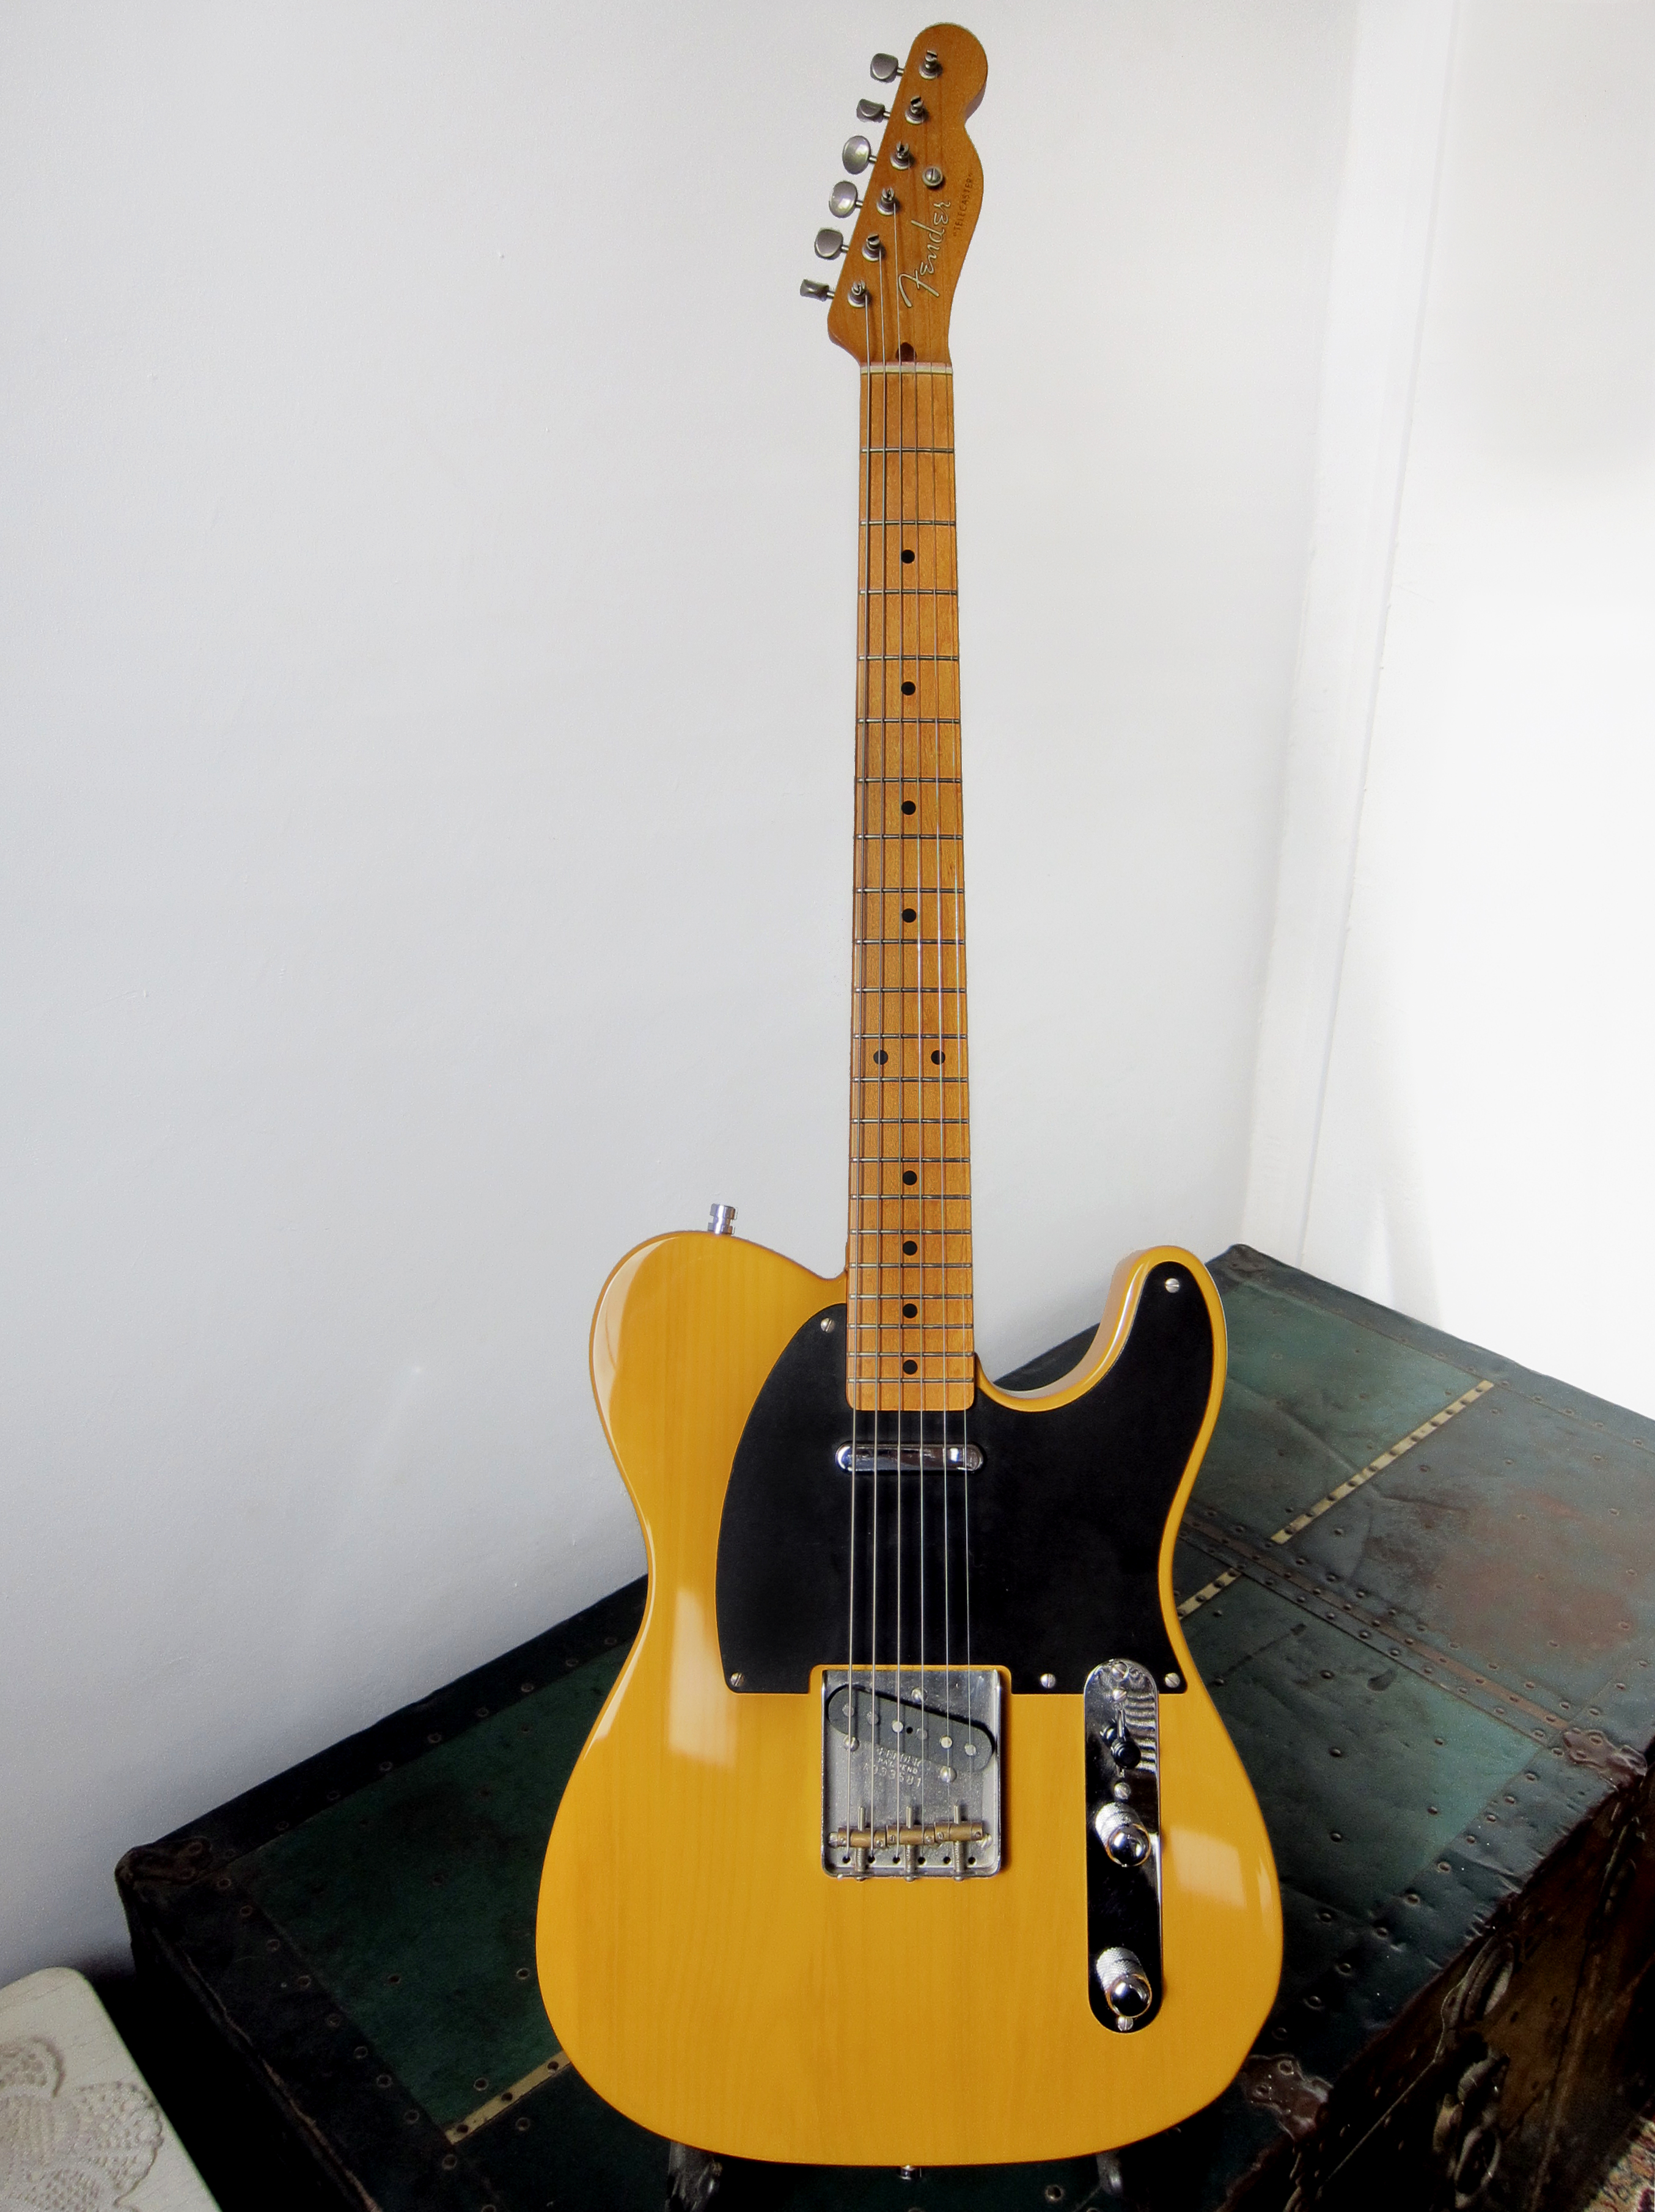
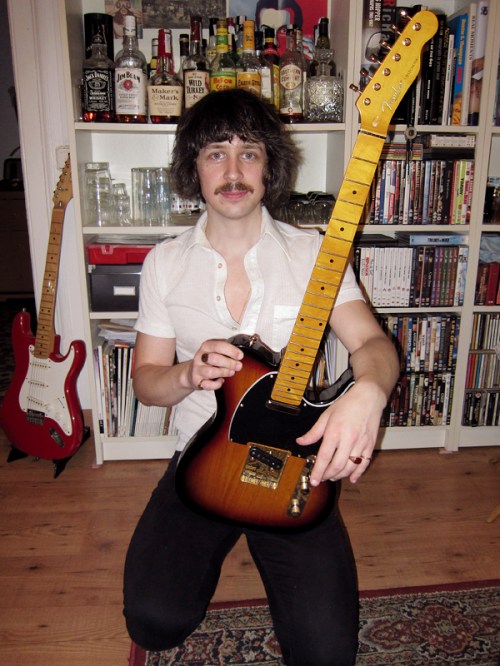
The Claescaster is finally finished

The Claescasters 
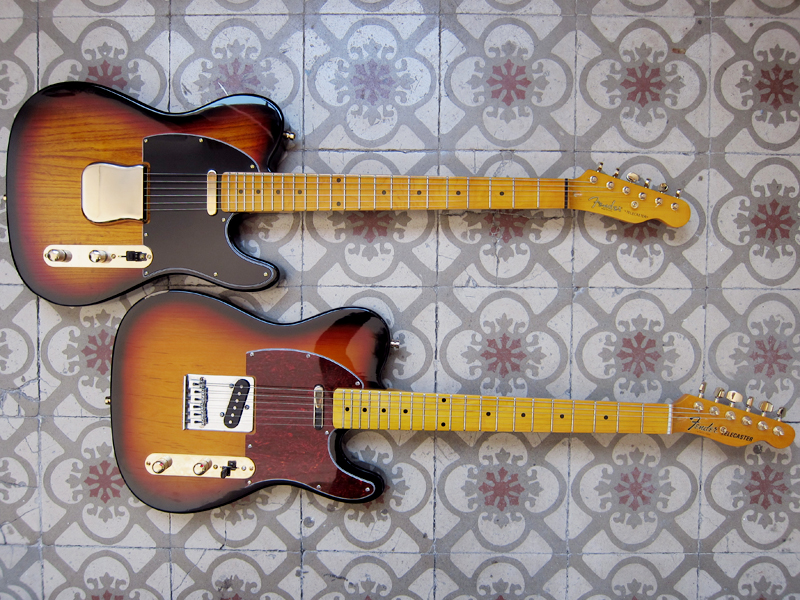
The old and then new Claescaster together

Look at the grain on the top one, the new swamp ash Claescaster, amazing. It weighs around 4.5 kg so a pretty fat little baby but it feels amazingly solid and nice around the neck. The old one, which is most likely basswood, weighs around 3.2 kg.

Earlier parts of the Claescaster story can be found here 1, 2, 3, 4.

The Claescaster

Claescaster
This is what the final Claescaster might look like

Last week I started to put the new Claescaster together. I have never built a guitar before so there has been a bit of figuring stuff out. I decided to go for CTS pots since they are supposed to be the best but regretted my decision as soon as I got them. It turned out that CTS pots, and I guess most things made in the USA, doesn’t fit things made in Europe or Asia. The shafts of the pots was too big for my control plate so the first thing I had to do was to drill the holes bigger. That worked out quite OK with the help of my boss Ralf, someone had to hold while the other one drilled. However, since the shafts were bigger than all the other pots, washers and nuts I had lying around at home I couldn’t take any spare parts to make sure that not too much of the shaft was sticking up. It wasn’t too much work to force on a push on knob, but a lot harder to remove it. I went for a normal import 3-way switch since it cost 3€ and seemed solid and reliable. I bought all the electronics from Stringsfield in Valencia, really cheap and quick delivery.

Claescaster
Fancy CTS pots from the USA that turned out to not be Asian friendly in size

Next problem I had to face was the size of the holes on the back where the strings come through. All my other strings through body guitars has 8 mm holes to fit a 8.25 mm string ferrules but not Mighty Mite. They decided to go for the rather unorthodox 7 mm holes so neither the small 6.3 mm or the big 8.25 mm string ferrules would fit. Thanks a lot. I stupidly tried to drill the hole bigger, which of course cracked the lacquer and made a complete mess. I’m not sure if I used the wrong drill or if the wood is harder than stone but since it was only 1 mm difference the drill just dug in and got stuck in the hole and of course cracked the lacquer when I tried to get it out again. I first tried sandpaper on a pen that made very little to widen the hole. Then I found this round file in the kitchen drawer at work, it looked like a knife sharpener but it’s actually a round file. It took some time and it was hard to make all the holes equal and straight but it worked. I managed to gently tap in the string ferrules with a block of wood over to protect them and a firm stroke of a hammer. It doesn’t look perfect and I wish I would never have thought about trying to drill them bigger but hey, you learn from your mistakes. Or like Bob Ross put it, “we don’t make mistakes, we just have happy accidents”. I’m pretty sure the back will soon have plenty of buckle rash from my big country belt buckles and other battles scars from being happily used over the years. Who looks a the back anyway?

Claescaster
I had to slowly and painstakingly file the holes bigger to fit the 8.25 mm wide string ferrules

Claescaster
The damage done, cracked lacquer and some missing gold

Claescaster
Tonerider Vintage plus pickups in gold and Wilkinson Vintage telecaster bridge

It was pretty straight forward to fit the bridge and control plate. I had to put the pickguard on and a neck to keep everything in place and then just make sure it all lined up. I drilled pilot holes for everything since the wood seems really hard to screw in. To fit the neck pickups was a bit more of a nightmare than I first expected. I think I will have to redo it once I get the neck so I can fit the pickguard and make everything line up properly first. I hope that the Tonerider Vintage Plus pickups are going to sound amazing because I wasn’t overly impressed when I realised that the came with chrome coloured screws and no plastic on the neck pickup. I had to tape it with cello tape not to scratch it when I fitted it. Luckily I had some gold pickup screws lying around so that was easily changed.

Claescaster
The solder inspector came around to make sure that I was doing my job

Down to what I like best, soldering. I’m glad I bought cloth covered wires, they are really stiff and nice to work with. I fitted a TAD Vintage Oil Cap 0.05uF which I think might go well with the CTS 250k pots. I decided to go for two audio pots in the end, instead of one linear and one audio. I hope that was a good choice. I also bought a backup Orange Drop 0.033Mf just in case I don’t like the oil cap. I did the 50′s vintage wiring, as I did on the old Claescaster since it keeps the treble pretty well when you turn down the volume. I’m not sure if it’s my soldering iron that doesn’t get hot enough but I had some problems soldering the ground wires to the top of the pot. I even sanded it before, maybe the material is different on the CTS pots because I didn’t have any problems with the Alpha pots on the old guitar. The solder inspector, my cat, didn’t approve either so I eventually gave up and decided to try again this weekend when I hopefully have the new neck and machine heads too.

The Claescaster

It’s finally here, my new Claescaster! The Mighty Mite swamp ash body that I ordered from USA just arrived to my office after spending a month in Spanish customs. It’s not as bright and lovely looking as in the eBay picture but I didn’t expect it to be either since it was a photo taken with flash. It still looks really nice, the grain is just amazing, the 3-tone sunburst is even and the weight is great, it feels really heavy and solid. Now let’s see if the neck from the old Claescaster and all the new hardware and electronics I bought fits. I ordered the Tonerider Vintage Plus pickups from Northwest guitars about two weeks ago but they managed to send out a pair in nickel so I had to send them back. Hopefully the new gold ones will arrive this week so I can spend the weekend putting the Claescaster together. Happy times.

Mighty Mite Swamp ash Tele body Mighty Mite swamp ash body

Update: Tuesday 23rd April 2013
I have slowly started to put the Claescaster together, pretty much everything is fitted now except pickups and neck, I’ll try to get some images up. I had a lot of problems with the neck. First I thought I could use the old Claescaster neck until I could afford to buy an Allparts TMNF-FAT, they cost around 280€, but it didn’t fit. I carved off 1 mm on the bottom side and managed to get the neck to fit in the pocket but the holes didn’t line up. To fill and re-drill the holes felt like too much work, especially since I eventually would like to put it back on the old guitar and still have the original Claescaster as a backup. I took off some of my other guitars necks but nothing fitted, maybe it would have been weird with a big headed Strat head on it anyway. I searched eBay high and low for cheap necks but the big problem as always is the decal, I kind of like to have the fake Fender logo on them and people tend to charge a lot for fitting a decal, if they can do it at all. I guess I could have fitted one myself but since I want a layer of lacquer over and I don’t know where to get that here it was easier to find one with a decal already fitted. I emailed First Avenue Guitars, the kind Yorkshire lad that I bought the old Claescaster neck from, he did a great job with the decal last time. He managed to dig this neck out of the basement for me, 50’s decal fitted and 8.5 mm holes for the machine heads so I can fit vintage Kluson style tuners. It’s a 22 fret 2-piece neck of Canadian maple, I would have preferred a 1 piece without the overhang but for £58 (70€) including shipping there wasn’t any point in arguing. I got some gold machine heads from Northwest guitars and now I just hope that it will arrive before the weekend so I can finally get my new Claescaster up and running. I received the Tonerider Vintage Plus pickups this morning so I might fit them tonight if I get a chance.

First Avenue Guitars The new Claescaster neck from First Avenue Guitars

Claescaster I managed to fit the old neck back on my original Claescaster and patch up the damage pretty well. The part I carved out to fit on the new body has been painted black and then filled with some black tape to keep it snug in the pocket.

The Claescaster

A quick update on my new Claescaster. The Mighty Mite Swamp ash body that I ordered from USA back in the beginning of March might finally be on it’s way. I saw this update when I tracked it this morning, “Customs clearance processing complete”. I presume that means that they will finally send me my body that has been stuck in Madrid since the 14th of March. How can something take a month to clear? The thing that annoys me the most is perhaps not that I had to wait for more than a month, but that they charged 40% on top of the original price including shipping. A body that cost $150 that I paid 170€ for including shipping and then I had to pay an extra 68€ in import tax and custom fees. I have imported two guitars straight from Japan without any problems so I couldn’t even in my wildest imagination think that it would be this bad just because the package came form USA. The Japanese guitars I bought, on two separate occasions, were delivered with DHL Express, cost $125 and was here within 48 hours and the tax was only about 18-20% of the actual price, not price plus shipping. I think I paid around 70-80€ when I imported Nancy, a Fender Telecaster ’52 re-issue Made in Japan from 1987-1989, but she cost six times more than the new body did. Well at least now I know that you can’t buy things from USA if you live in Spain.

Fender Telecaster TL52-75, '52 re-issue Made in Japan, FujiGen 1989 Fender Telecaster TL52-75, ’52 re-issue Made in Japan, FujiGen 1987-1989. There is no way to find the production year of these A-serial Telecaster with the serial number on the bridge plate. However, it must have been made between 1987 and 1989 since it’s a TL52-75. They were called TL52-70 between 1984-1986 and then changed to TL52-700 in 1990

How to… solder electronics

How to change a switch
I spent Saturday doing my new favourite thing, soldering. How could I have lived for thirty two years without realising how exciting this is, well maybe not, but still. It’s a nice past time and probably healthier, even with the fumes, than spending Saturday afternoons in the sun drinking beer in a terrace, that tends to happen when you live in Spain. First I changed the old 3-way switch on my Westone Strat from 1979 to a fancy US made 5-way switch that I got from Swivel Electronics on eBay Japan.

Westone Strat from 1979 Note how bent the blade of the old switch was

I fitted the new switch and then started to unsolder one cable at the time and moved it from the old to the new switch. Unfortunately I managed to fit the switch the wrong way around so when I was done and had put the pickguard back on and strung up the guitar again I had to take it all off and redo it. I turned out that a 5-switch wasn’t that much more complicated than a 3-way switch for a Telecaster and I know those by heart now. Suddenly I have a fully functioning 70’s Japanese Strat and who knew that the in-between pickup sounds would be so amazing.

Westone Strat from 1979 New 5-way switch fitted

How to change a potentiometer
When I ordered all the electronics needed for the new Claescaster I bought two new pots for the old Telecaster as well. I found this great guitar shop in Valencia called Stringsfield with super cheap and quick shipping so I got two Alpha 250k audio pots for my old one and two CTS 250k for my new Claescaster project, my Mighty Mite Swamp ash body that is still stuck in customs in Madrid.

Morgan Telecaster, Claescaster It was time to change the old mini 500k pots for a full size Alpha 250k

Morgan Telecaster, Claescaster I fitted the new pots on the control plate and then started to move all the cables around

The old electronics was such a mess so I changed the pots but kept cables, switch and my Orange drop capacitor. I figured there was no point buying any better cables since I wasn’t going to change the pickups yet. I might change all of that in the near future, as soon as the new Claescaster is done. I’m tempted to get the Artec Vintage Style AlNiCo Telecaster Pickup Set from Northwest Guitars, they sound really good for the price, £29.99. Of course I did the old 50’s vintage wiring again, I really liked the tone of that modification. I haven’t had time to rehearse with this guitar yet but I’m pretty sure that the new pots will make it a bit less treble sounding and hopefully make it sound a bit warmer.

Morgan Telecaster, Claescaster Looks pretty clean and tidy to me

Guitar of the day

Keith Richards'
Keith Richards’ “Micawber” 1953 Fender Telecaster Blonde

1953 Fender Telecaster Blonde 
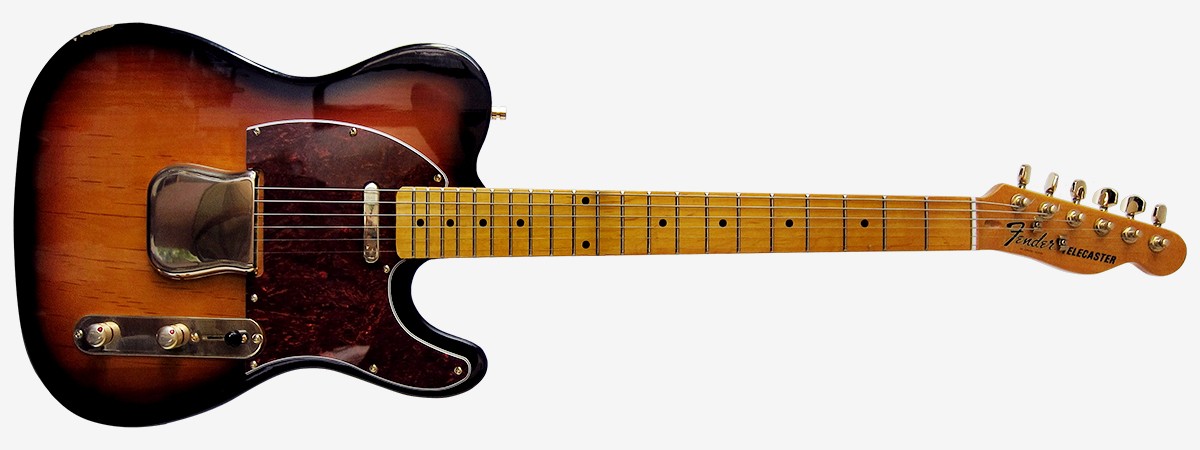
Micawber is named after a Charles Dickens character, no one is exactly sure why. Keith’s had this guitar since Exile On Main St. This guitar is kept in Open G tuning (G,D,G,B,D) low to high with no capo, and of course has the famous 5 strings with the 6th string removed (as do all his open G tuned guitars). Taken from the Keith Shrine

Keith Richards, Micawber, 1953 Fender Telecaster Blonde Keith Richards live at Earls Court in 1976

How to… change the nut

I have never been too impressed with the cheap plastic nut on the Claescaster. When I first got it I brought the guitar to work and used it as my office guitar and after six month of heavy playing most of the string buzz was gone, but not all. I truly believe that if you do any changes and things doesn’t sound perfect straight away then just ignore it for a week or two and let the guitar settle a bit. If I get any slight buzzing or things feels weird after I have adjusted the bridge or saddles on my guitars I tend to leave it until the problem disappears, which it almost always does.  However, after two years of playing the Claescaster like crazy I felt that the last bit of buzzing wouldn’t go away unless I changed the nut. I have drilled, soldered and screwed in my guitars, adjusted necks and changed things around but I have never dared to remove a nut. It just felt like one of those things you couldn’t do by yourself. After 3 glasses of cava at work I felt I had the Dutch courage needed to take on this daunting task so on my way home I went passed Herrera Guitars,  my favourite guitar shop in Barcelona, and bought a TUSQ PQ-5010-00 slotted nut for Strat and Tele. I started with removing the old nut, something that was way easier than I expected. I took some watch tools, finally I found some use for those, and just lightly tapped the nut from one side with a watch back opener and small hammer, it came loose straight away. I cleaned the slot a bit, removed some left over glue with a knife and then sanded the sides to make it slightly wider to fit the new nut. The TUSQ was a lot bigger than I expected, I did measure the old nut a couple of days ago but maybe I mixed up the measurements or I got the wrong nut because this one was almost 3 mm longer than the existing one, even though the string spacing was the same. I took the old nut as a reference and made a mark on each side and then just cut off the excess with a knife on the chopping board, it’s a very easy material to cut and work with. I filed down the edges with a sandpaper and also scratched all sides so the glue would stick better. Now it was just down to put some super glue in the slot, probably not the best glue for this but the only one I had at home, and then gently tap down the nut in its place. Done. I have to say that this was way easier than I expected and everything went really well. I should of course have masked off the wood with some tape not to scratch it but I was too excited to take those kind of precautions. Now with the new nut fitted this neck is a joy to play, it’s a world of difference. I feel that both tone and resonance has improved a lot and I can easily recommend TUSQ.

How to change the nutThe old plastic nut that this cheap neck came with

How to change the nutA watch back opener and a little rubber hammer turned out to be excellent tools for this

How to change the nutIt was way easier than I expected to remove the old nut

How to change the nutI scraped off some leftover glue with a knife

How to change the nutSome sandpaper got the surface smooth and I also needed to widen the slot a bit to fit the new nut

How to change the nutNot the best cut nut slot but I didn’t really expect more from this neck

How to change the nutThe new TUSQ PQ-5010-00 only cost 8€

How to change the nutPerfect fit

How to change the nutA tiny bit of glue and then just gently tap the new nut in it’s place

How to change the nut All set, a new nut is fitted on the Claescaster