The Claescaster
by claesgellerbrink

This is what the final Claescaster might look like
Last week I started to put the new Claescaster together. I have never built a guitar before so there has been a bit of figuring stuff out. I decided to go for CTS pots since they are supposed to be the best but regretted my decision as soon as I got them. It turned out that CTS pots, and I guess most things made in the USA, doesn’t fit things made in Europe or Asia. The shafts of the pots was too big for my control plate so the first thing I had to do was to drill the holes bigger. That worked out quite OK with the help of my boss Ralf, someone had to hold while the other one drilled. However, since the shafts were bigger than all the other pots, washers and nuts I had lying around at home I couldn’t take any spare parts to make sure that not too much of the shaft was sticking up. It wasn’t too much work to force on a push on knob, but a lot harder to remove it. I went for a normal import 3-way switch since it cost 3€ and seemed solid and reliable. I bought all the electronics from Stringsfield in Valencia, really cheap and quick delivery.

Fancy CTS pots from the USA that turned out to not be Asian friendly in size
Next problem I had to face was the size of the holes on the back where the strings come through. All my other strings through body guitars has 8 mm holes to fit a 8.25 mm string ferrules but not Mighty Mite. They decided to go for the rather unorthodox 7 mm holes so neither the small 6.3 mm or the big 8.25 mm string ferrules would fit. Thanks a lot. I stupidly tried to drill the hole bigger, which of course cracked the lacquer and made a complete mess. I’m not sure if I used the wrong drill or if the wood is harder than stone but since it was only 1 mm difference the drill just dug in and got stuck in the hole and of course cracked the lacquer when I tried to get it out again. I first tried sandpaper on a pen that made very little to widen the hole. Then I found this round file in the kitchen drawer at work, it looked like a knife sharpener but it’s actually a round file. It took some time and it was hard to make all the holes equal and straight but it worked. I managed to gently tap in the string ferrules with a block of wood over to protect them and a firm stroke of a hammer. It doesn’t look perfect and I wish I would never have thought about trying to drill them bigger but hey, you learn from your mistakes. Or like Bob Ross put it, “we don’t make mistakes, we just have happy accidents”. I’m pretty sure the back will soon have plenty of buckle rash from my big country belt buckles and other battles scars from being happily used over the years. Who looks a the back anyway?
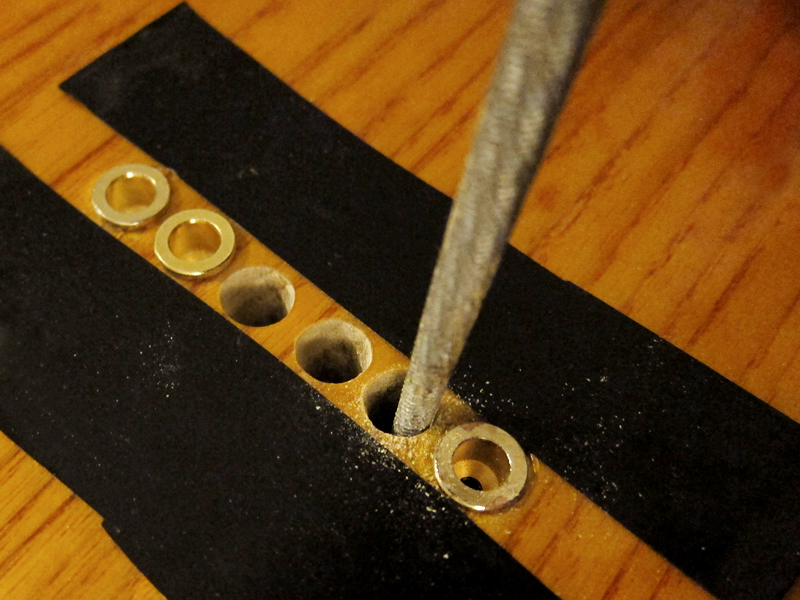
I had to slowly and painstakingly file the holes bigger to fit the 8.25 mm wide string ferrules
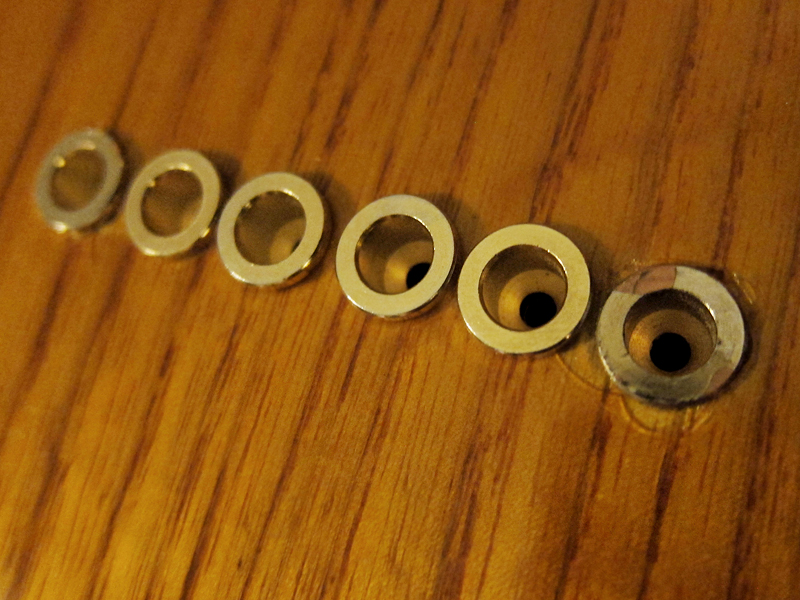
The damage done, cracked lacquer and some missing gold

Tonerider Vintage plus pickups in gold and Wilkinson Vintage telecaster bridge
It was pretty straight forward to fit the bridge and control plate. I had to put the pickguard on and a neck to keep everything in place and then just make sure it all lined up. I drilled pilot holes for everything since the wood seems really hard to screw in. To fit the neck pickups was a bit more of a nightmare than I first expected. I think I will have to redo it once I get the neck so I can fit the pickguard and make everything line up properly first. I hope that the Tonerider Vintage Plus pickups are going to sound amazing because I wasn’t overly impressed when I realised that the came with chrome coloured screws and no plastic on the neck pickup. I had to tape it with cello tape not to scratch it when I fitted it. Luckily I had some gold pickup screws lying around so that was easily changed.
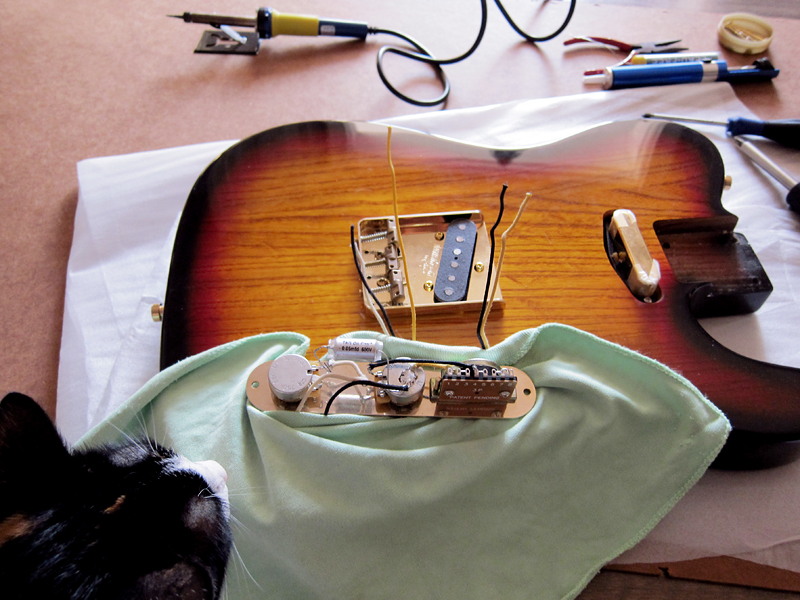
The solder inspector came around to make sure that I was doing my job
Down to what I like best, soldering. I’m glad I bought cloth covered wires, they are really stiff and nice to work with. I fitted a TAD Vintage Oil Cap 0.05uF which I think might go well with the CTS 250k pots. I decided to go for two audio pots in the end, instead of one linear and one audio. I hope that was a good choice. I also bought a backup Orange Drop 0.033Mf just in case I don’t like the oil cap. I did the 50′s vintage wiring, as I did on the old Claescaster since it keeps the treble pretty well when you turn down the volume. I’m not sure if it’s my soldering iron that doesn’t get hot enough but I had some problems soldering the ground wires to the top of the pot. I even sanded it before, maybe the material is different on the CTS pots because I didn’t have any problems with the Alpha pots on the old guitar. The solder inspector, my cat, didn’t approve either so I eventually gave up and decided to try again this weekend when I hopefully have the new neck and machine heads too.

[…] Earlier parts of the Claescaster story can be found here 1, 2, 3, 4. […]