Goya T-16
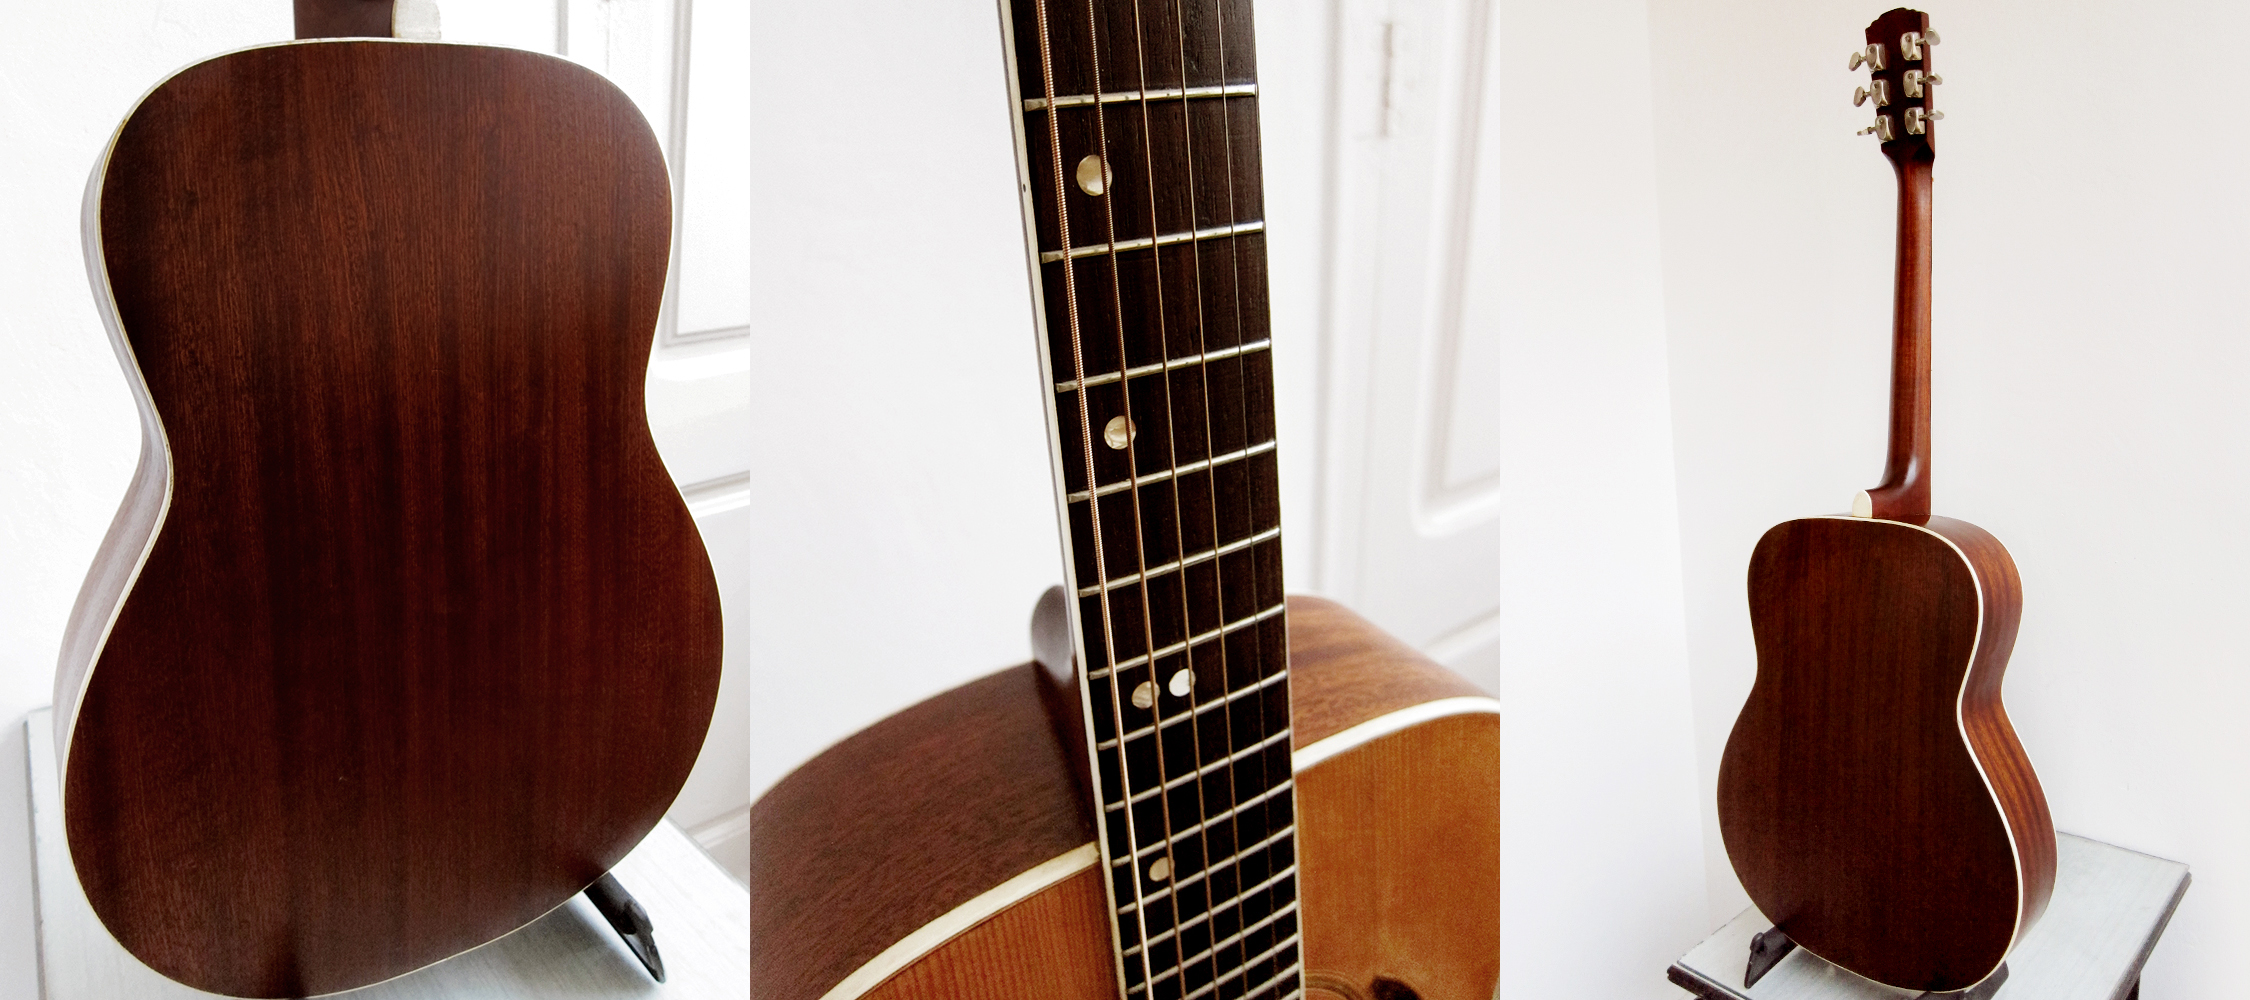
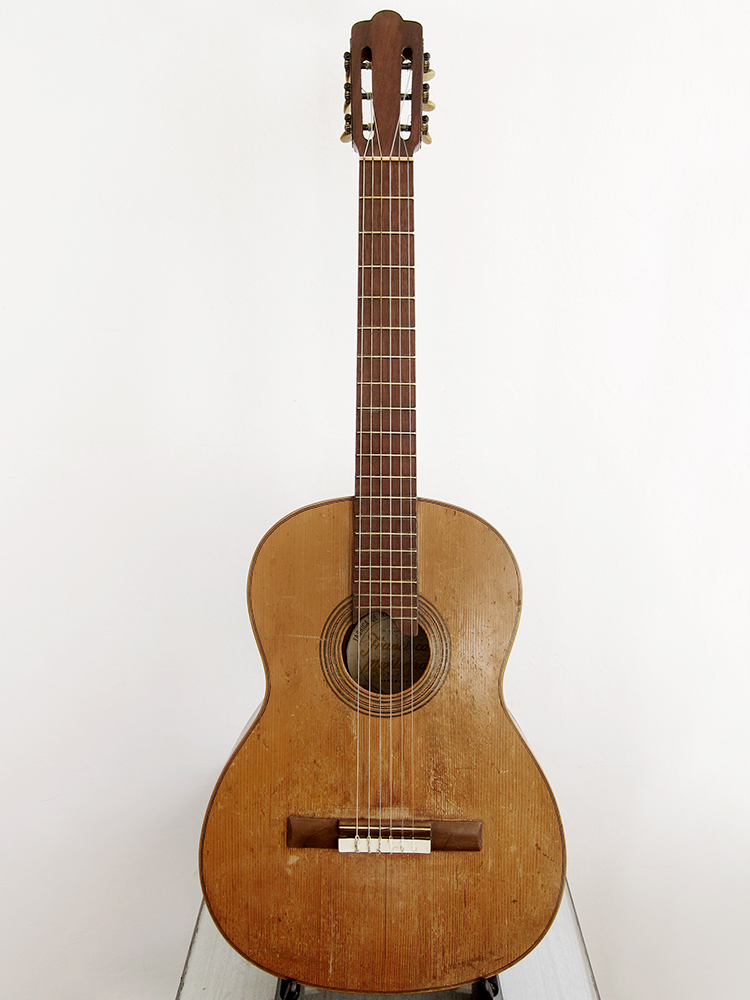
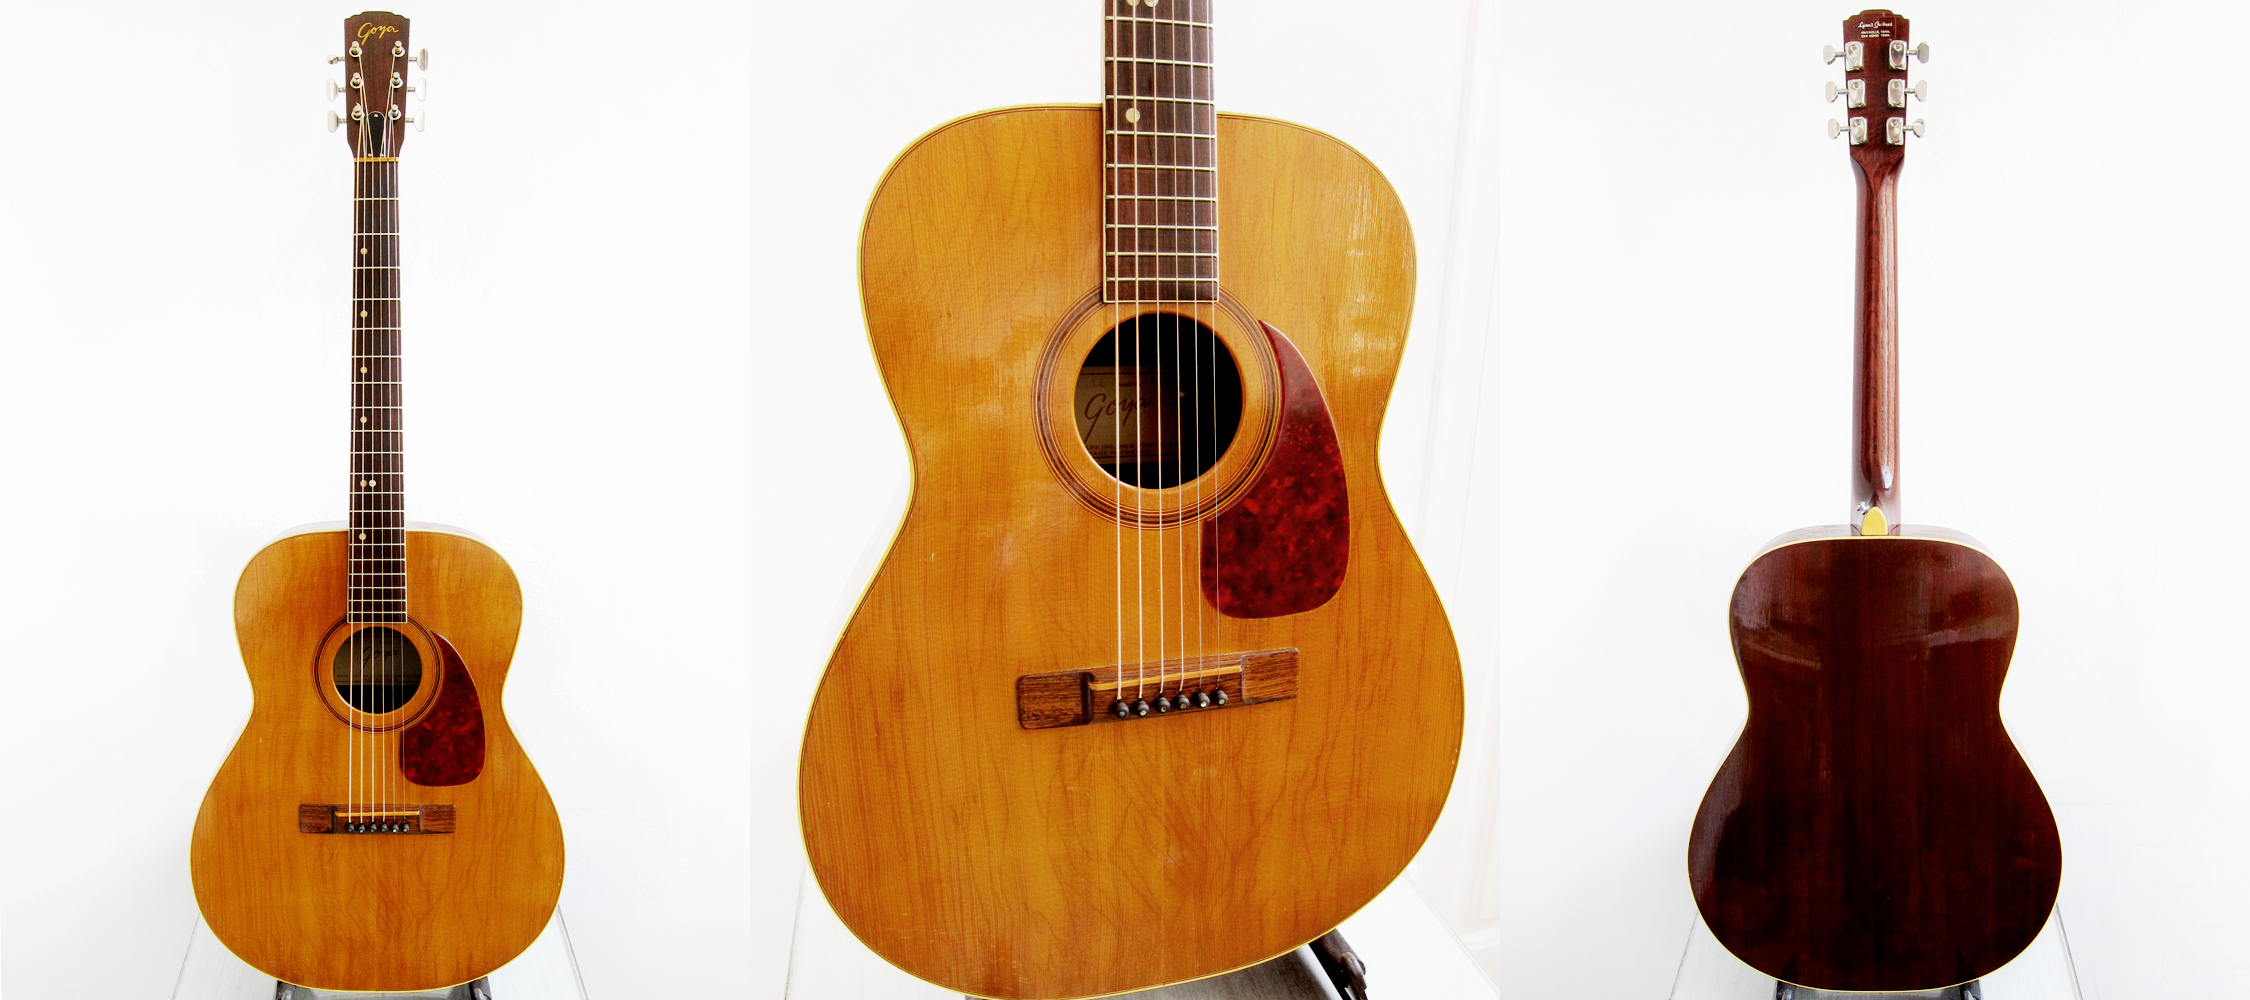
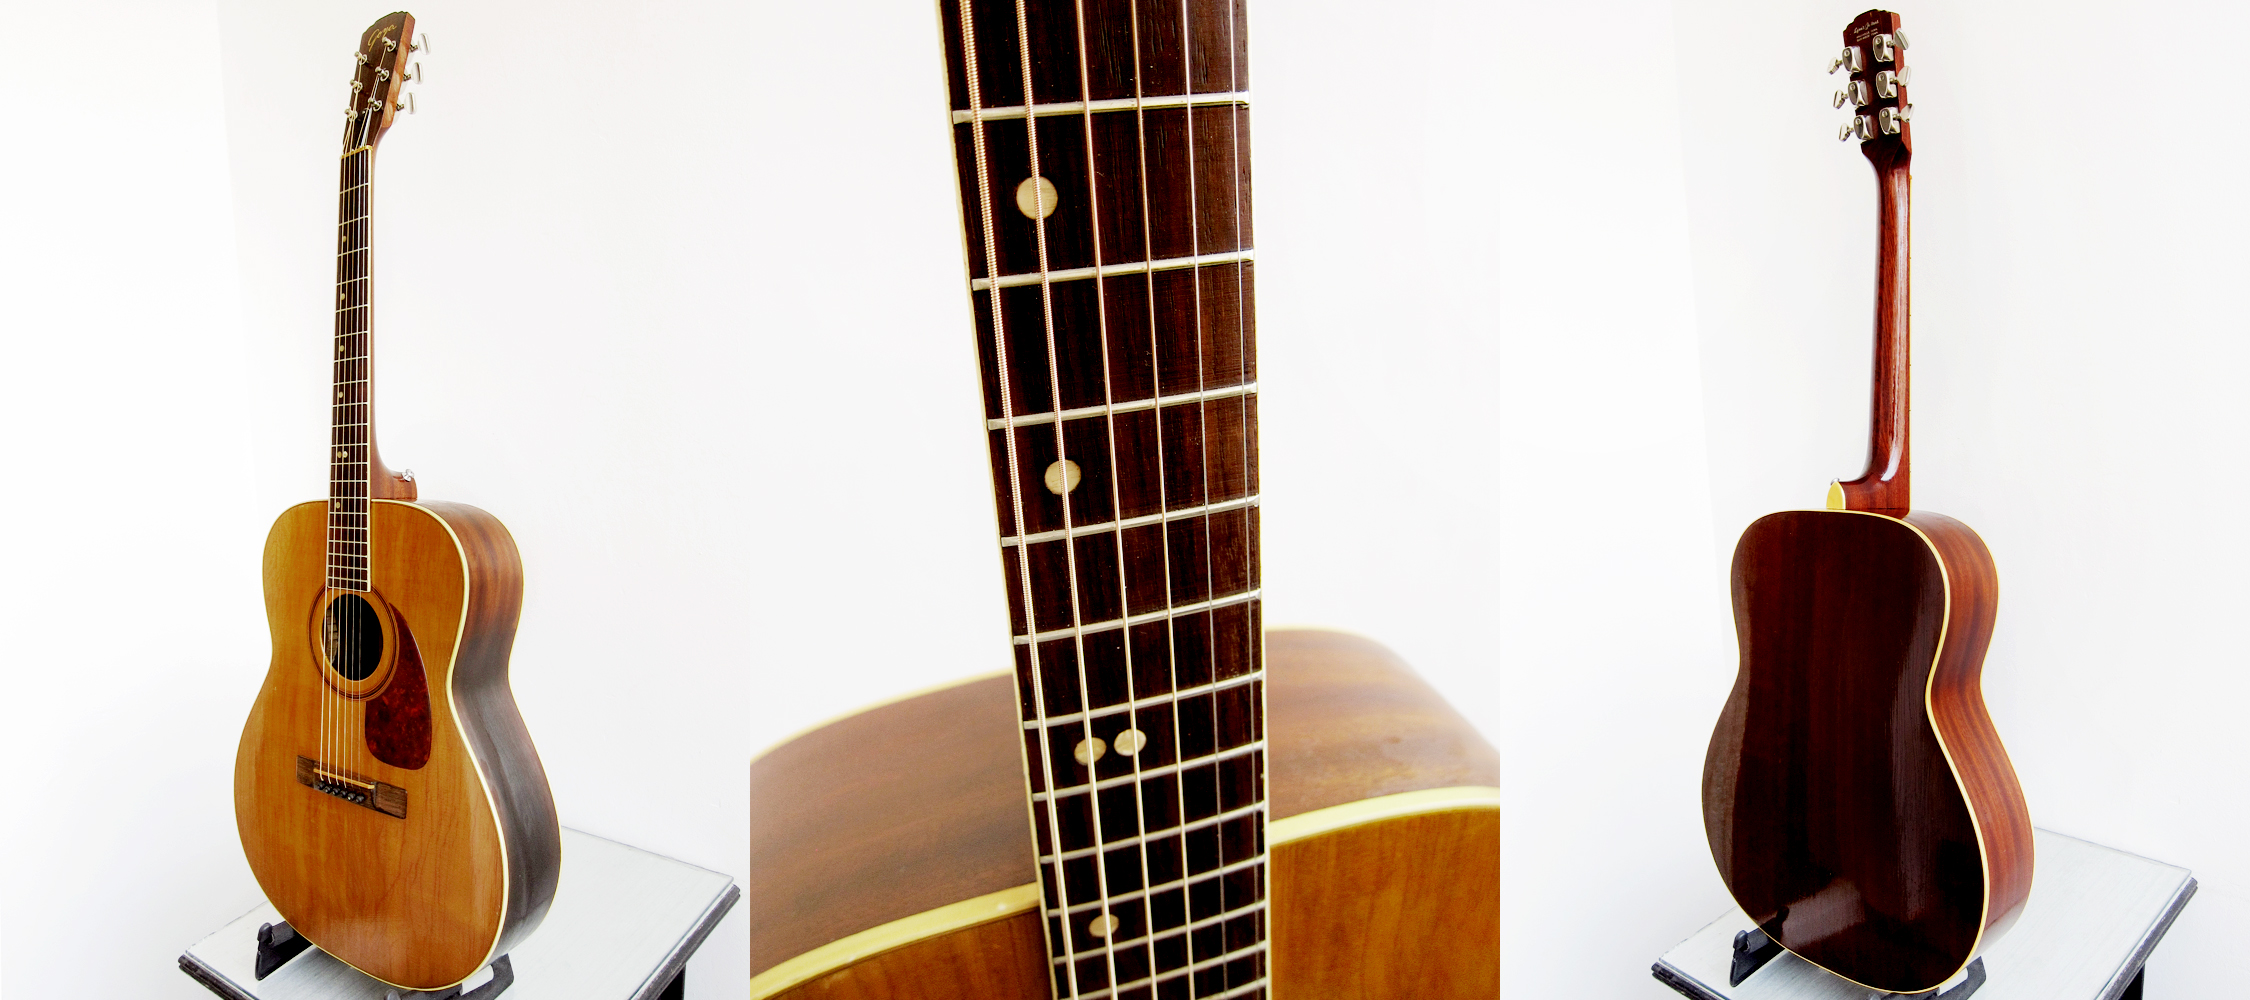
 Goya T-16, made in Sweden by Levin in 1966
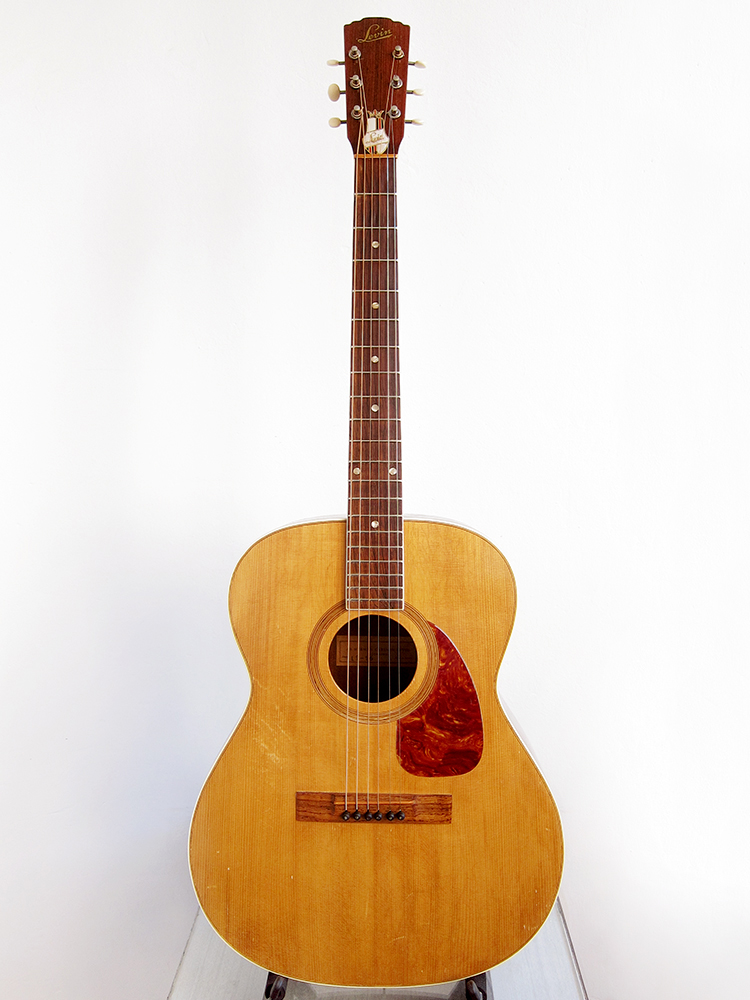
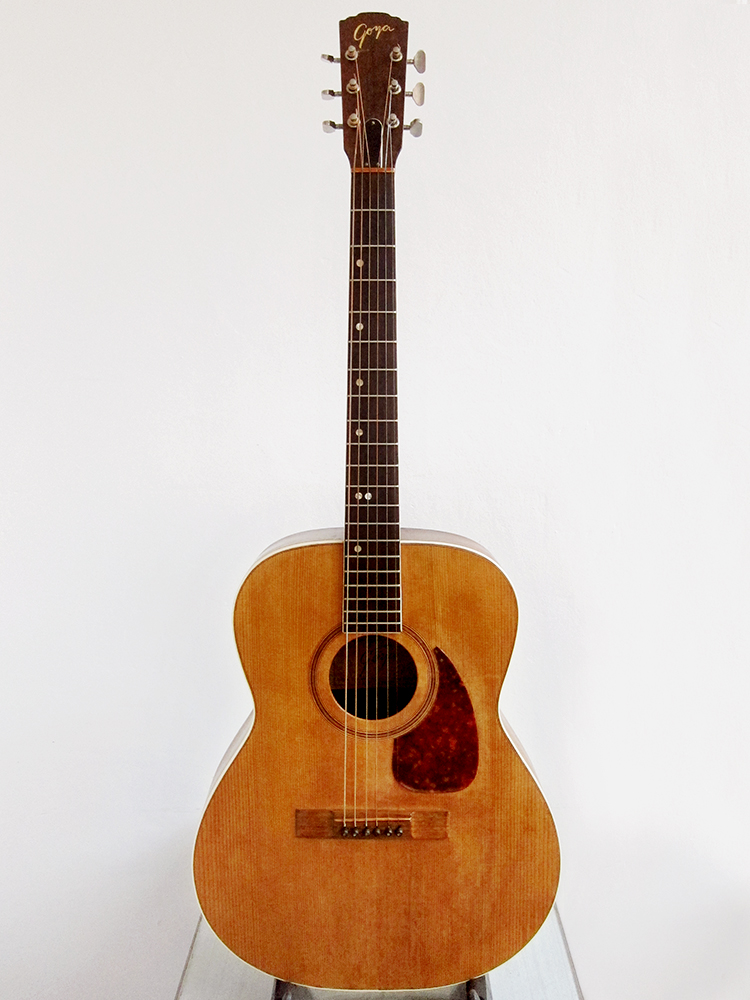
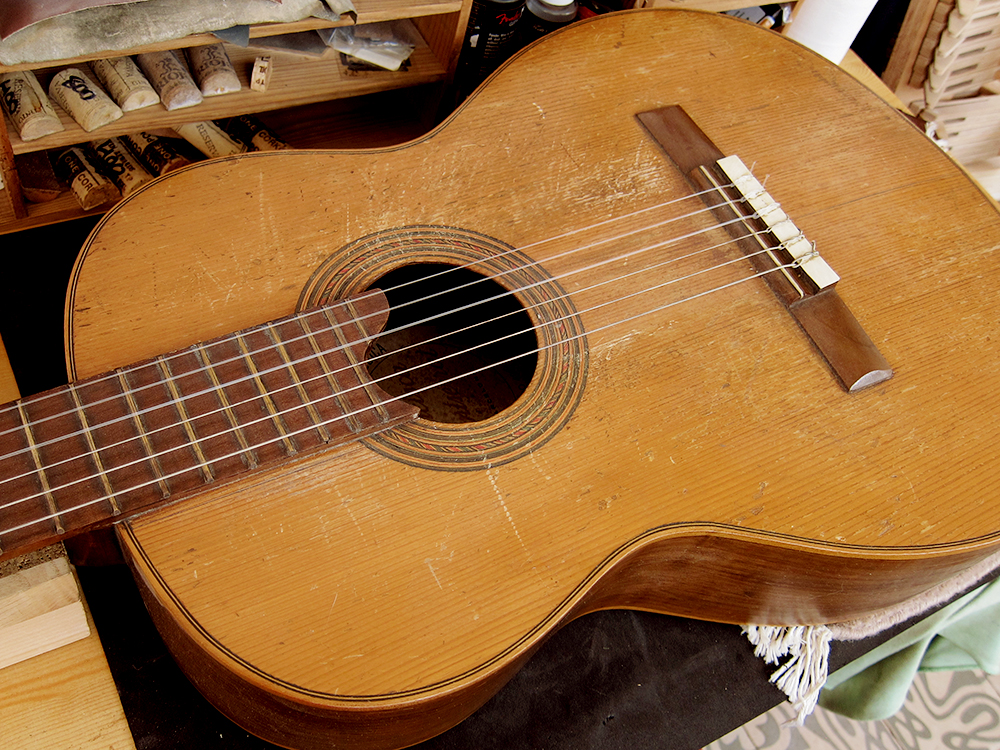
I found another Goya T-16 that I couldn’t resist. I’m not sure why I love these so much, if it’s the sound, shape or the fact that my dad’s old Levin LT-16 was my first guitar. This one seems to have had a crack in the lower bout on the bottom side and when that was fixed they gave the side a light burst to cover it and then lacquered the whole guitar. Back in the 1960’s when these guitars left the factory in Sweden, the Levin LT-16 came with a really nice satin finish and the Goya T-16 with a high gloss that cracked over time. The previous Goya T-16 was sanded down and this one had an extra coat of lacquer so I guess people weren’t entirely happy with the finish on these. They both sounds very different, the old one sounds more woody and dry and this one has a clearer snappier sound, I presume because of the lacquer. I really like the look of the top, more orange and pre-war Martin looking than the normal Goya T-16.

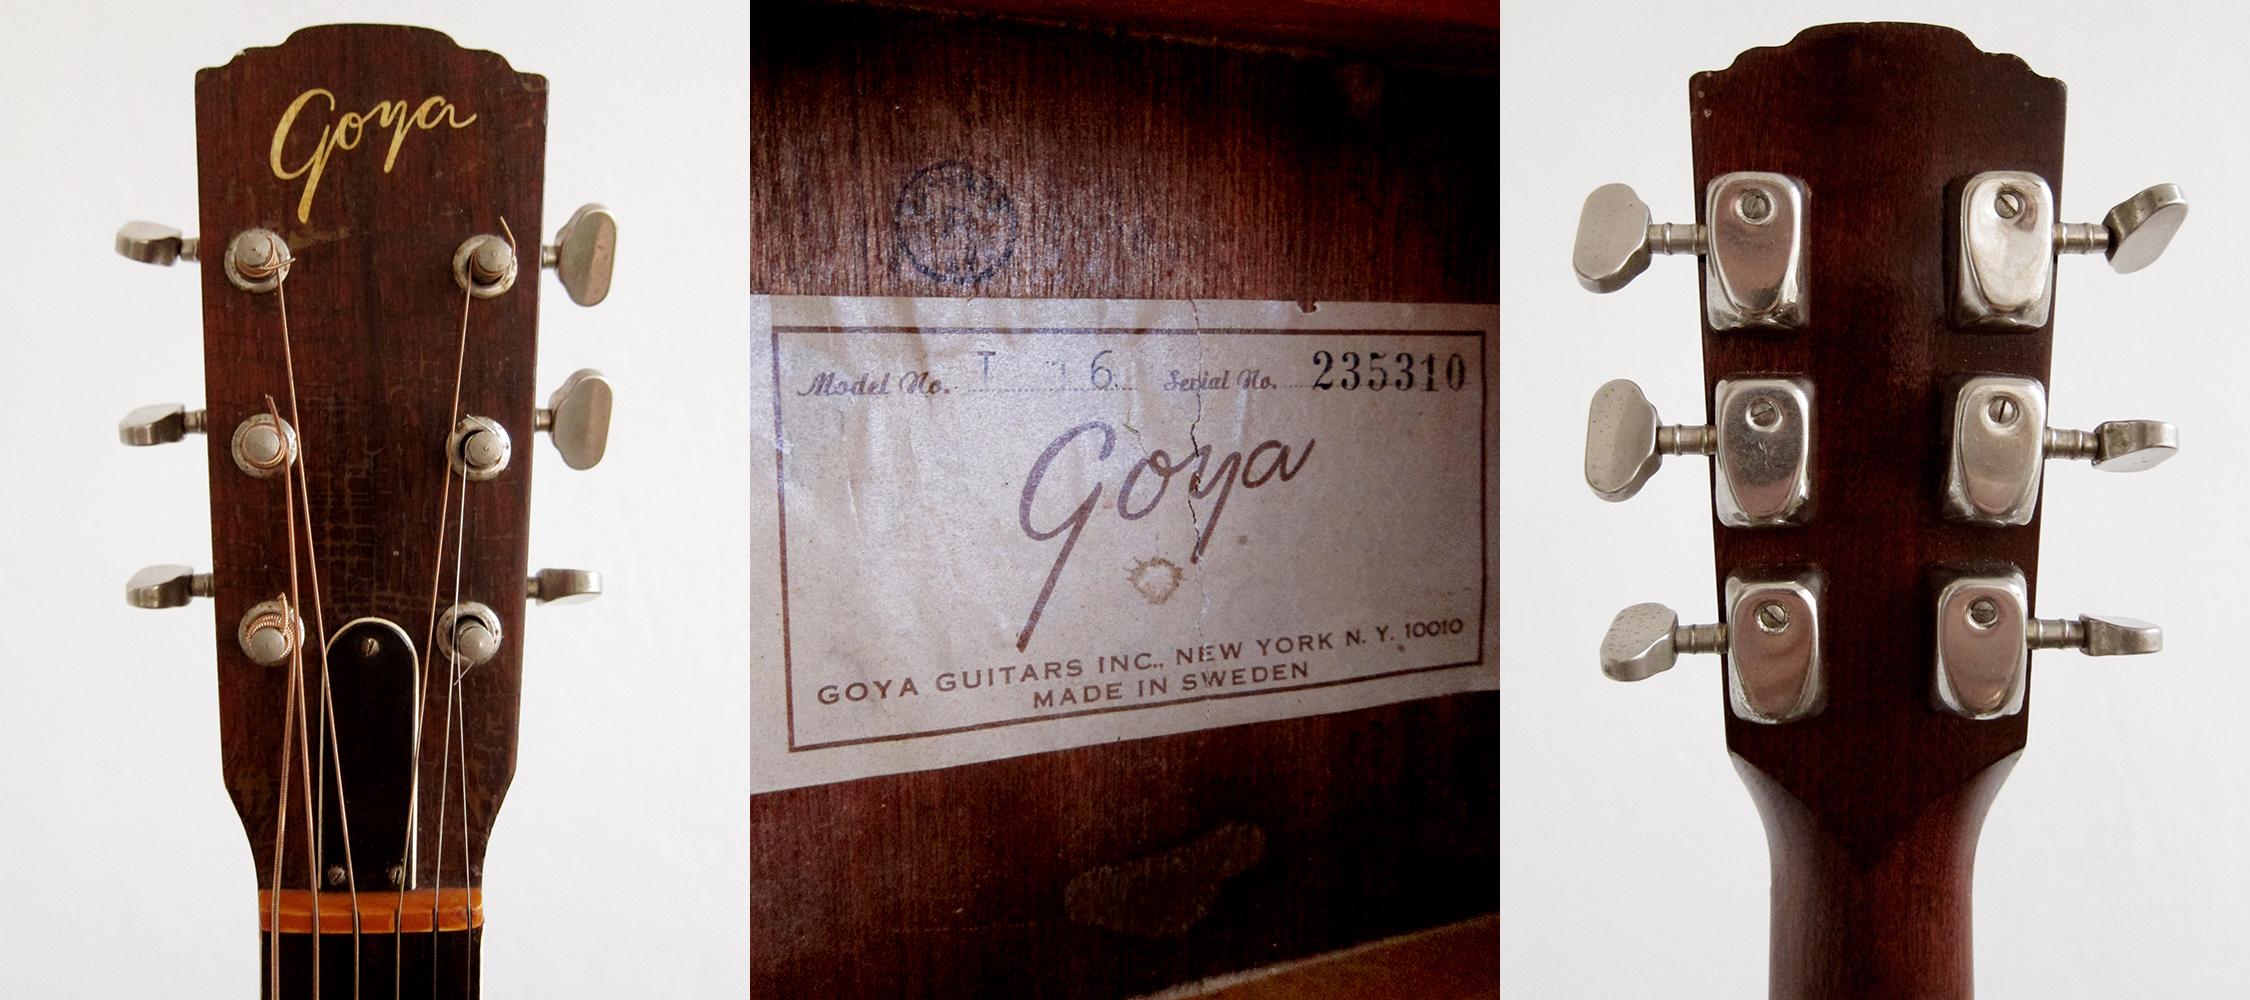
 I bought this 1966 Goya T-16 from an eBay seller in Illinois but I guess it first landed at Lynn’s Guitars in Knoxville Tennessee when it came from Sweden in the 1960’s.
Levin LT-16 / Goya T-16
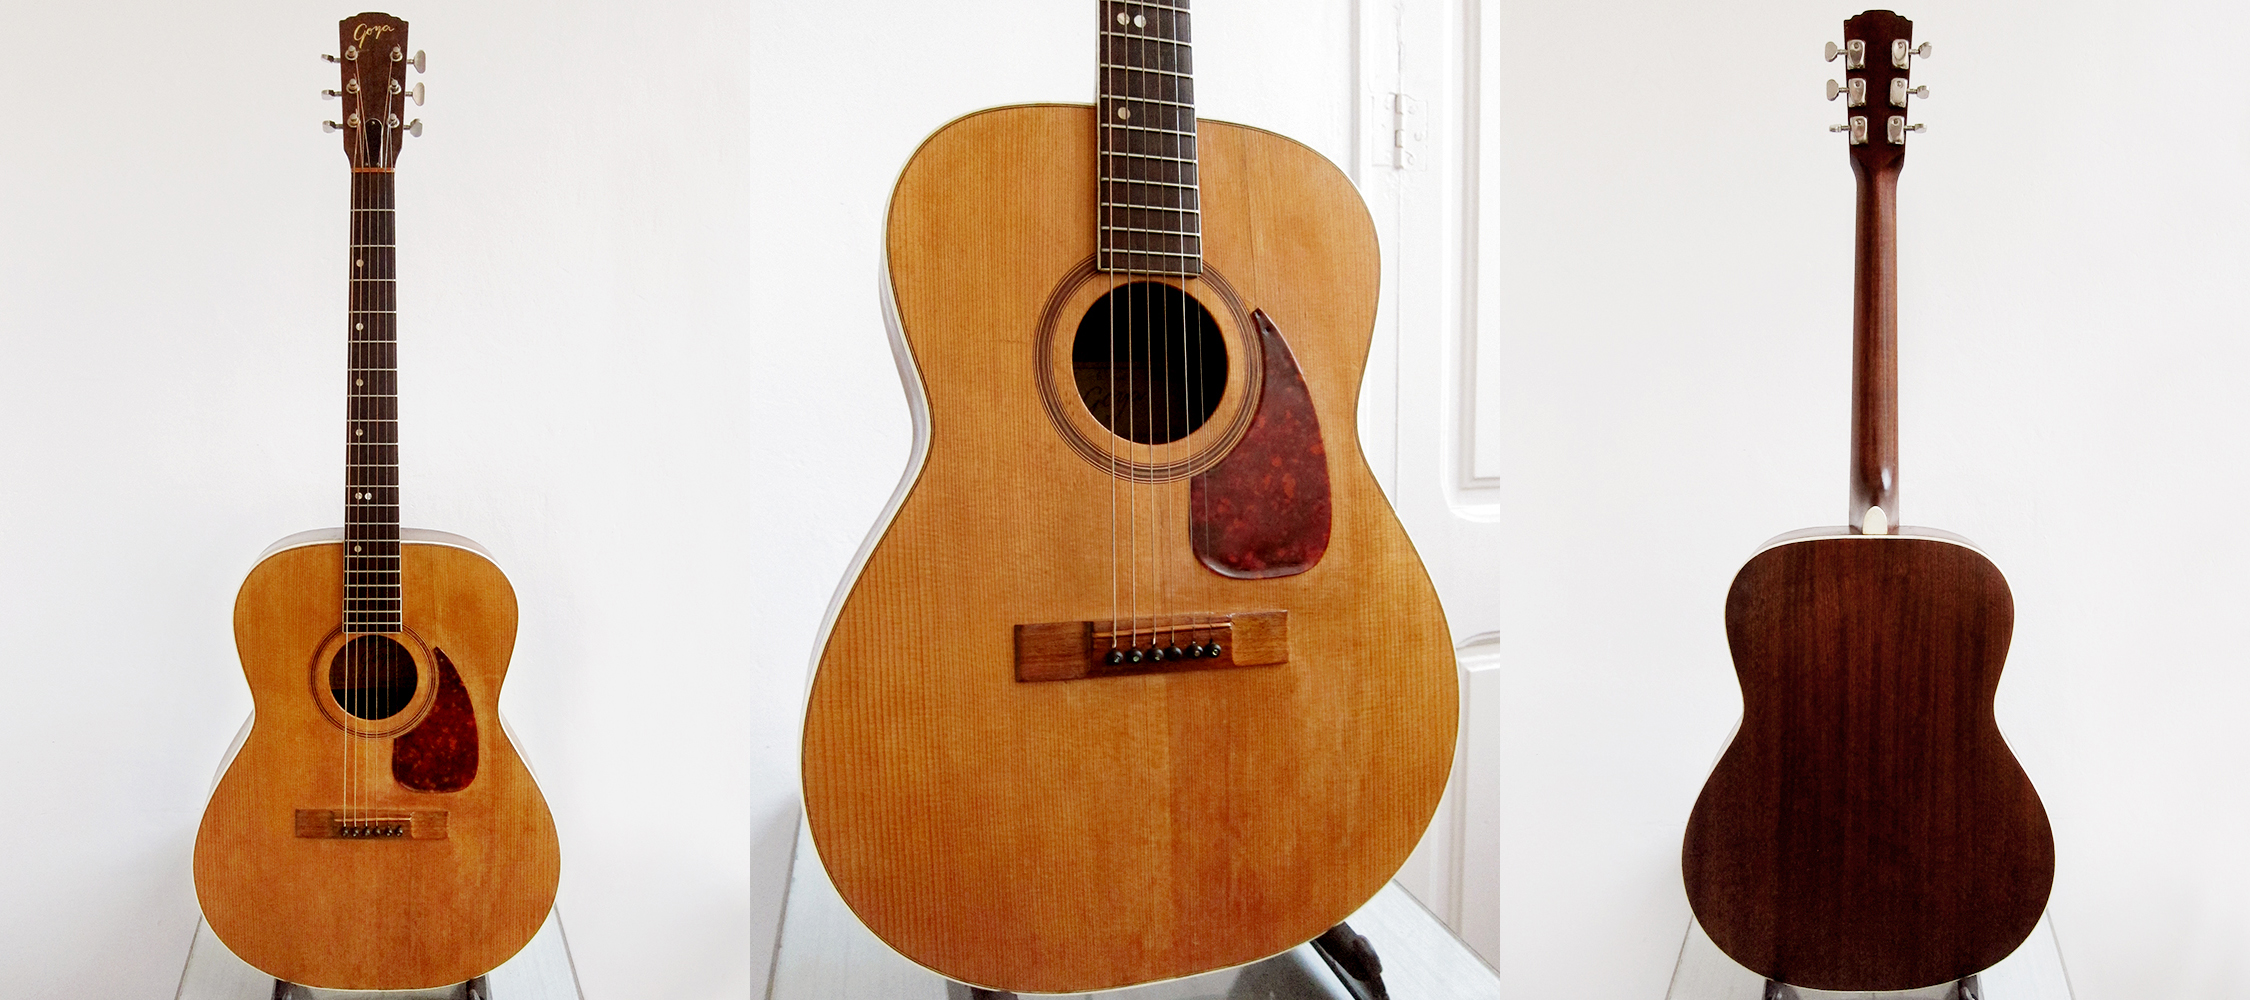
Grand Concert size: Body width: 380 mm, body length: 480 mm, body depth: 98 mm. Fingerboard width: 43 mm, scale length: 630 mm. Spruce top, mahogany back and sides, 4-ply bound top, single-bound back. Mahogany bolt-on neck with adjustable truss rod. Single-bound rosewood fingerboard with bass side pearloid dot inlay. Rosewood bridge, nickel plated individual Van Gent tuners with metal buttons. Matte natural finish and ten year warranty
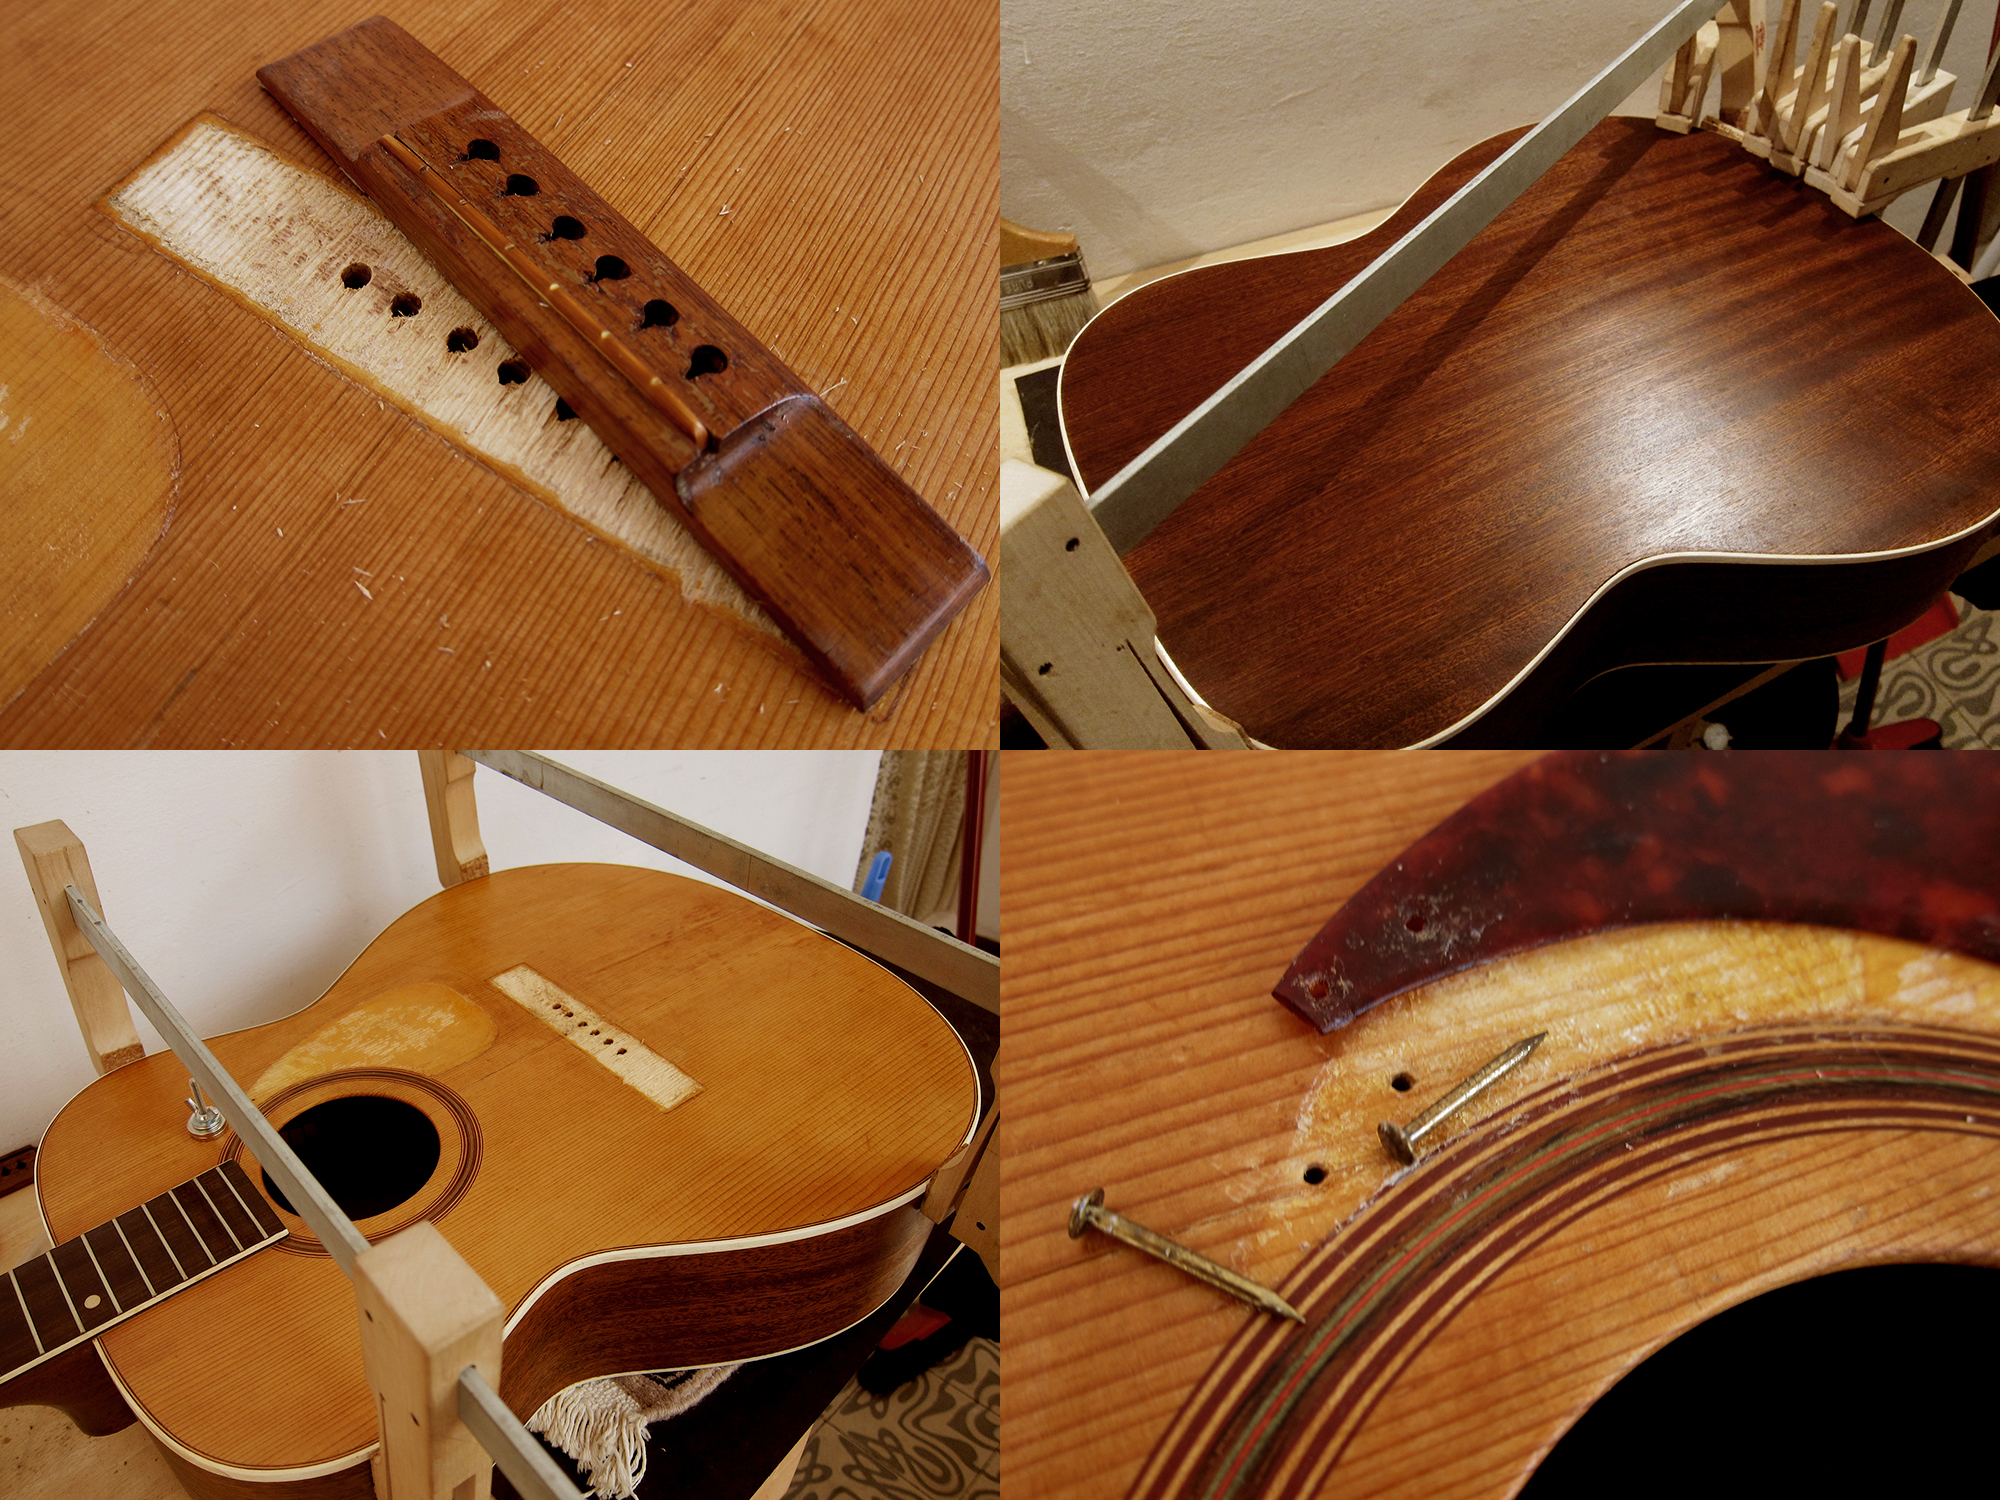
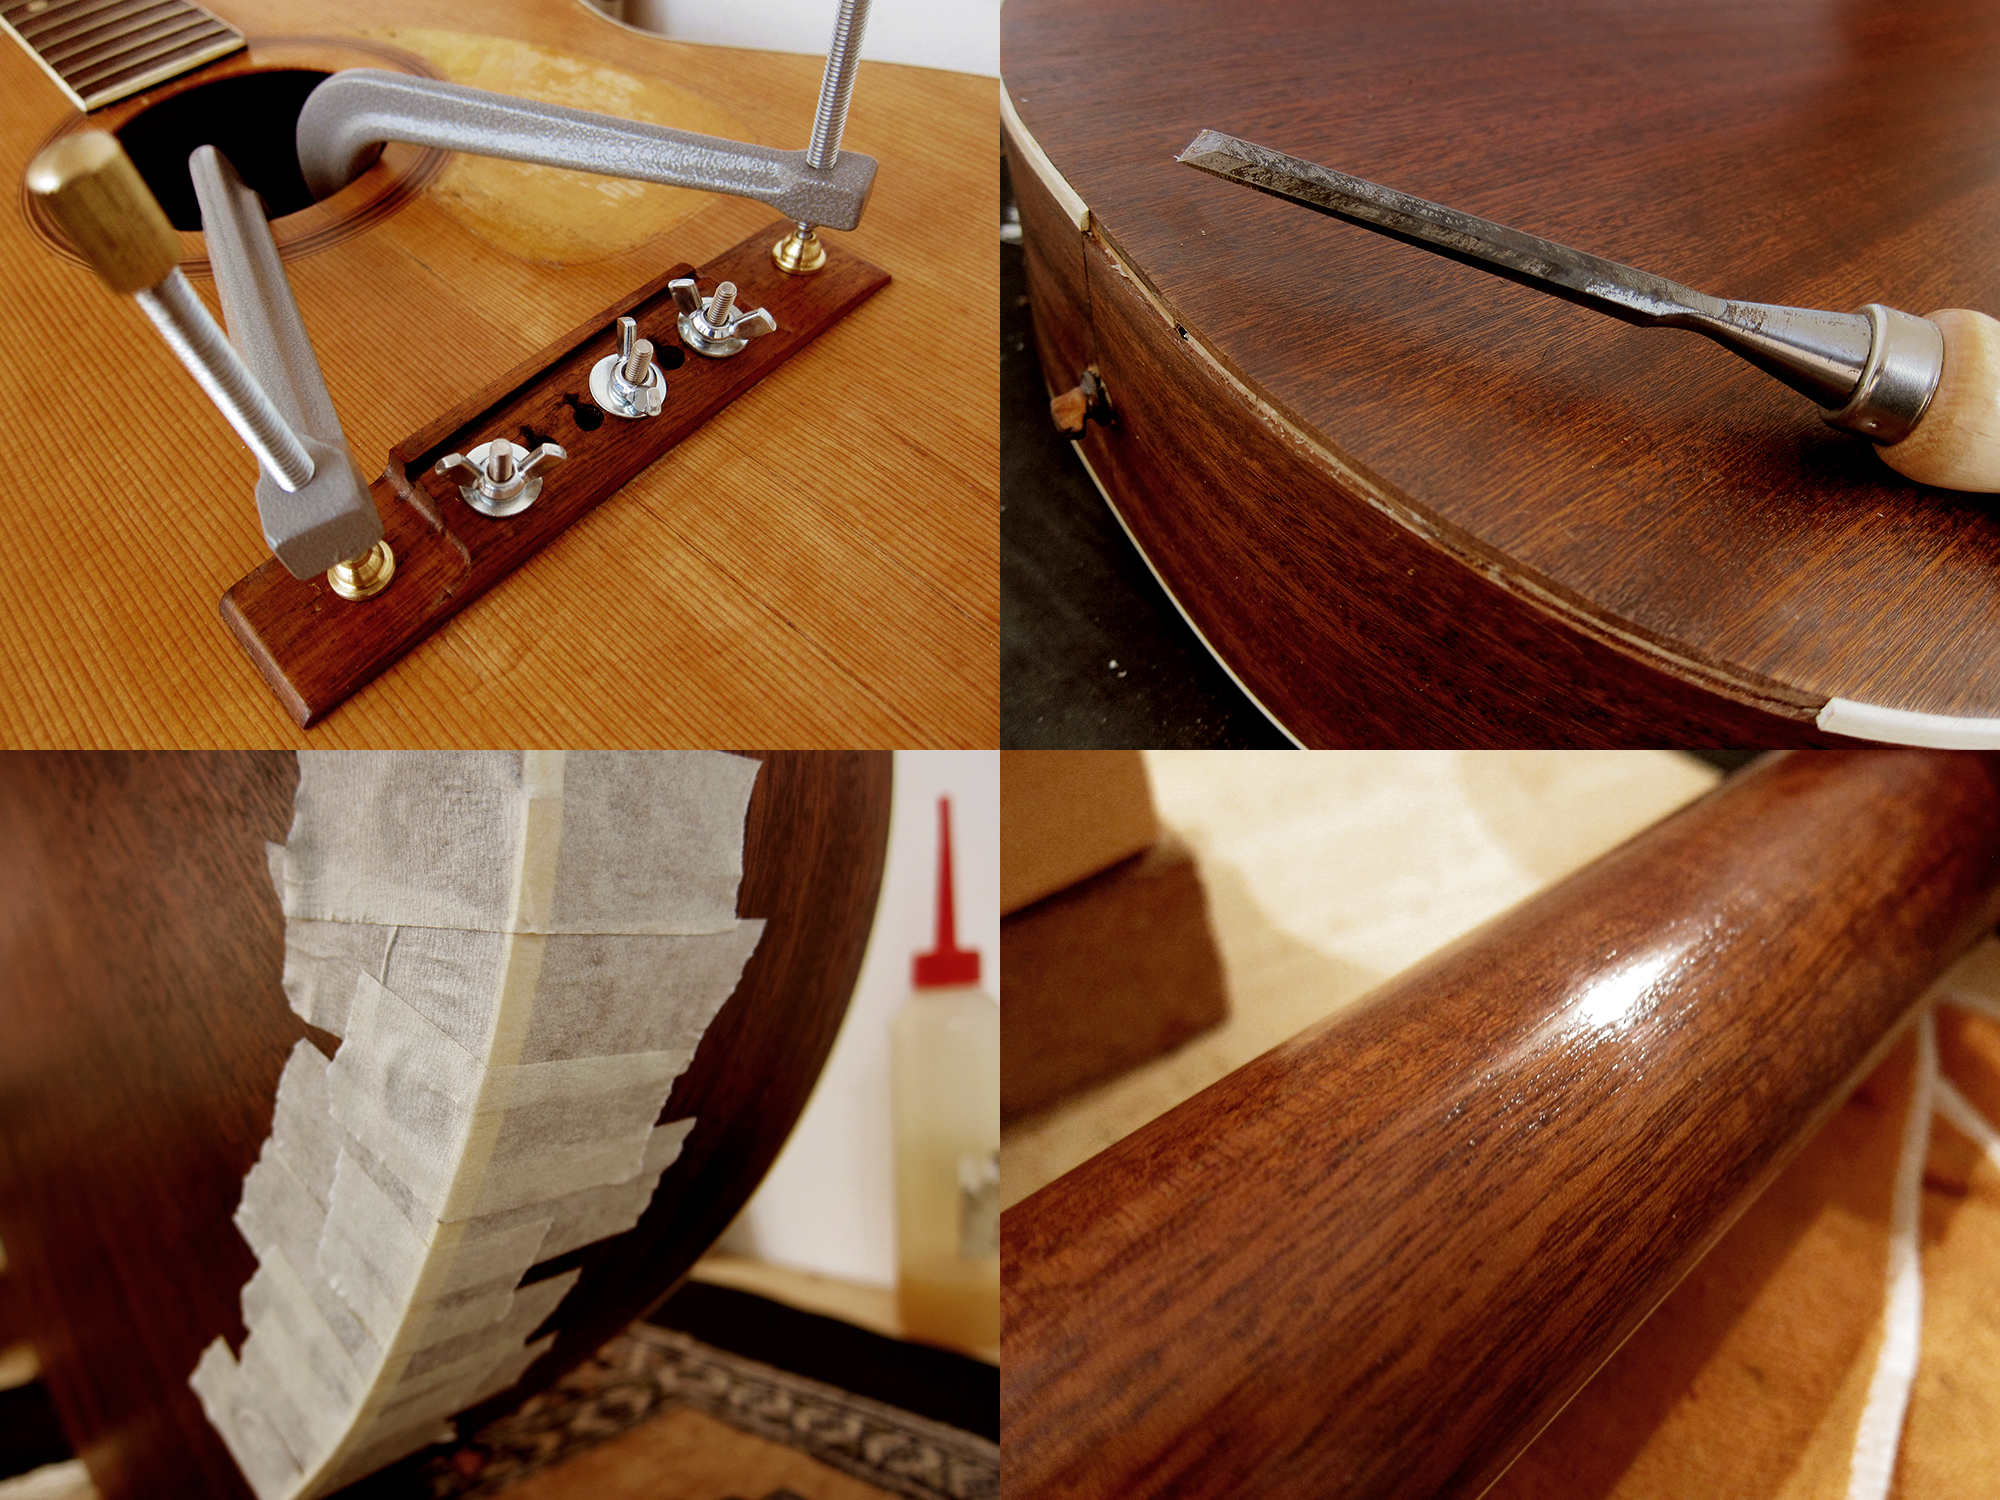
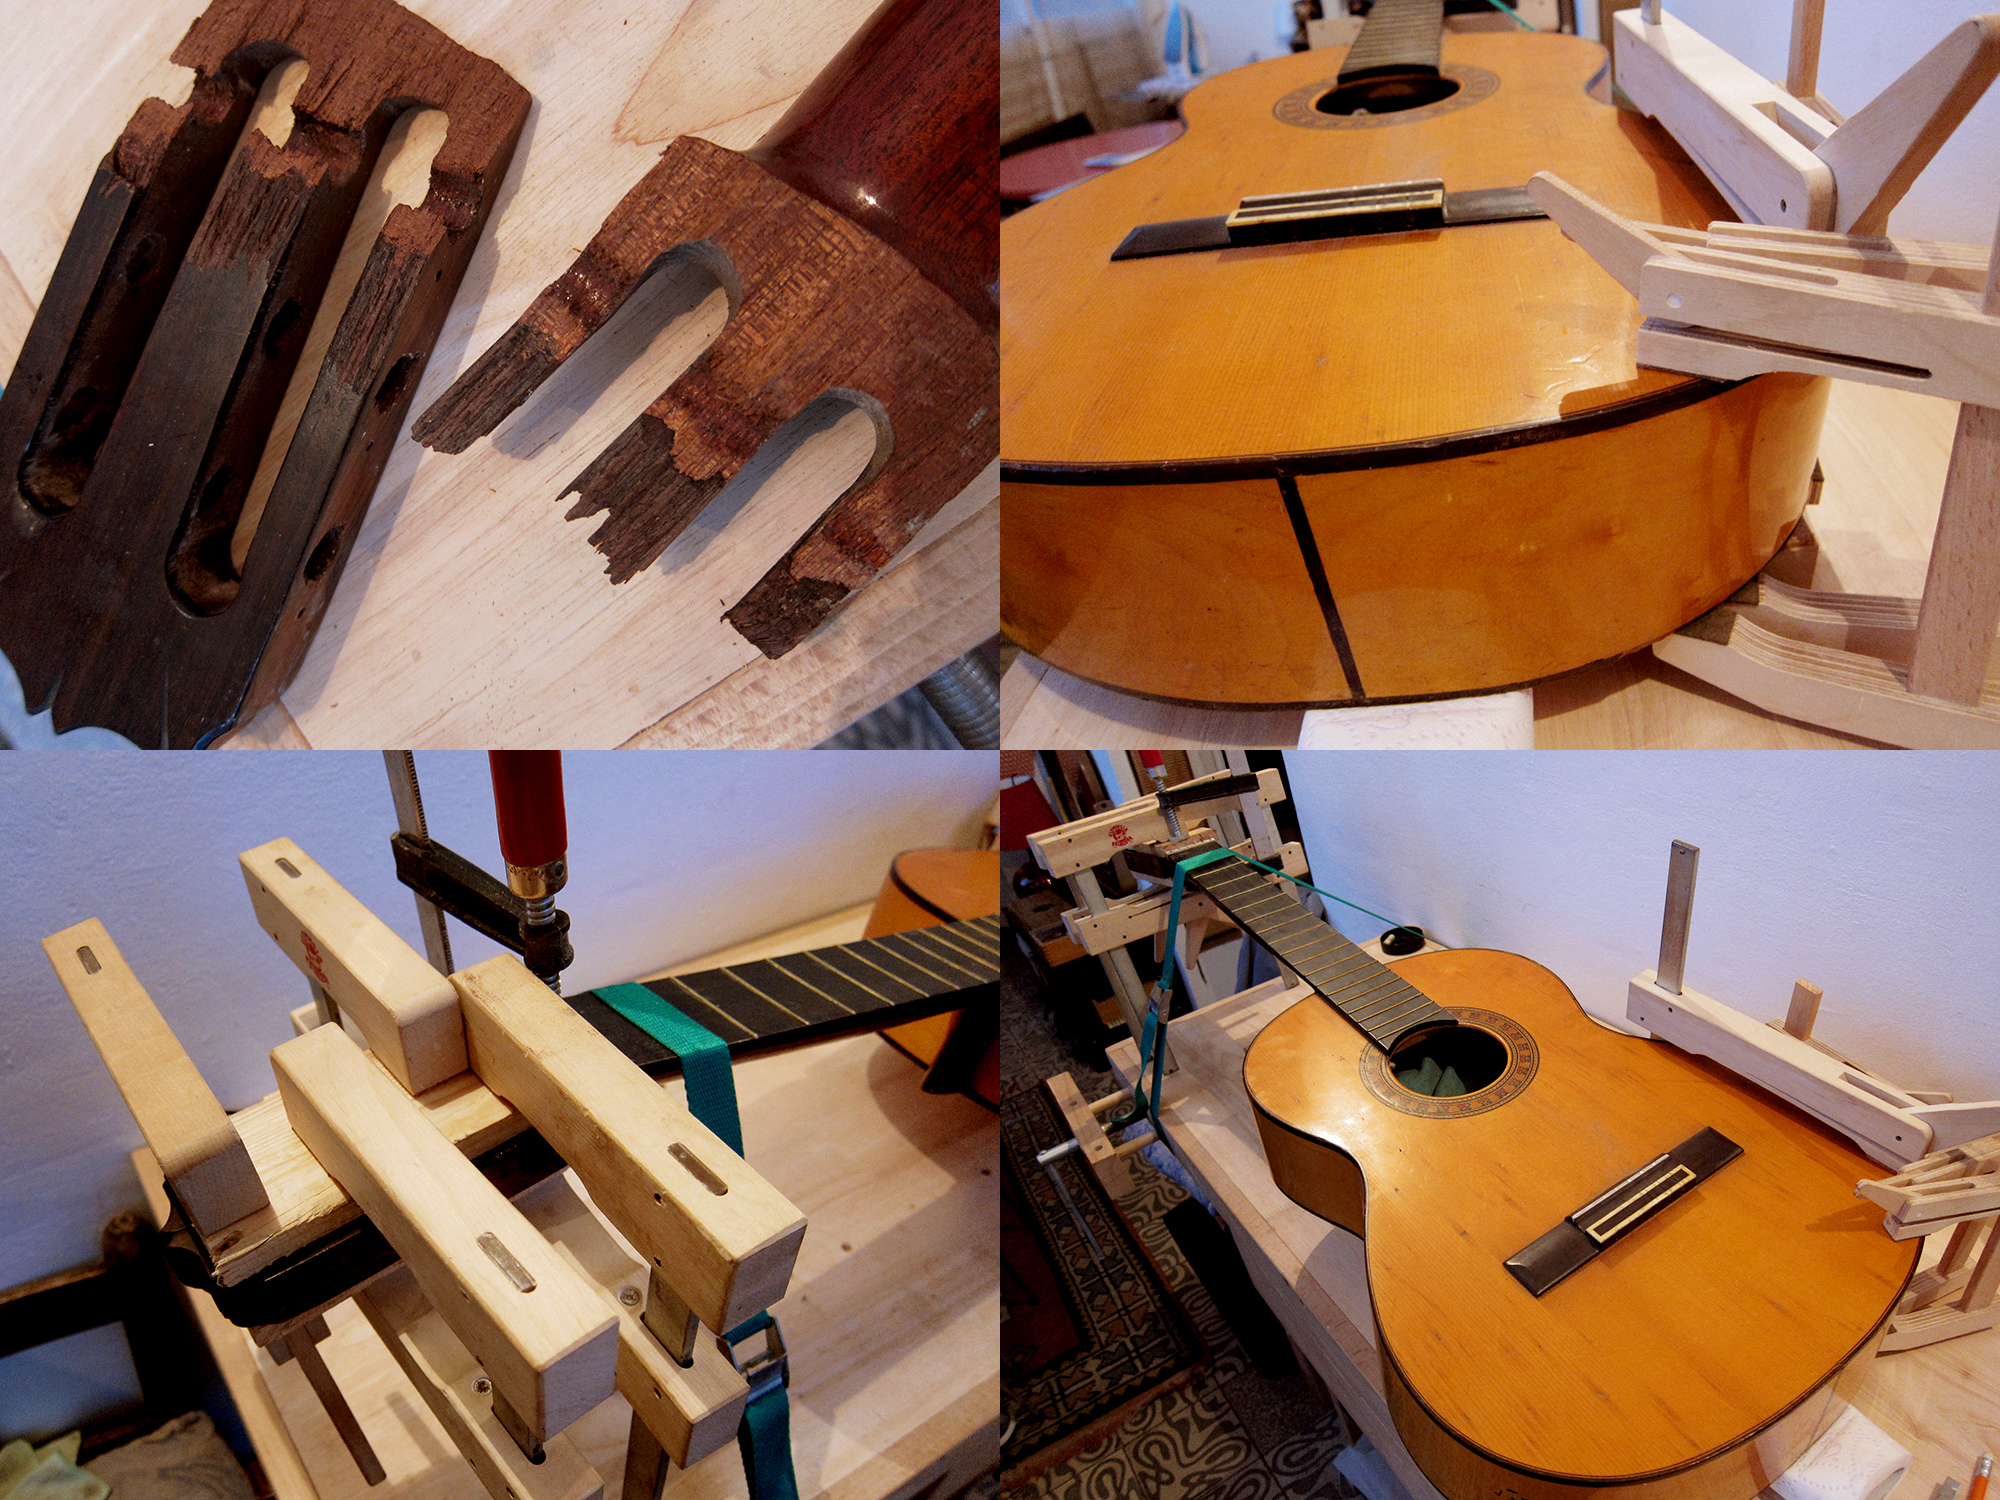
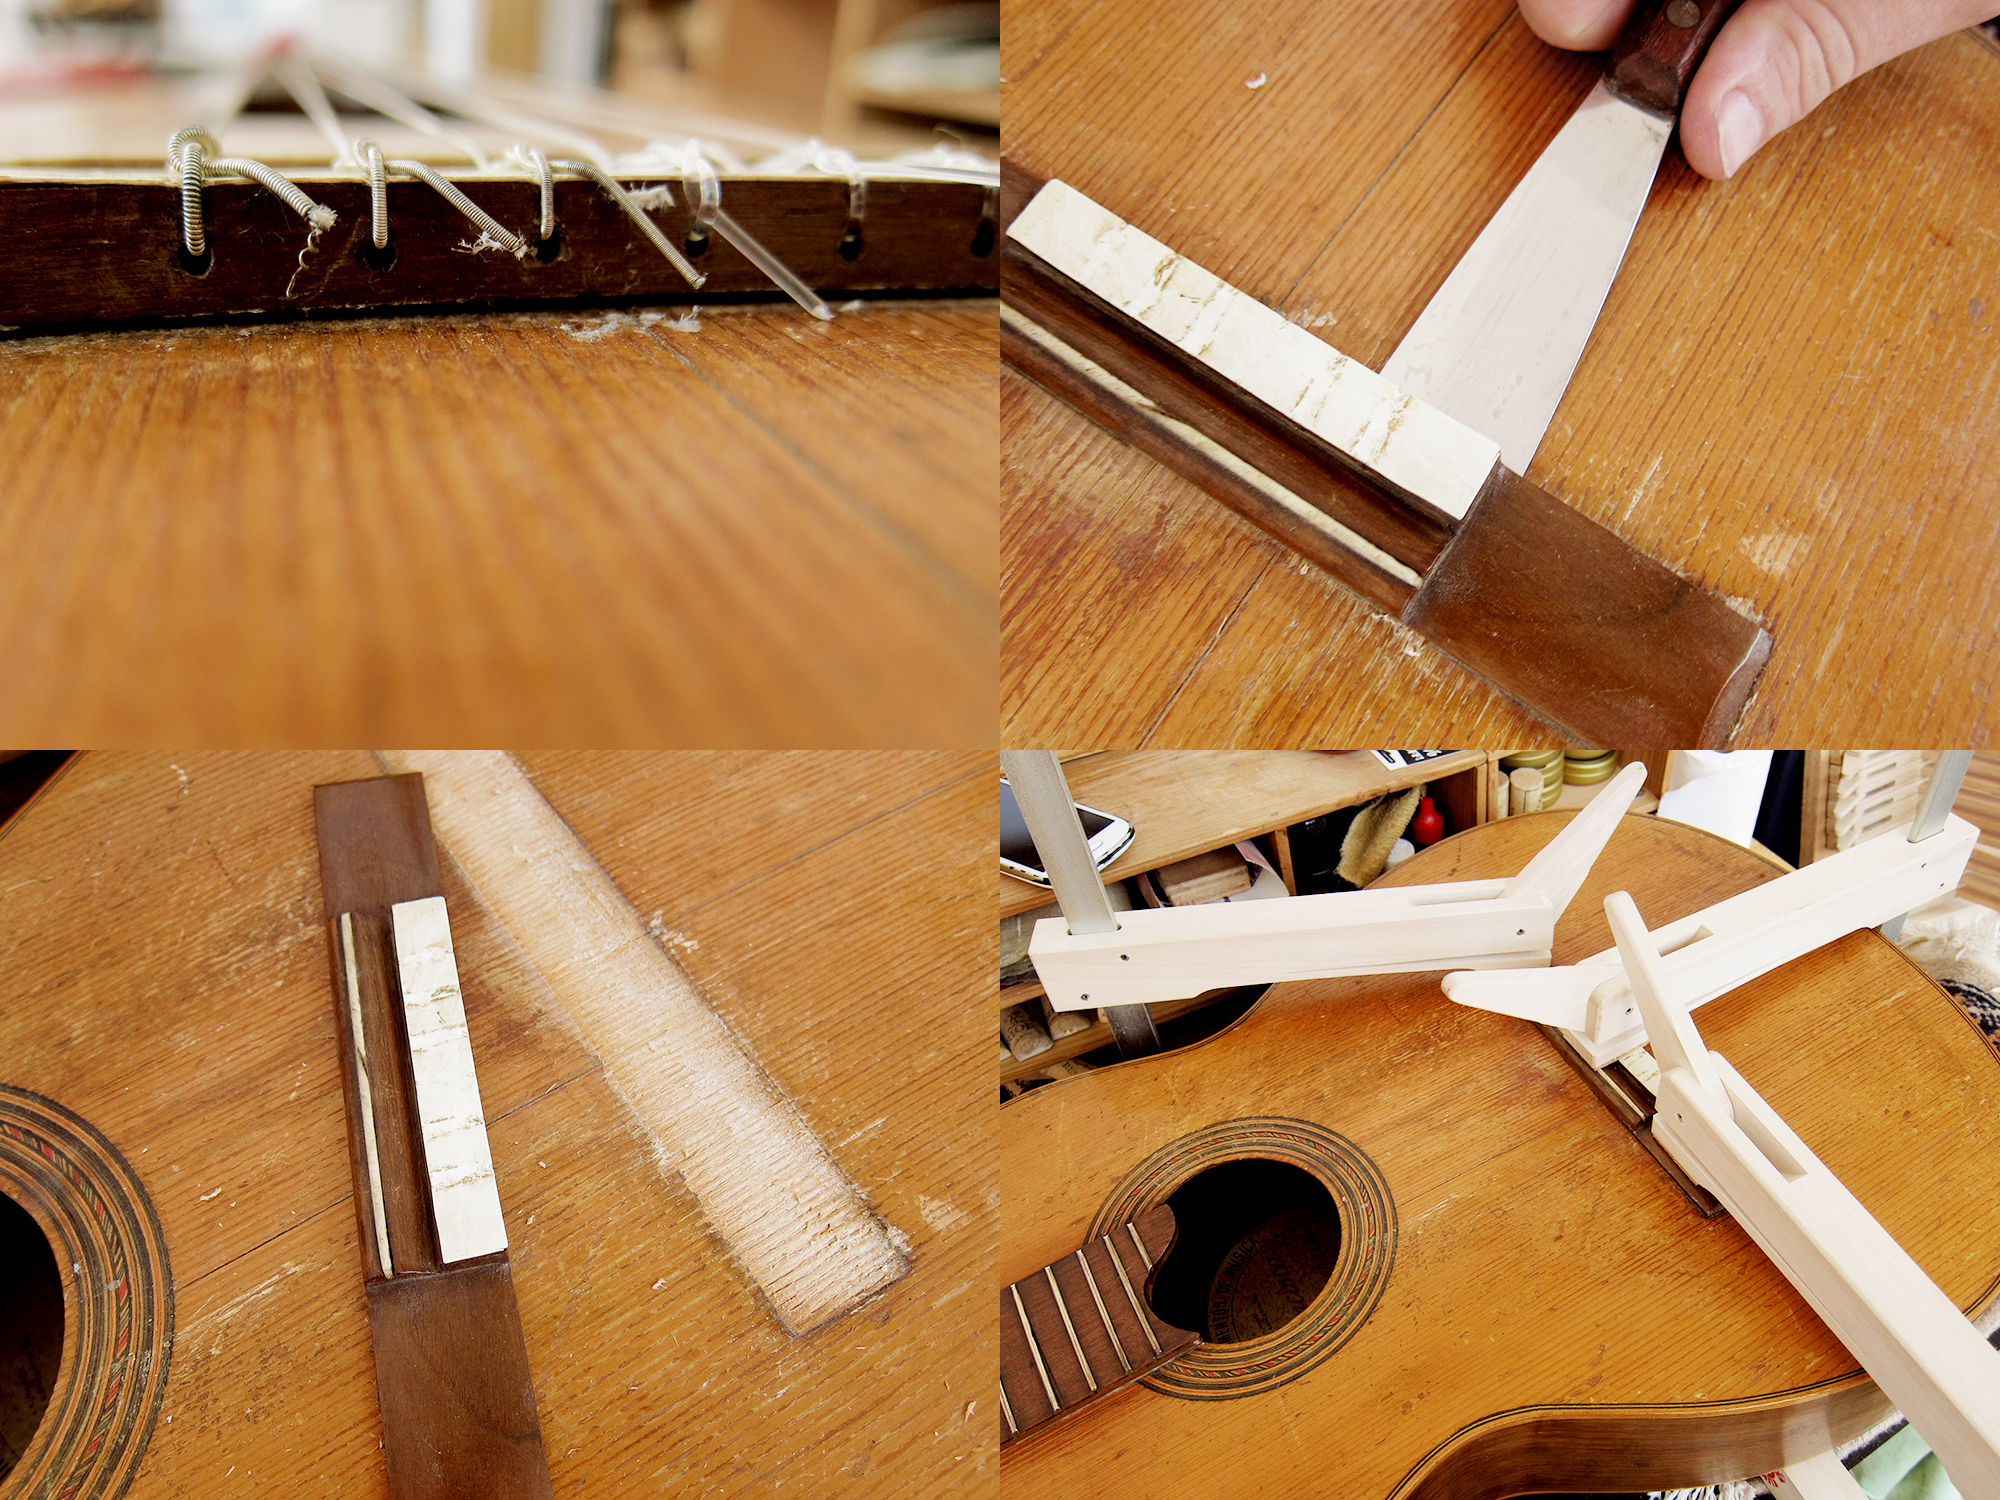
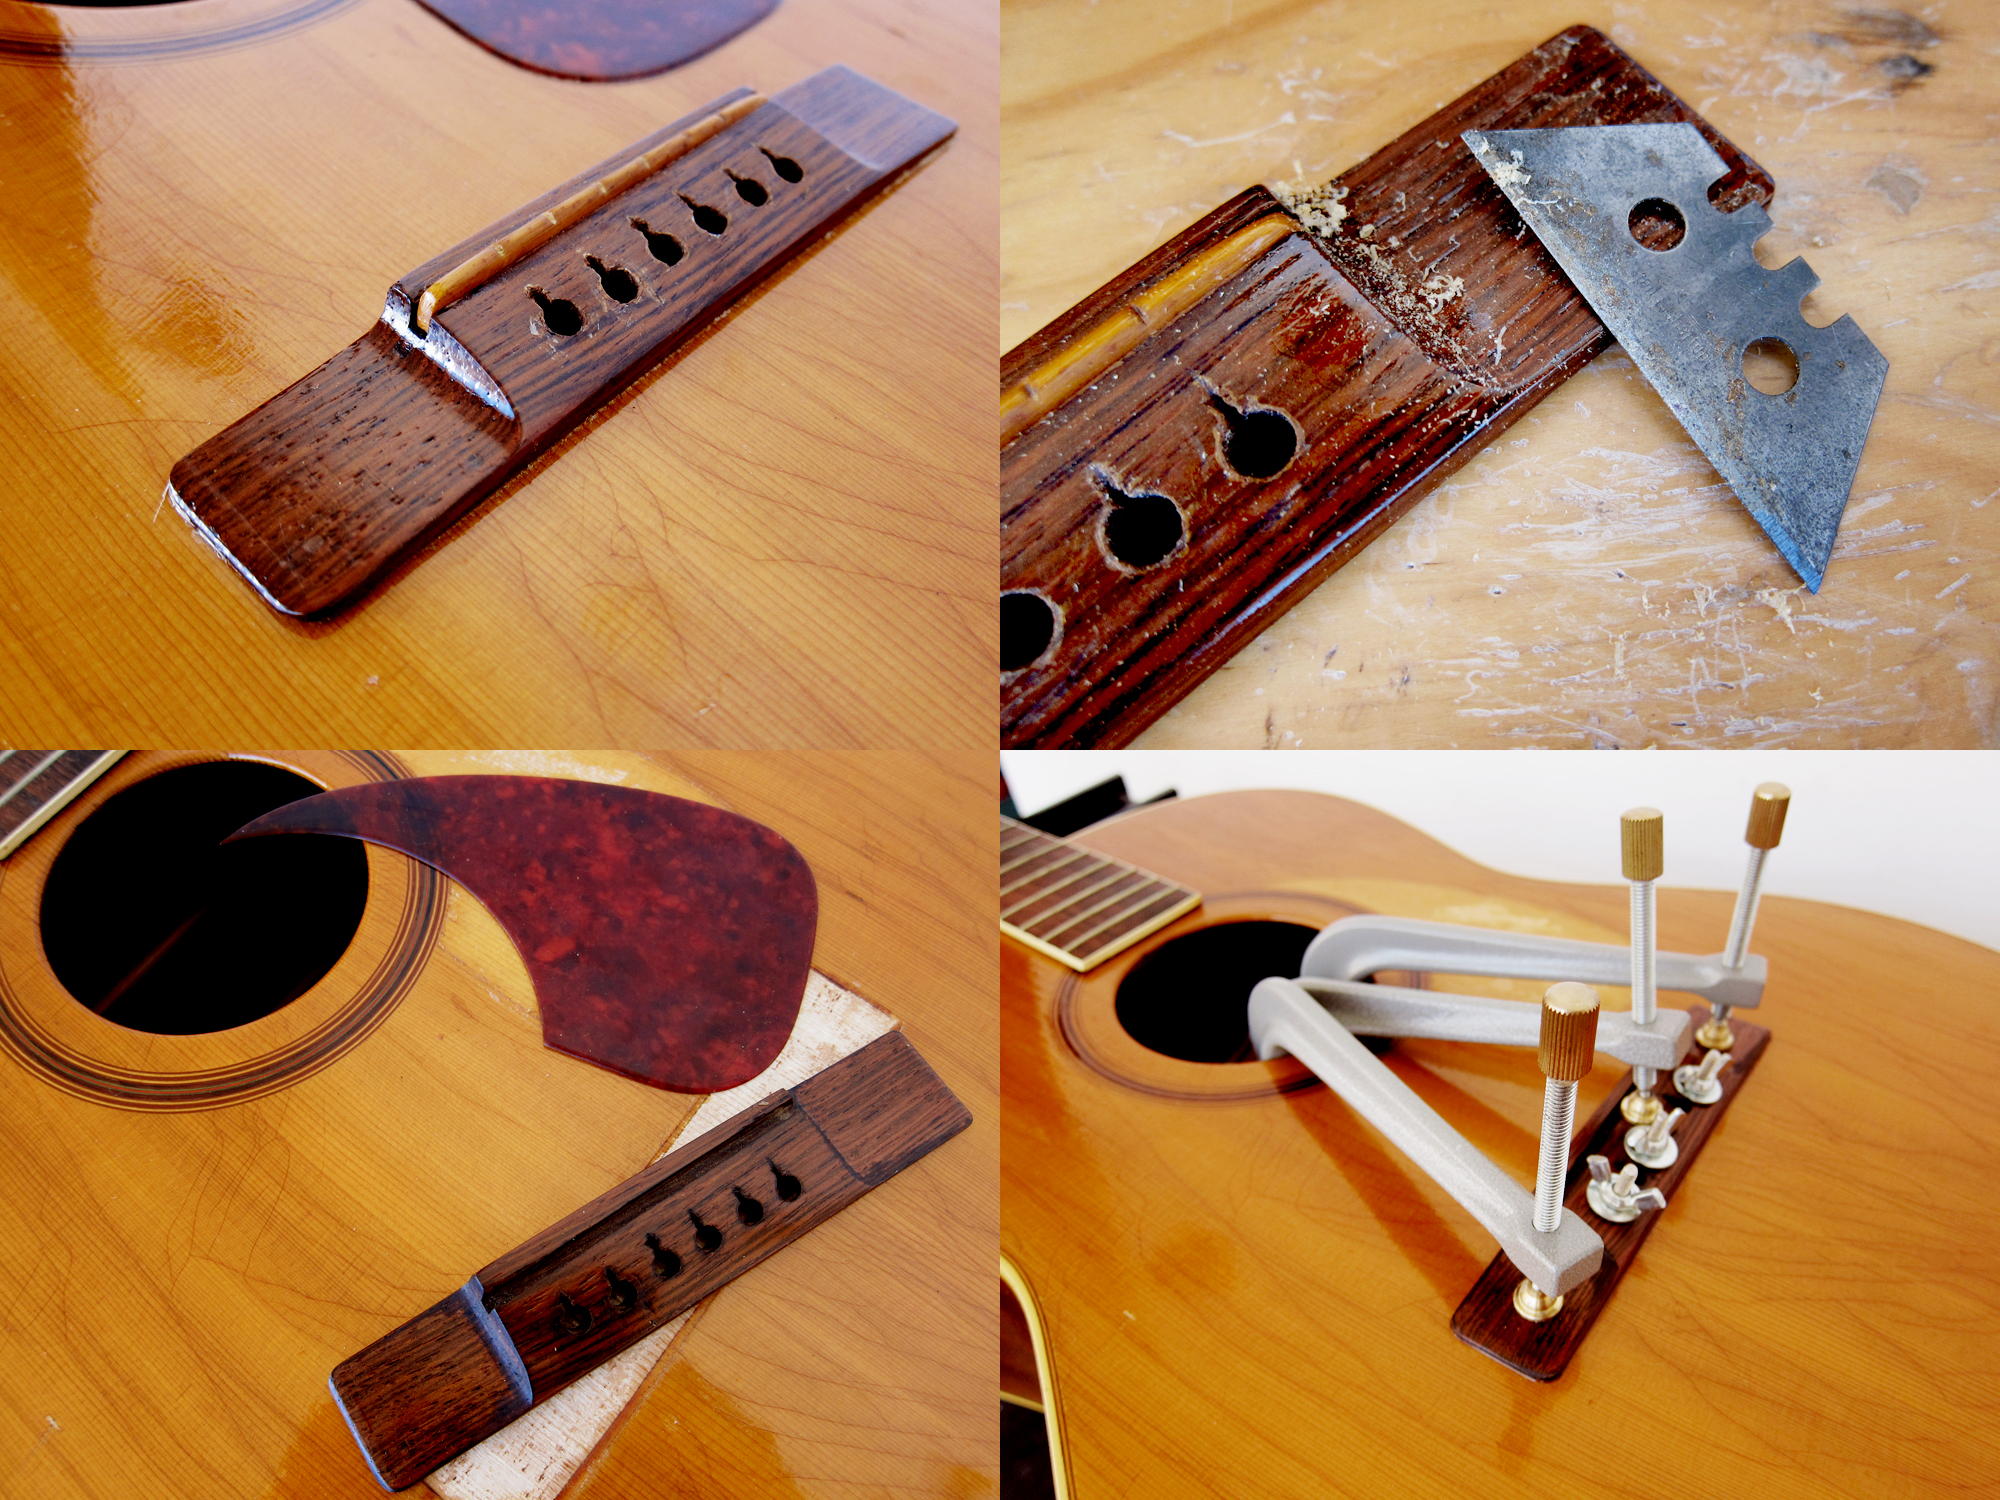 I removed the bridge and pickguard, scraped of the lacquer and then re-glued them. I also adjusted the neck angle by removing the bolts inside and then sanded down the heel a bit with a sandpaper, just like I did on the old Goya T-16.
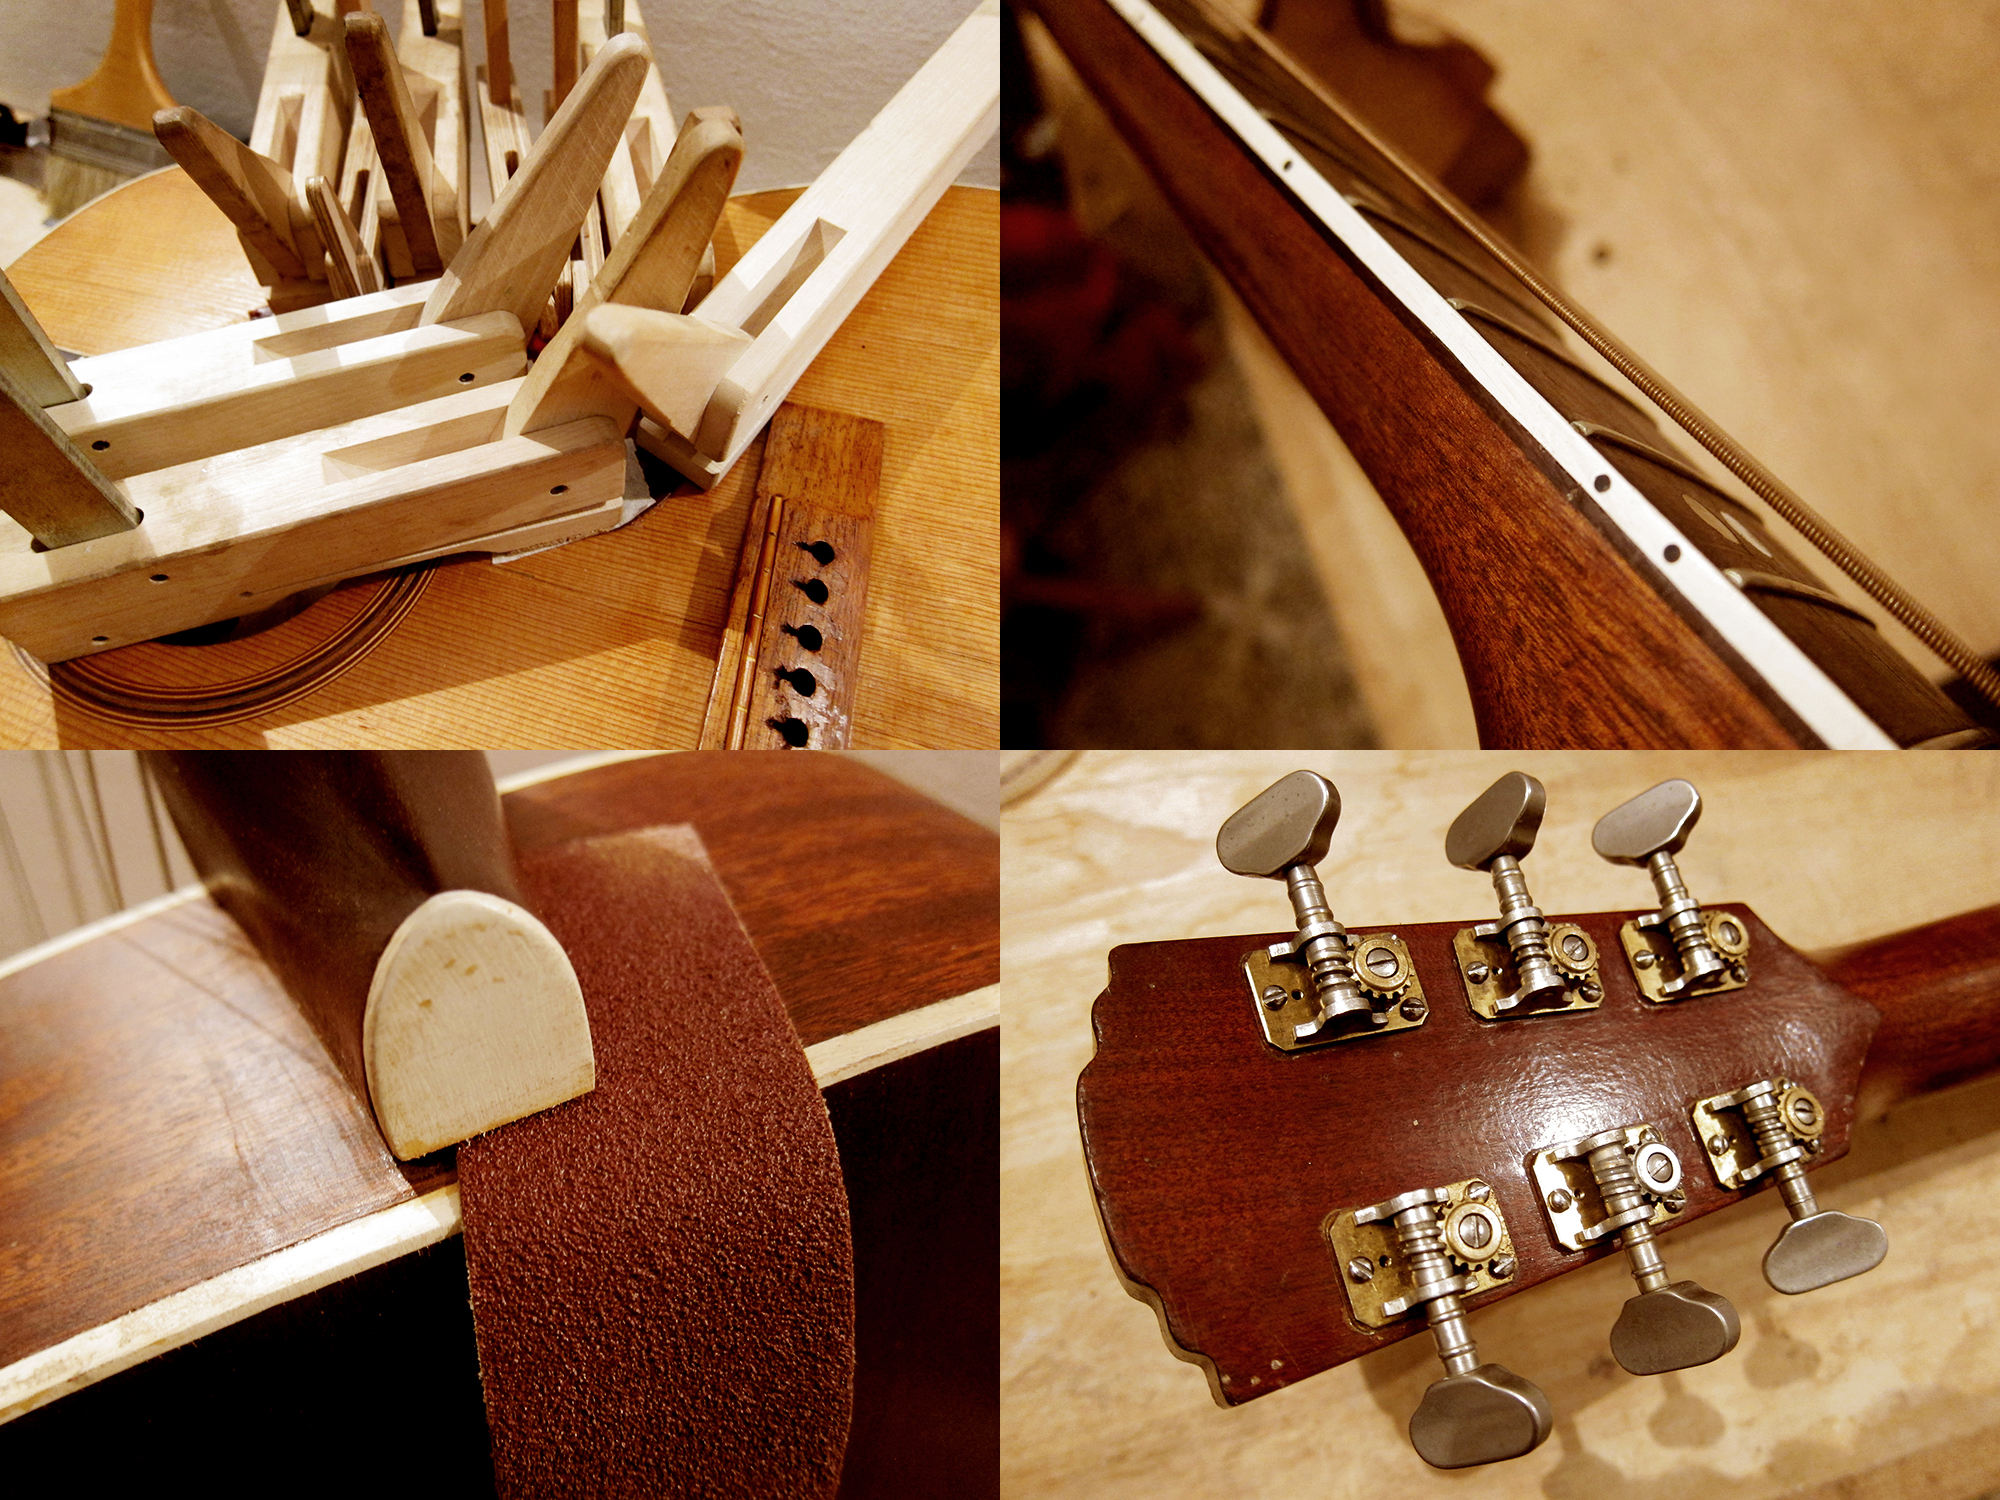
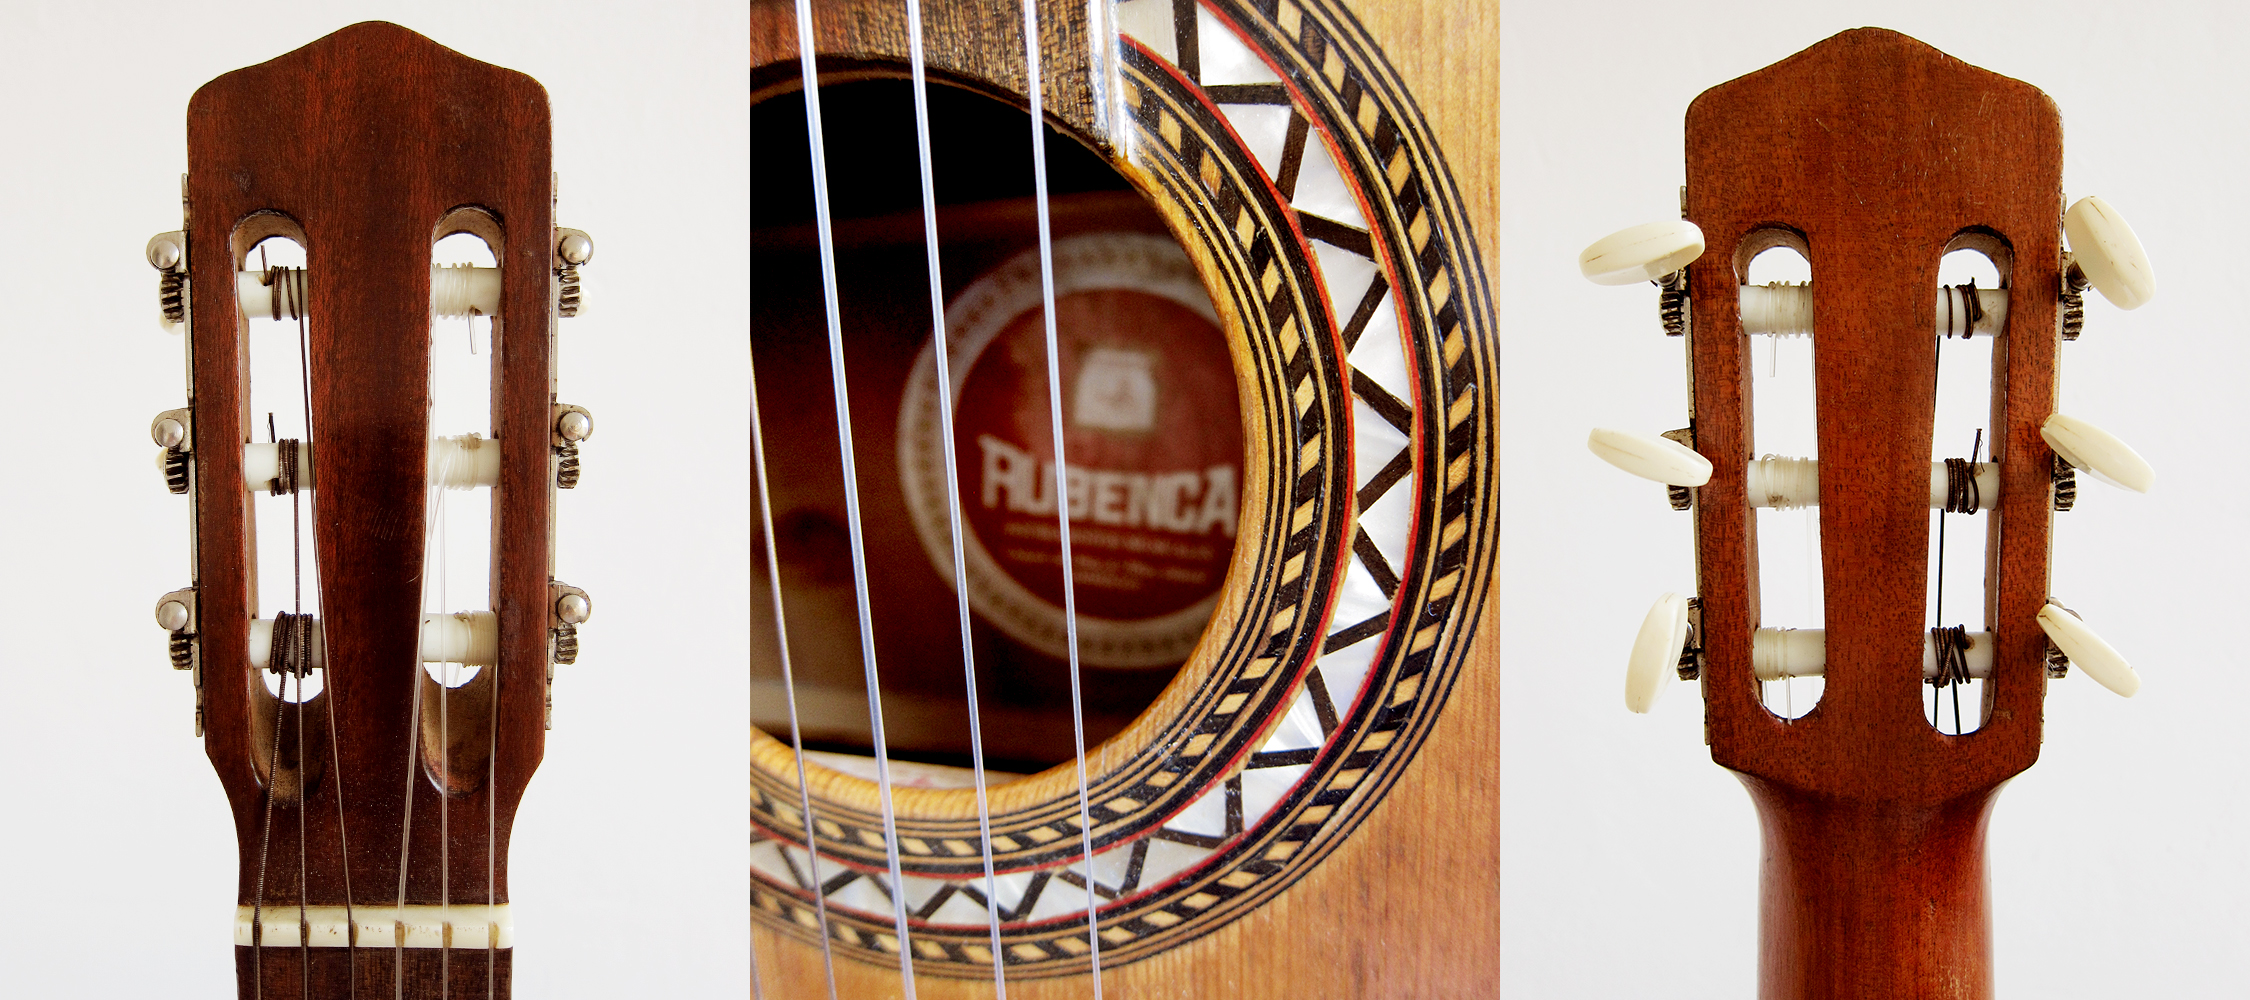
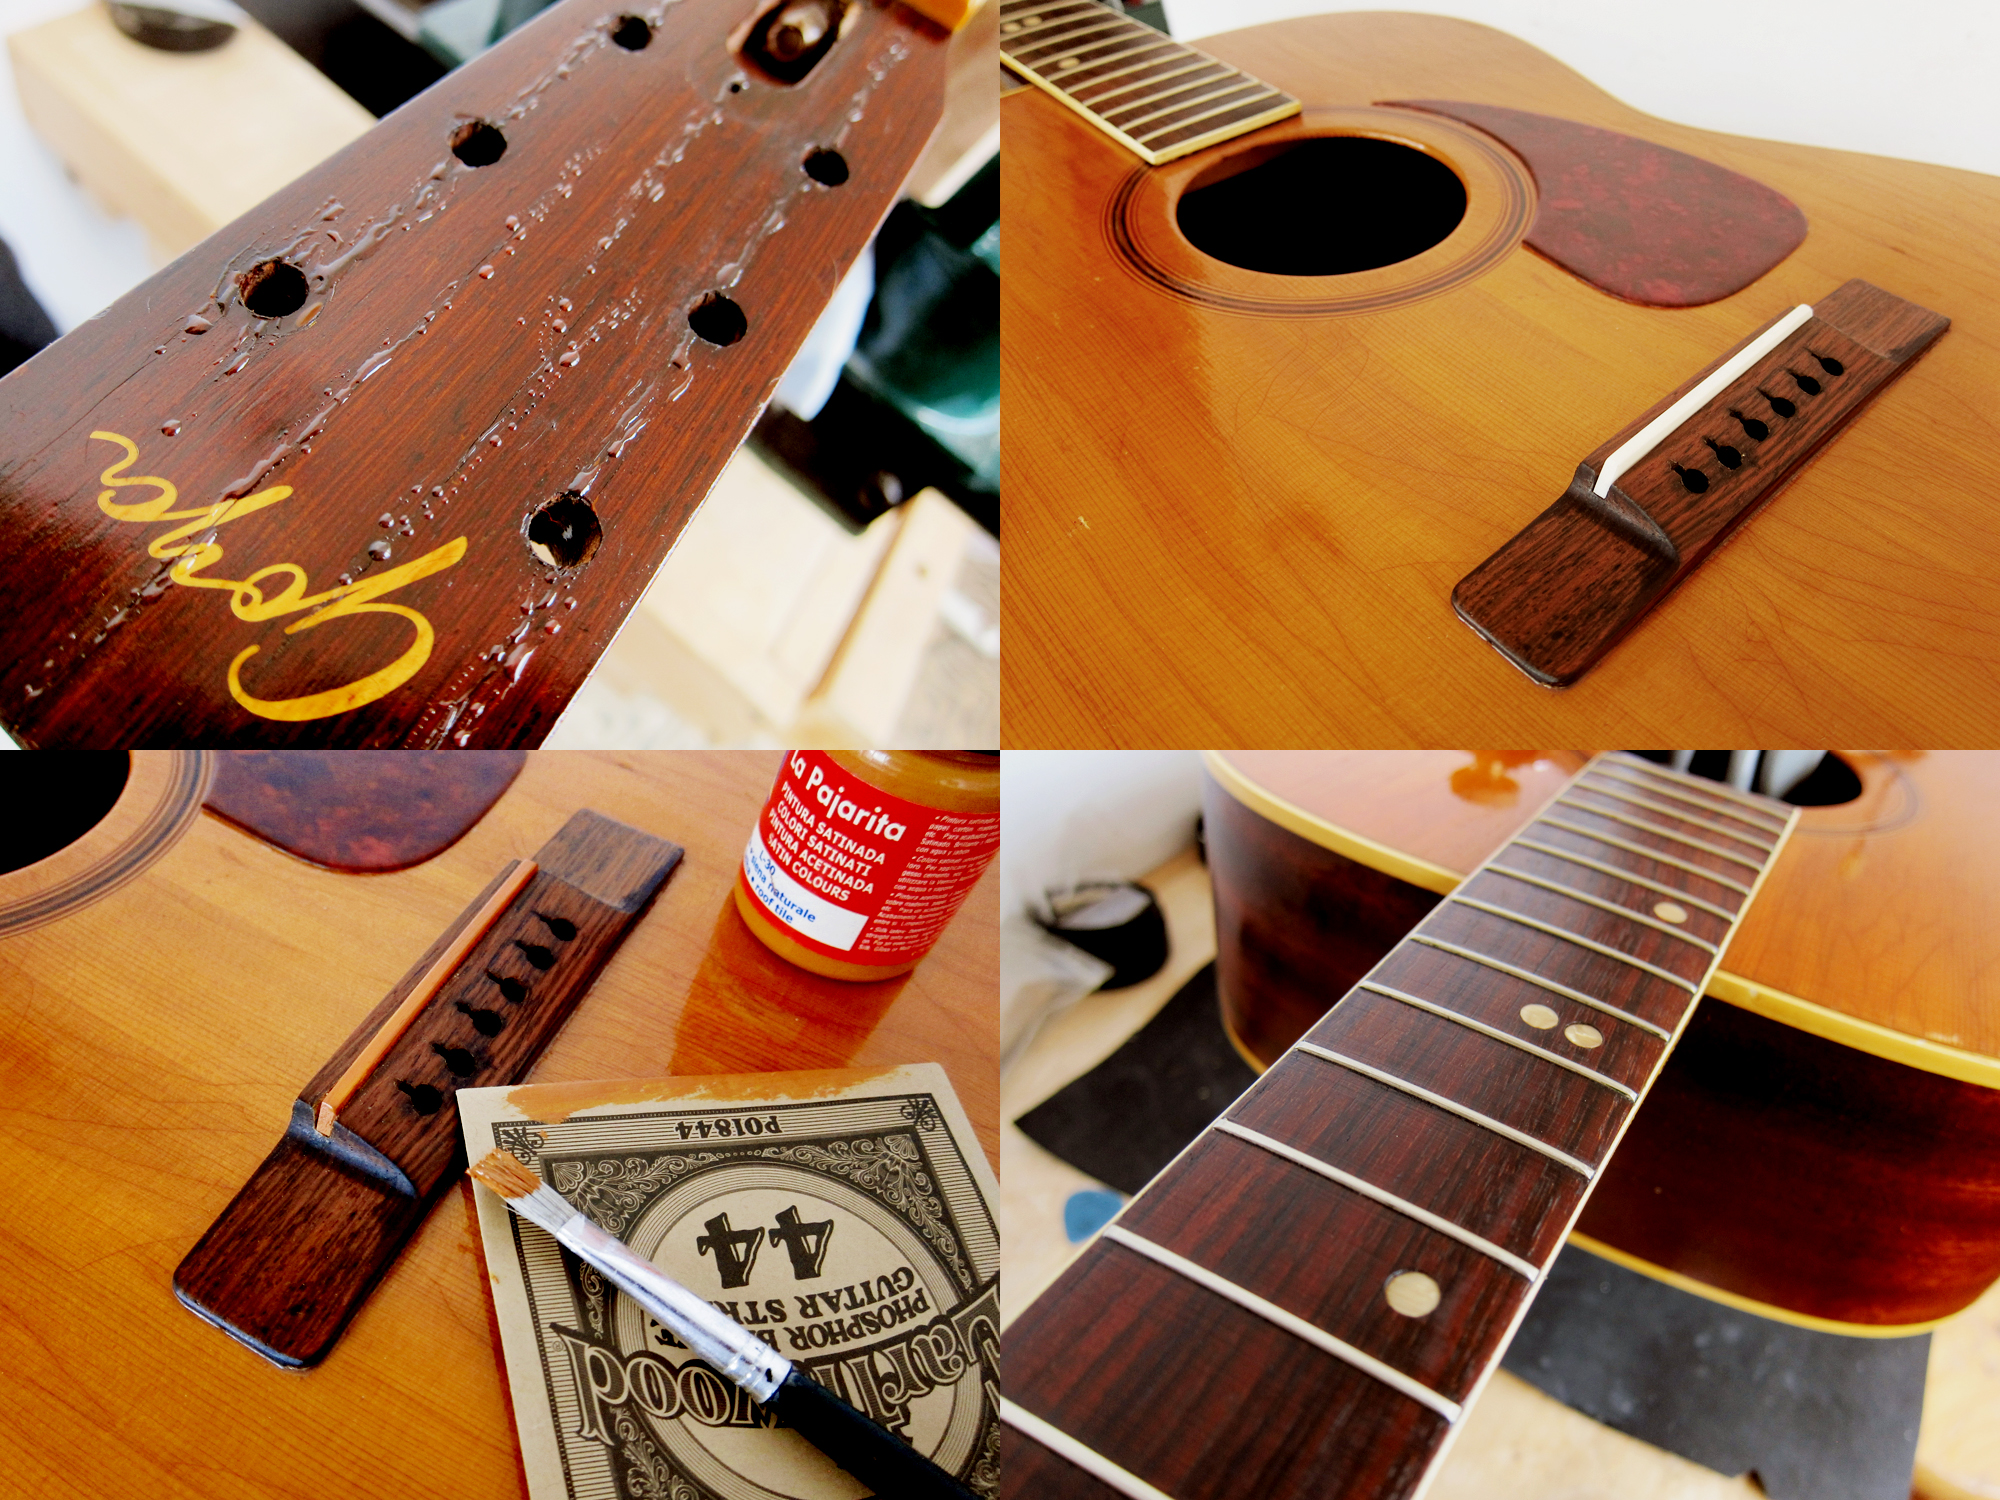 The headstock had some fine cracks that I filled with fish glue and then polished up. I cut a new bone saddle that I painted to match the old Levin Galalith saddle and then I cleaned up the fretboard and polished the frets.
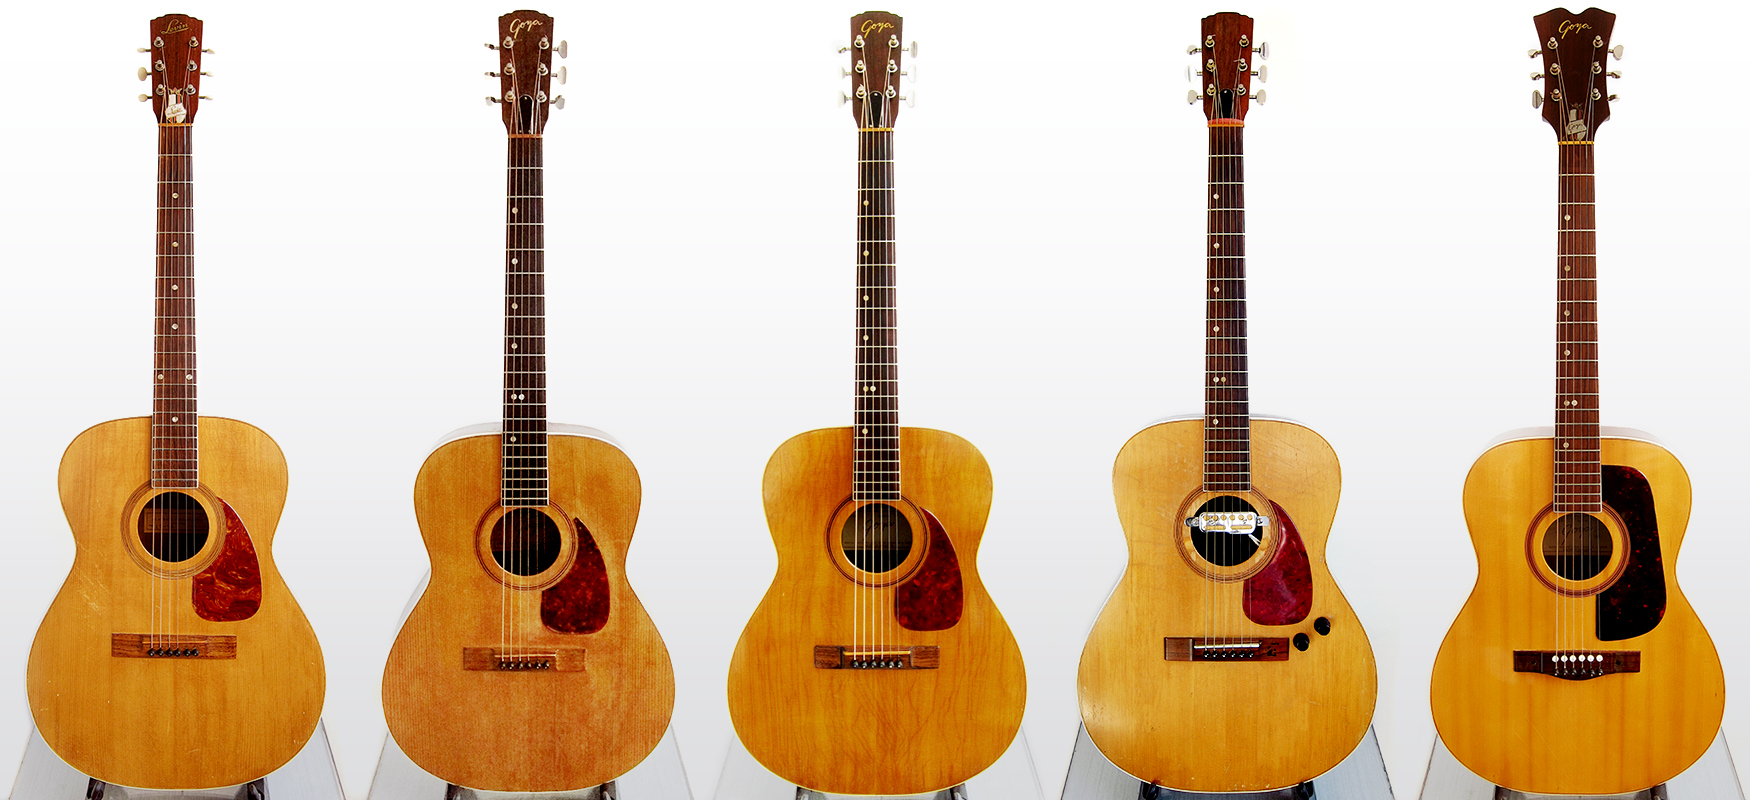 My collection of 000-sized Levin guitars so far, from left to right: Levin LS-16 (1963), Goya T-16 (1965), Goya T-16 (1966), Levin LT-16 (1966), Goya GG-172 (1970)