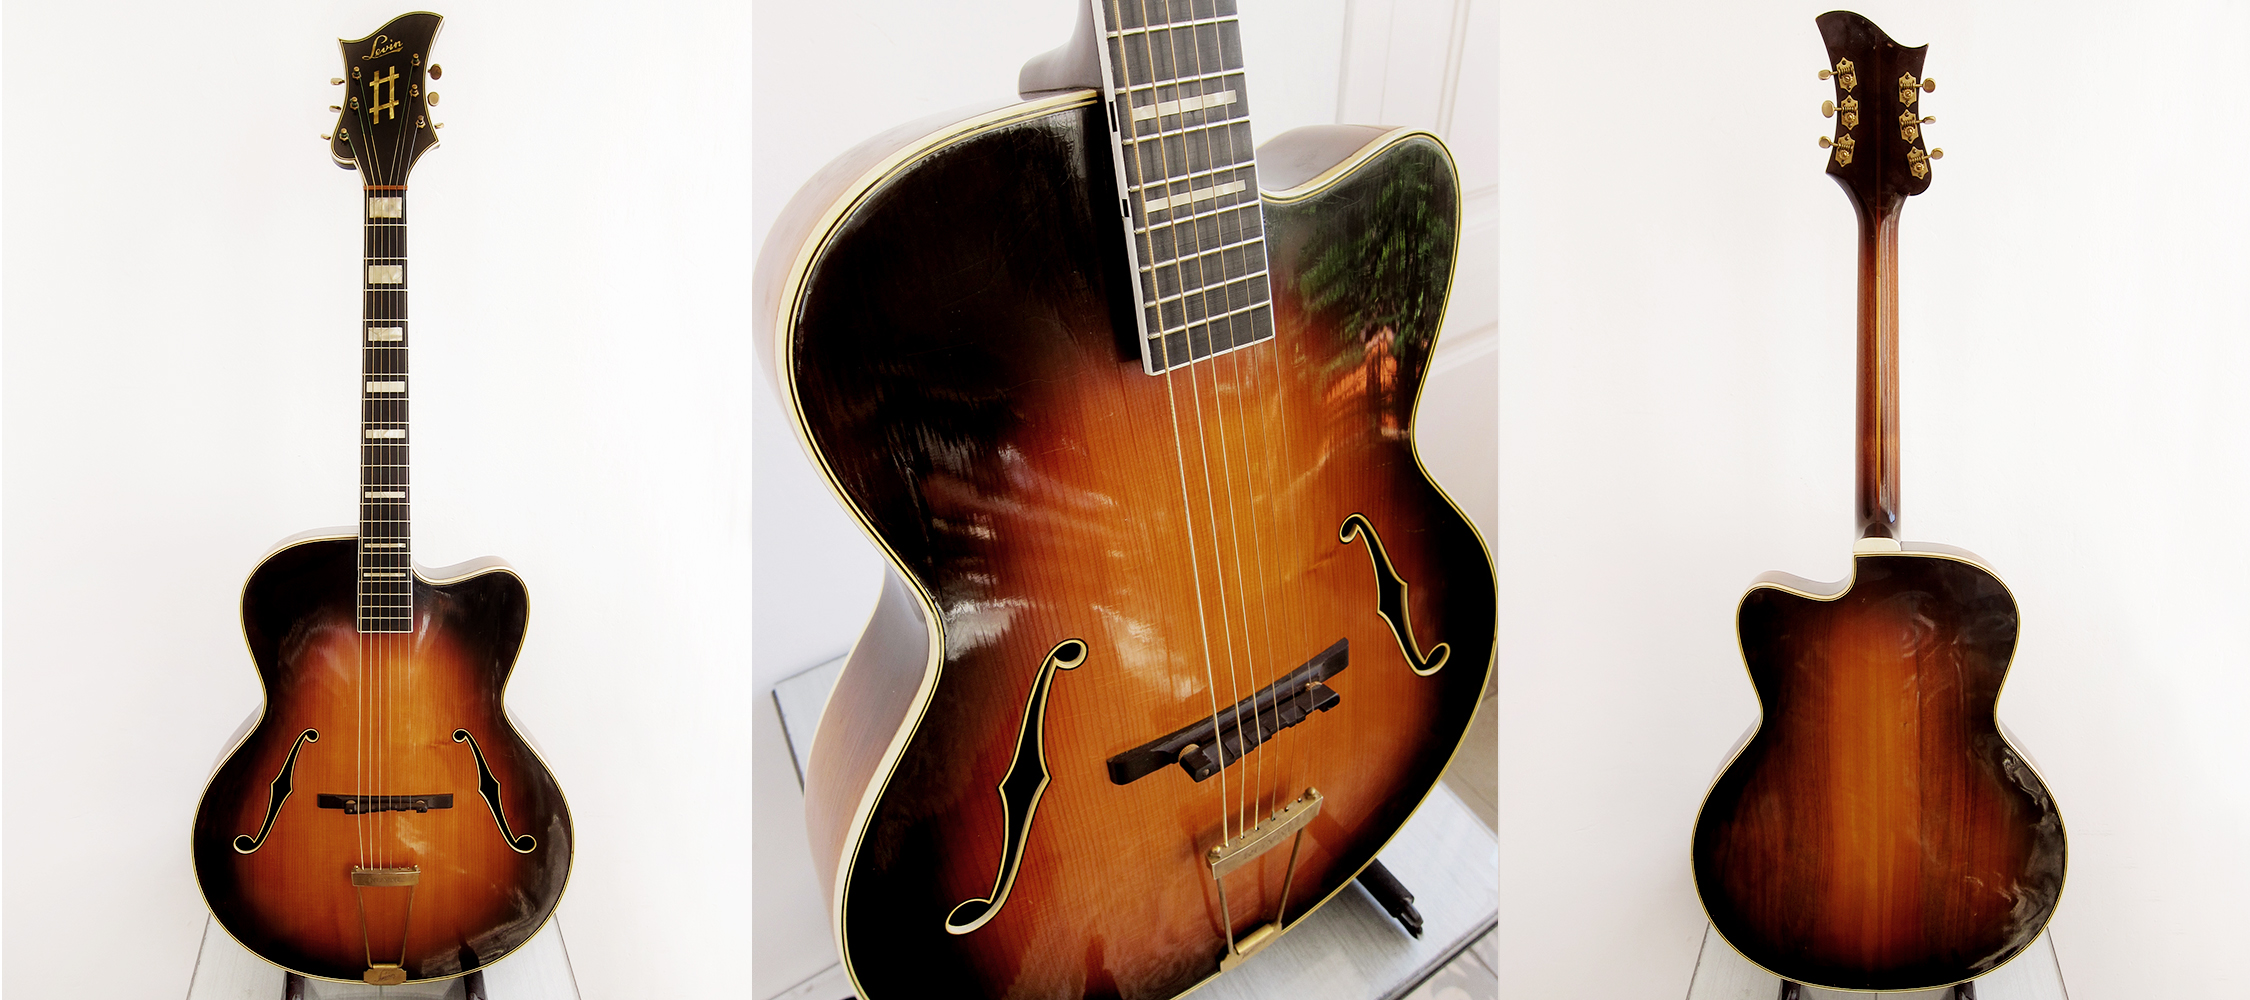
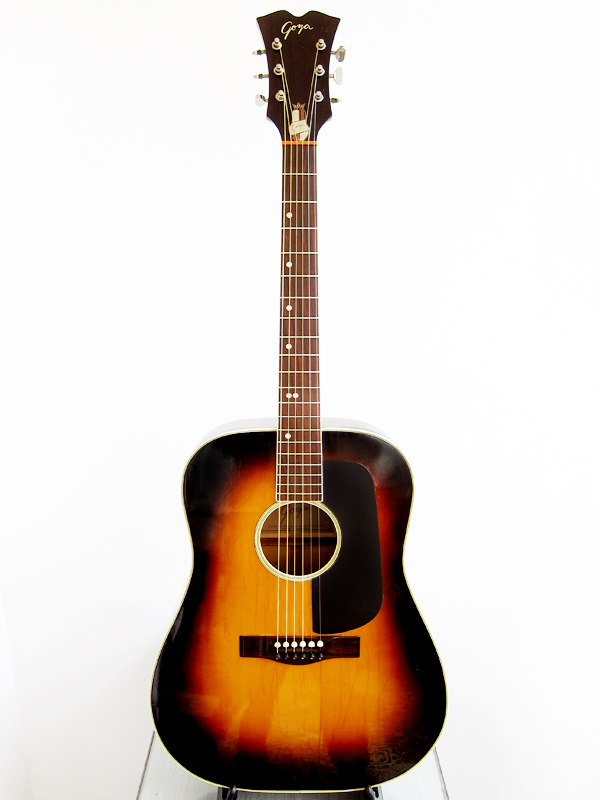
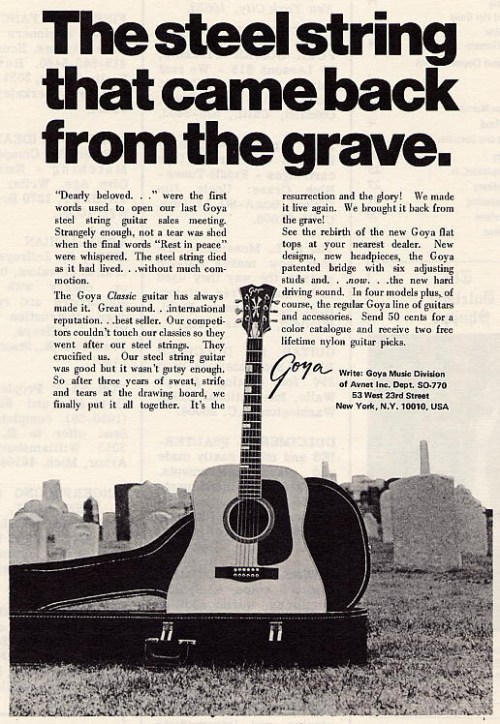
Goya GG-172
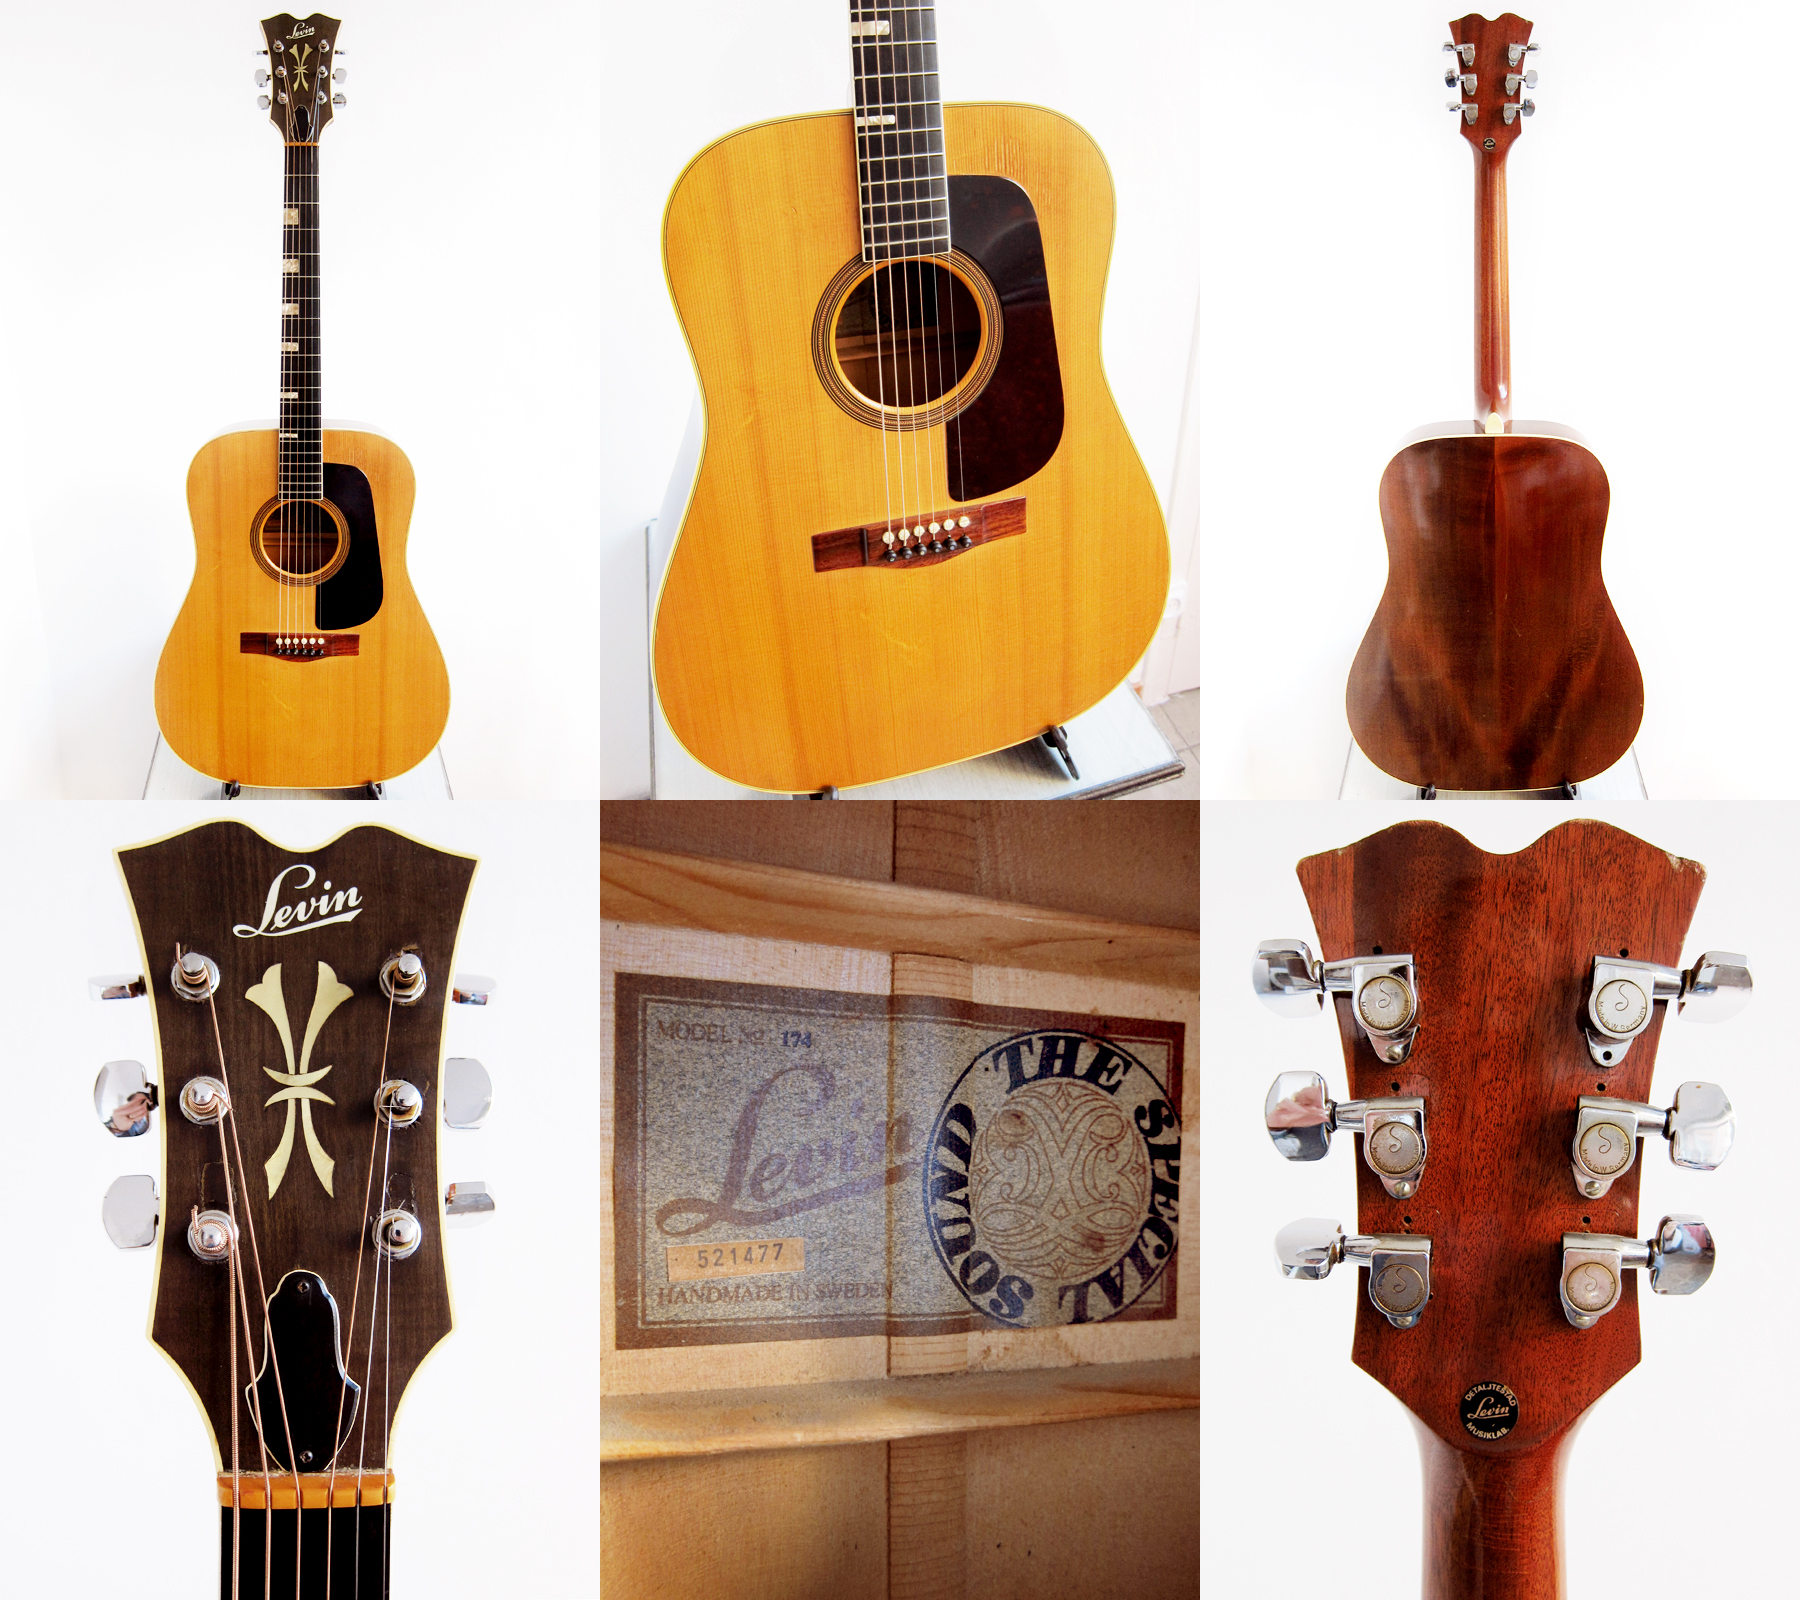
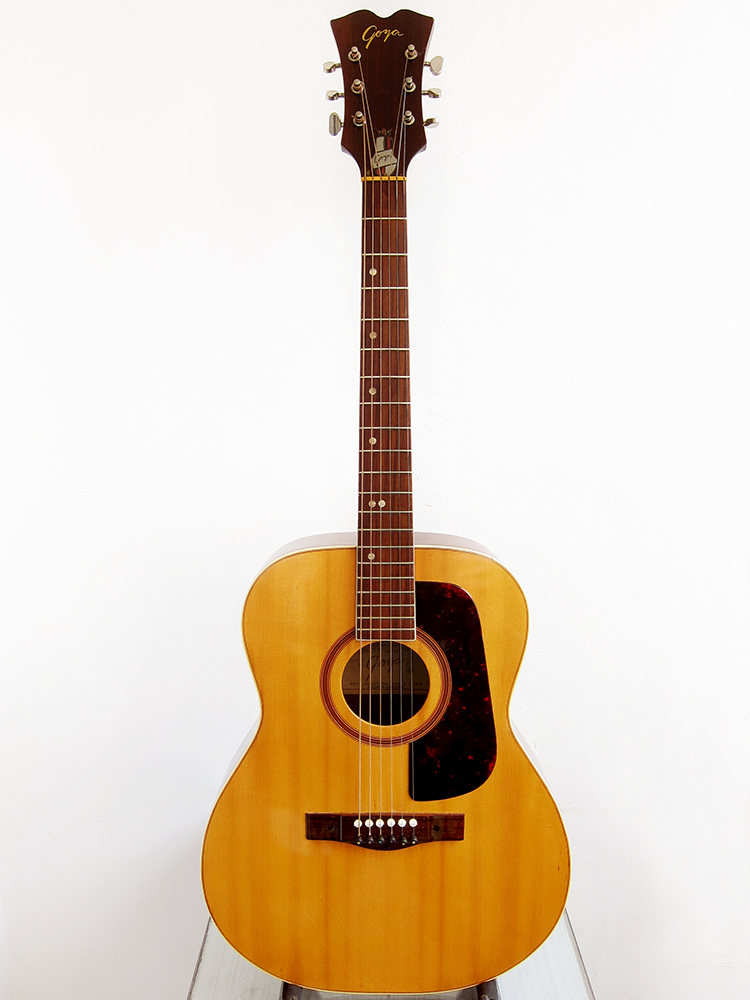 Goya GG-172 Made in Sweden by Levin in 1970
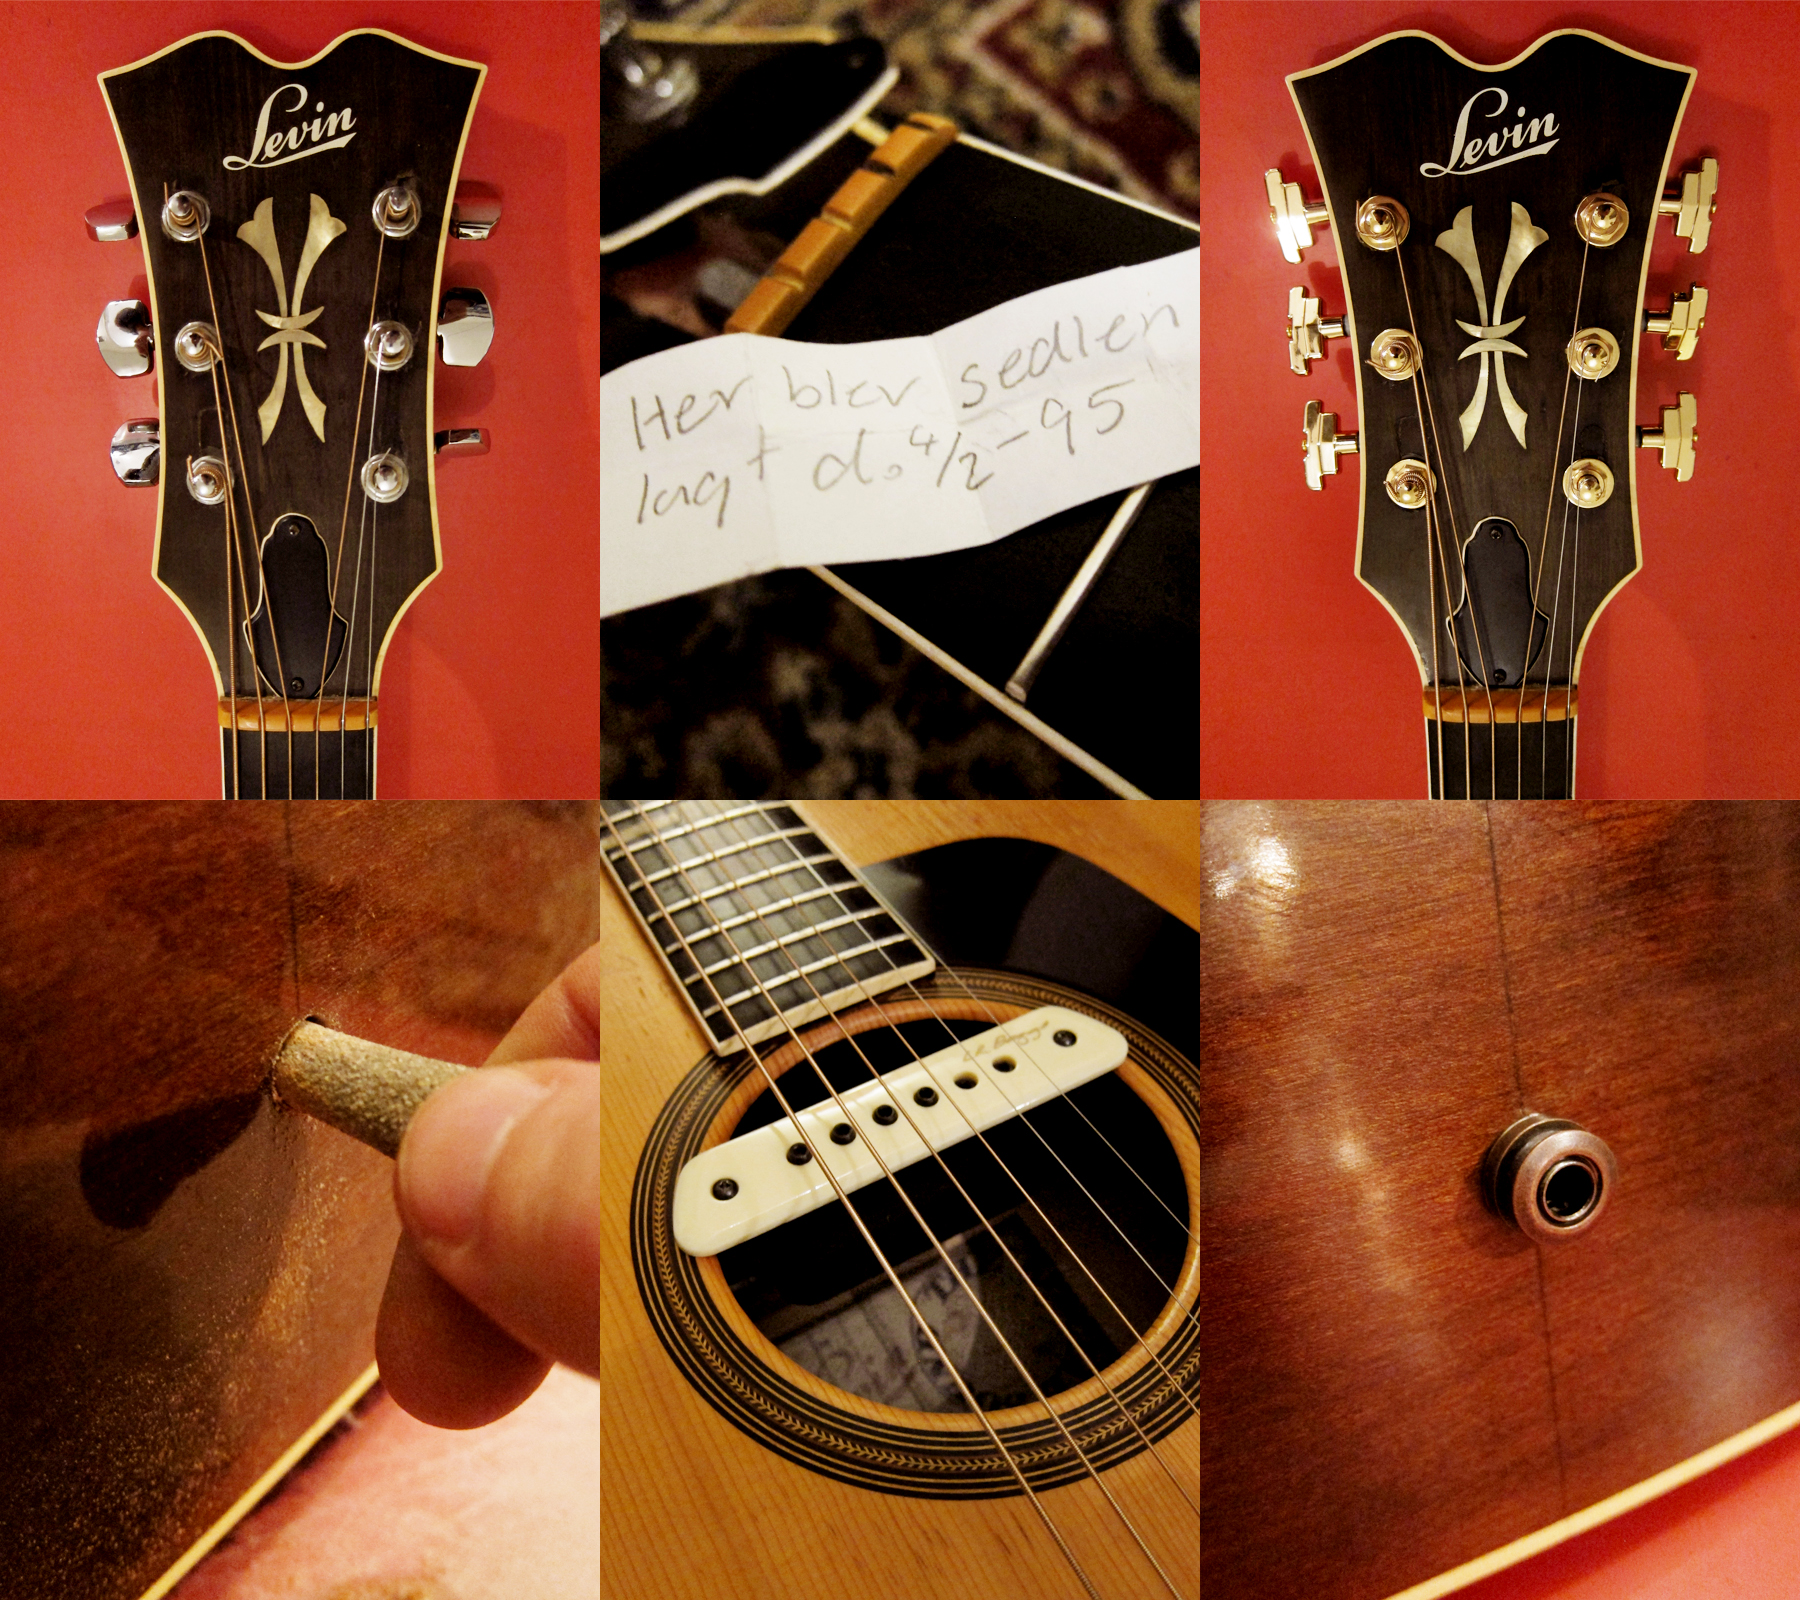
I feel really ashamed, I’ve had a beautiful Levin at home since June without fixing her up. There was a lot of things to got in the way, me building a Telecaster from scratch being the main one, but also that I had a lot of different ideas of what to do with this guitar that in the end never happened. This is my 8th Levin, or actually it’s number 9 in the collection since I got my 1951 Levin Royal after. It’s an old worn Goya Model GG-172 from 1970, according to Vintage Guitars Sweden. You can check how old your Levin / Goya is here, Levin serial numbers / Goya serial numbers. It plays very well now after my little restoration and starts to sound better and better, I have a feeling that no one has played this for a very long time. The Goya GG-172 is grand concert sized Levin, the same size as my dad’s old Levin LT-16. They are 38 cm wide just like a Martin 000, they are 15″ which is 38.1 cm. It’s a very nice size to play, slightly smaller than a normal Dreadnought but with decent bass from the solid mahogany back and sides. I bought the guitar via eBay from a pawn shop in Browns Mills, New Jersey, I freaking love the internet. I used the Global Shipping Program which worked fine this time as well, it took 2 weeks just like it did when I bought my Goya 163. I really wished that the Japanese sellers would start with this as well since it was such a mess when I bought my K.Yairi TG-40, it took 40 days to get through customs, with the Global Shipping Program you pay all the import taxes and charges straight away so it just goes straight trough customs without any delays. It’s a really nice little Levin but since I have 9 of them now and actually another on the way, I might have to consider selling it to make some room. If you are interested send me an email to claesgellerbrink@gmail.com
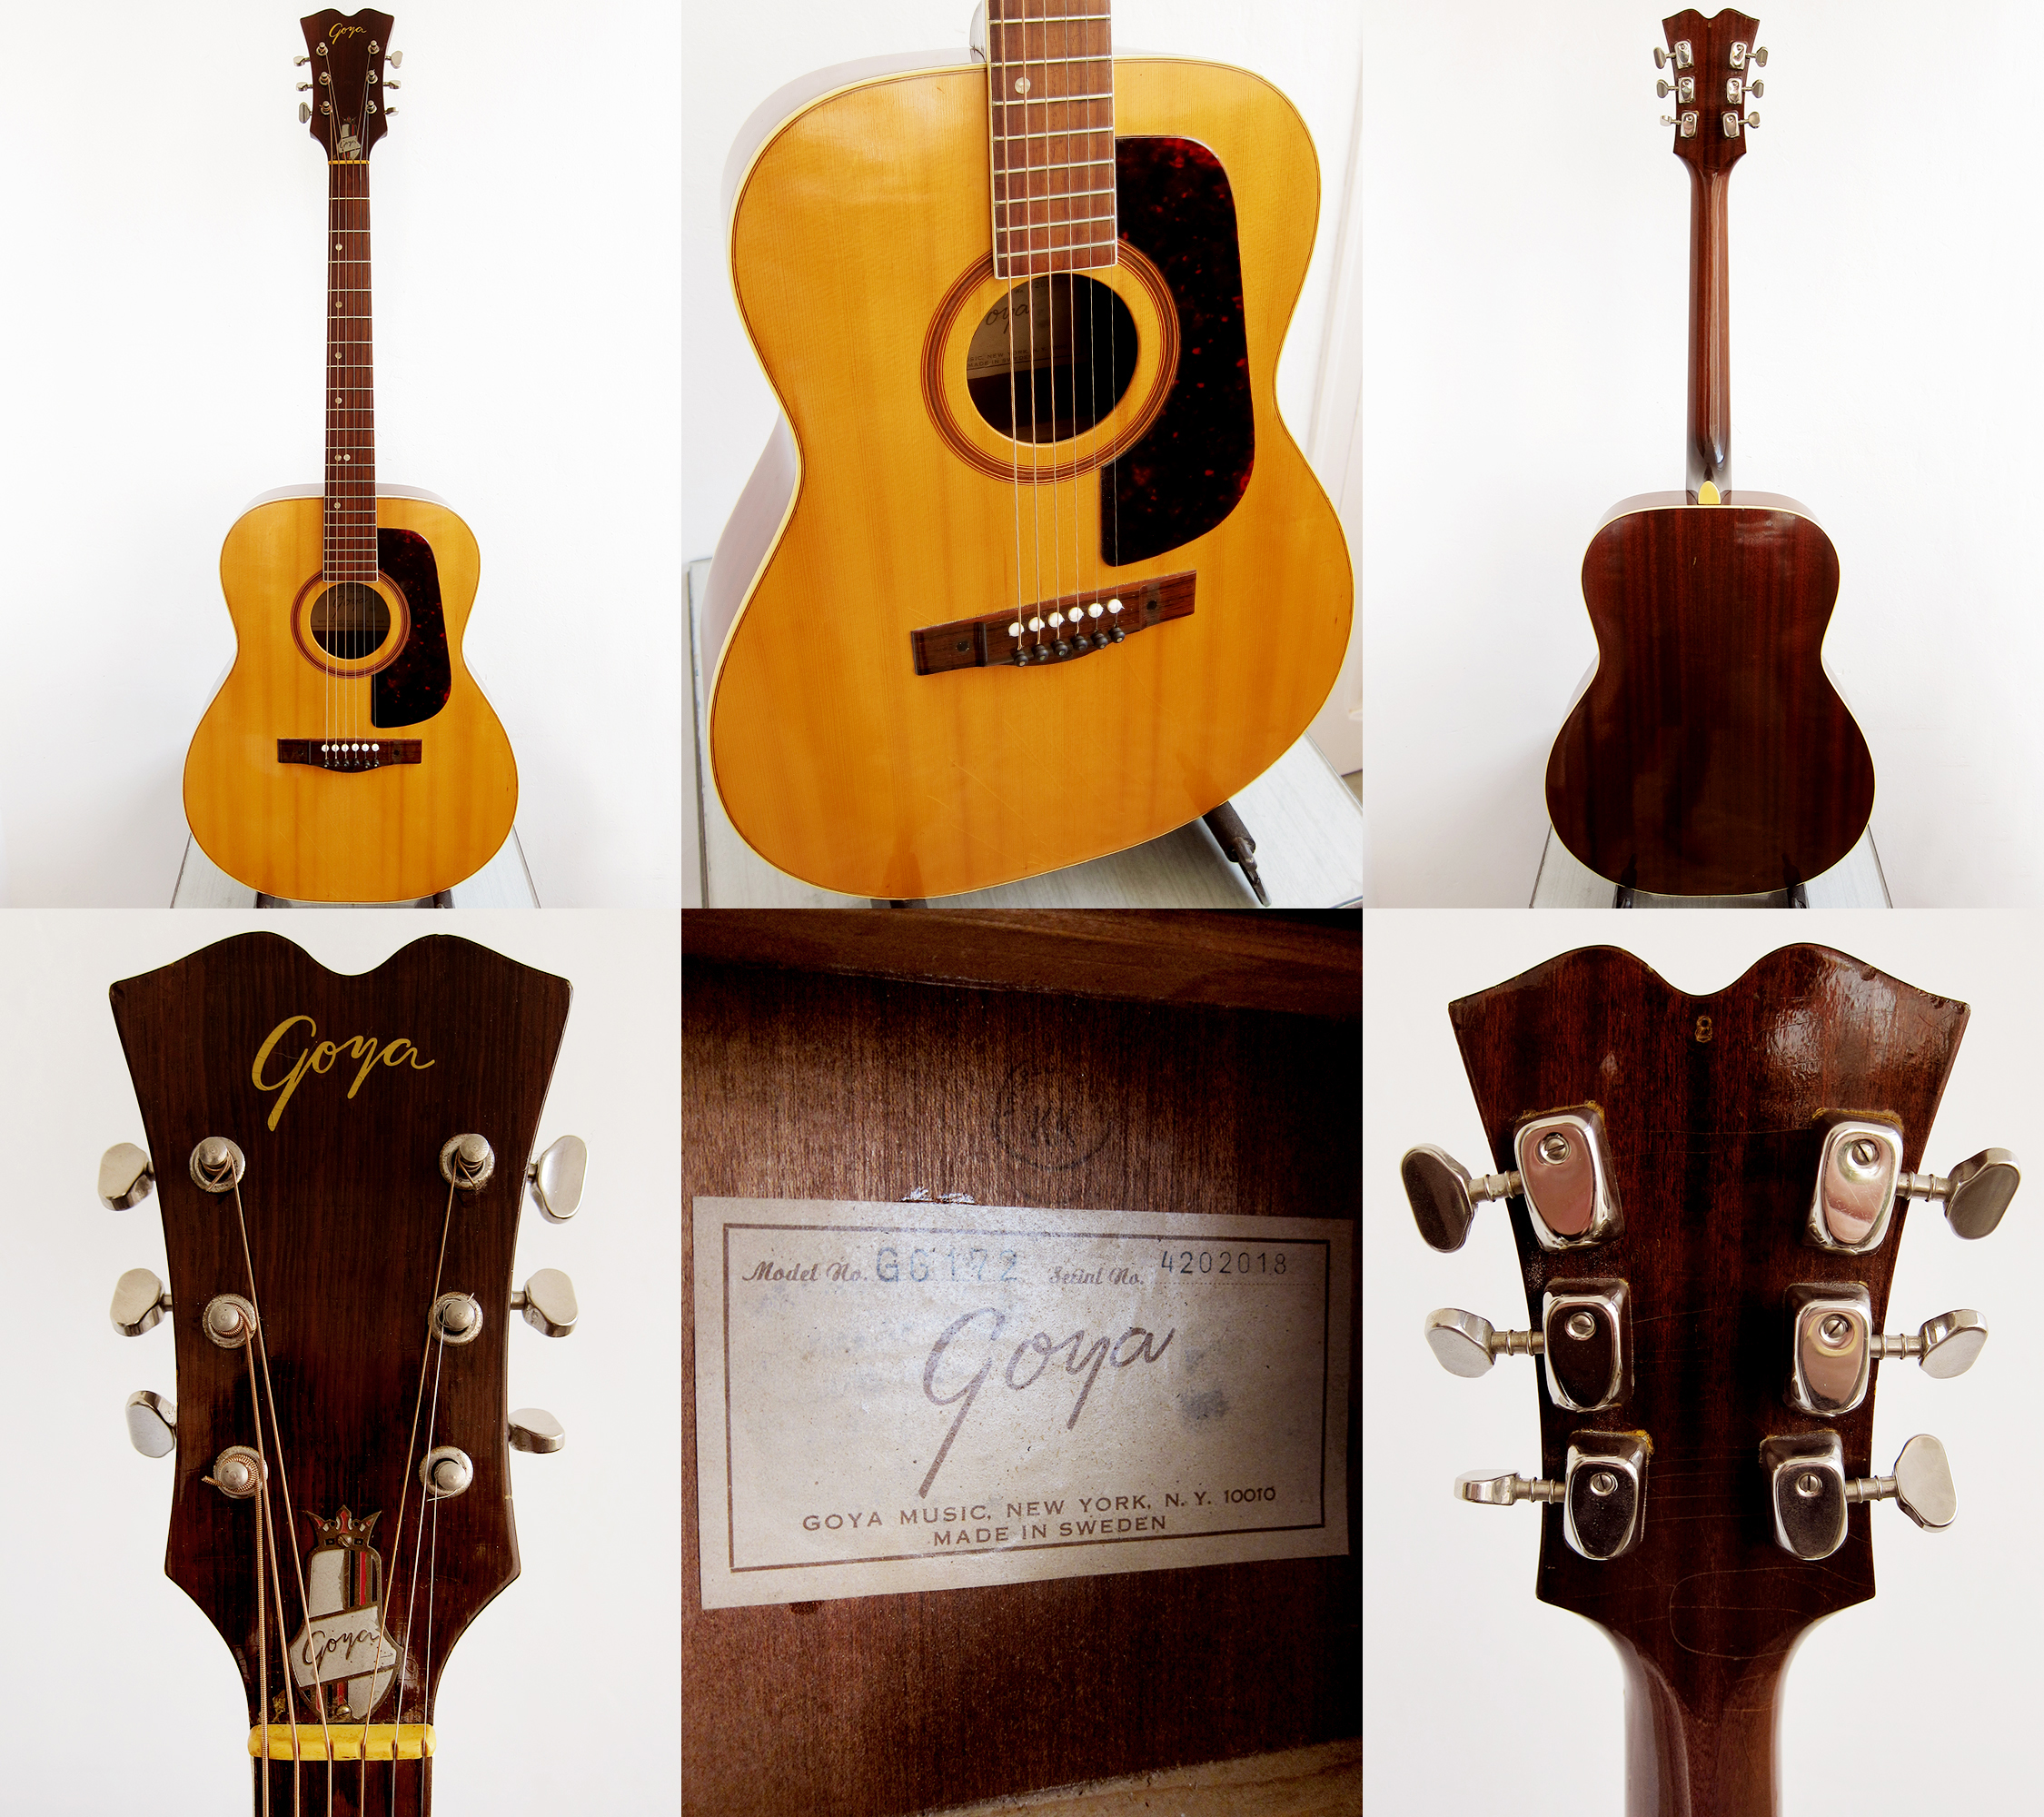
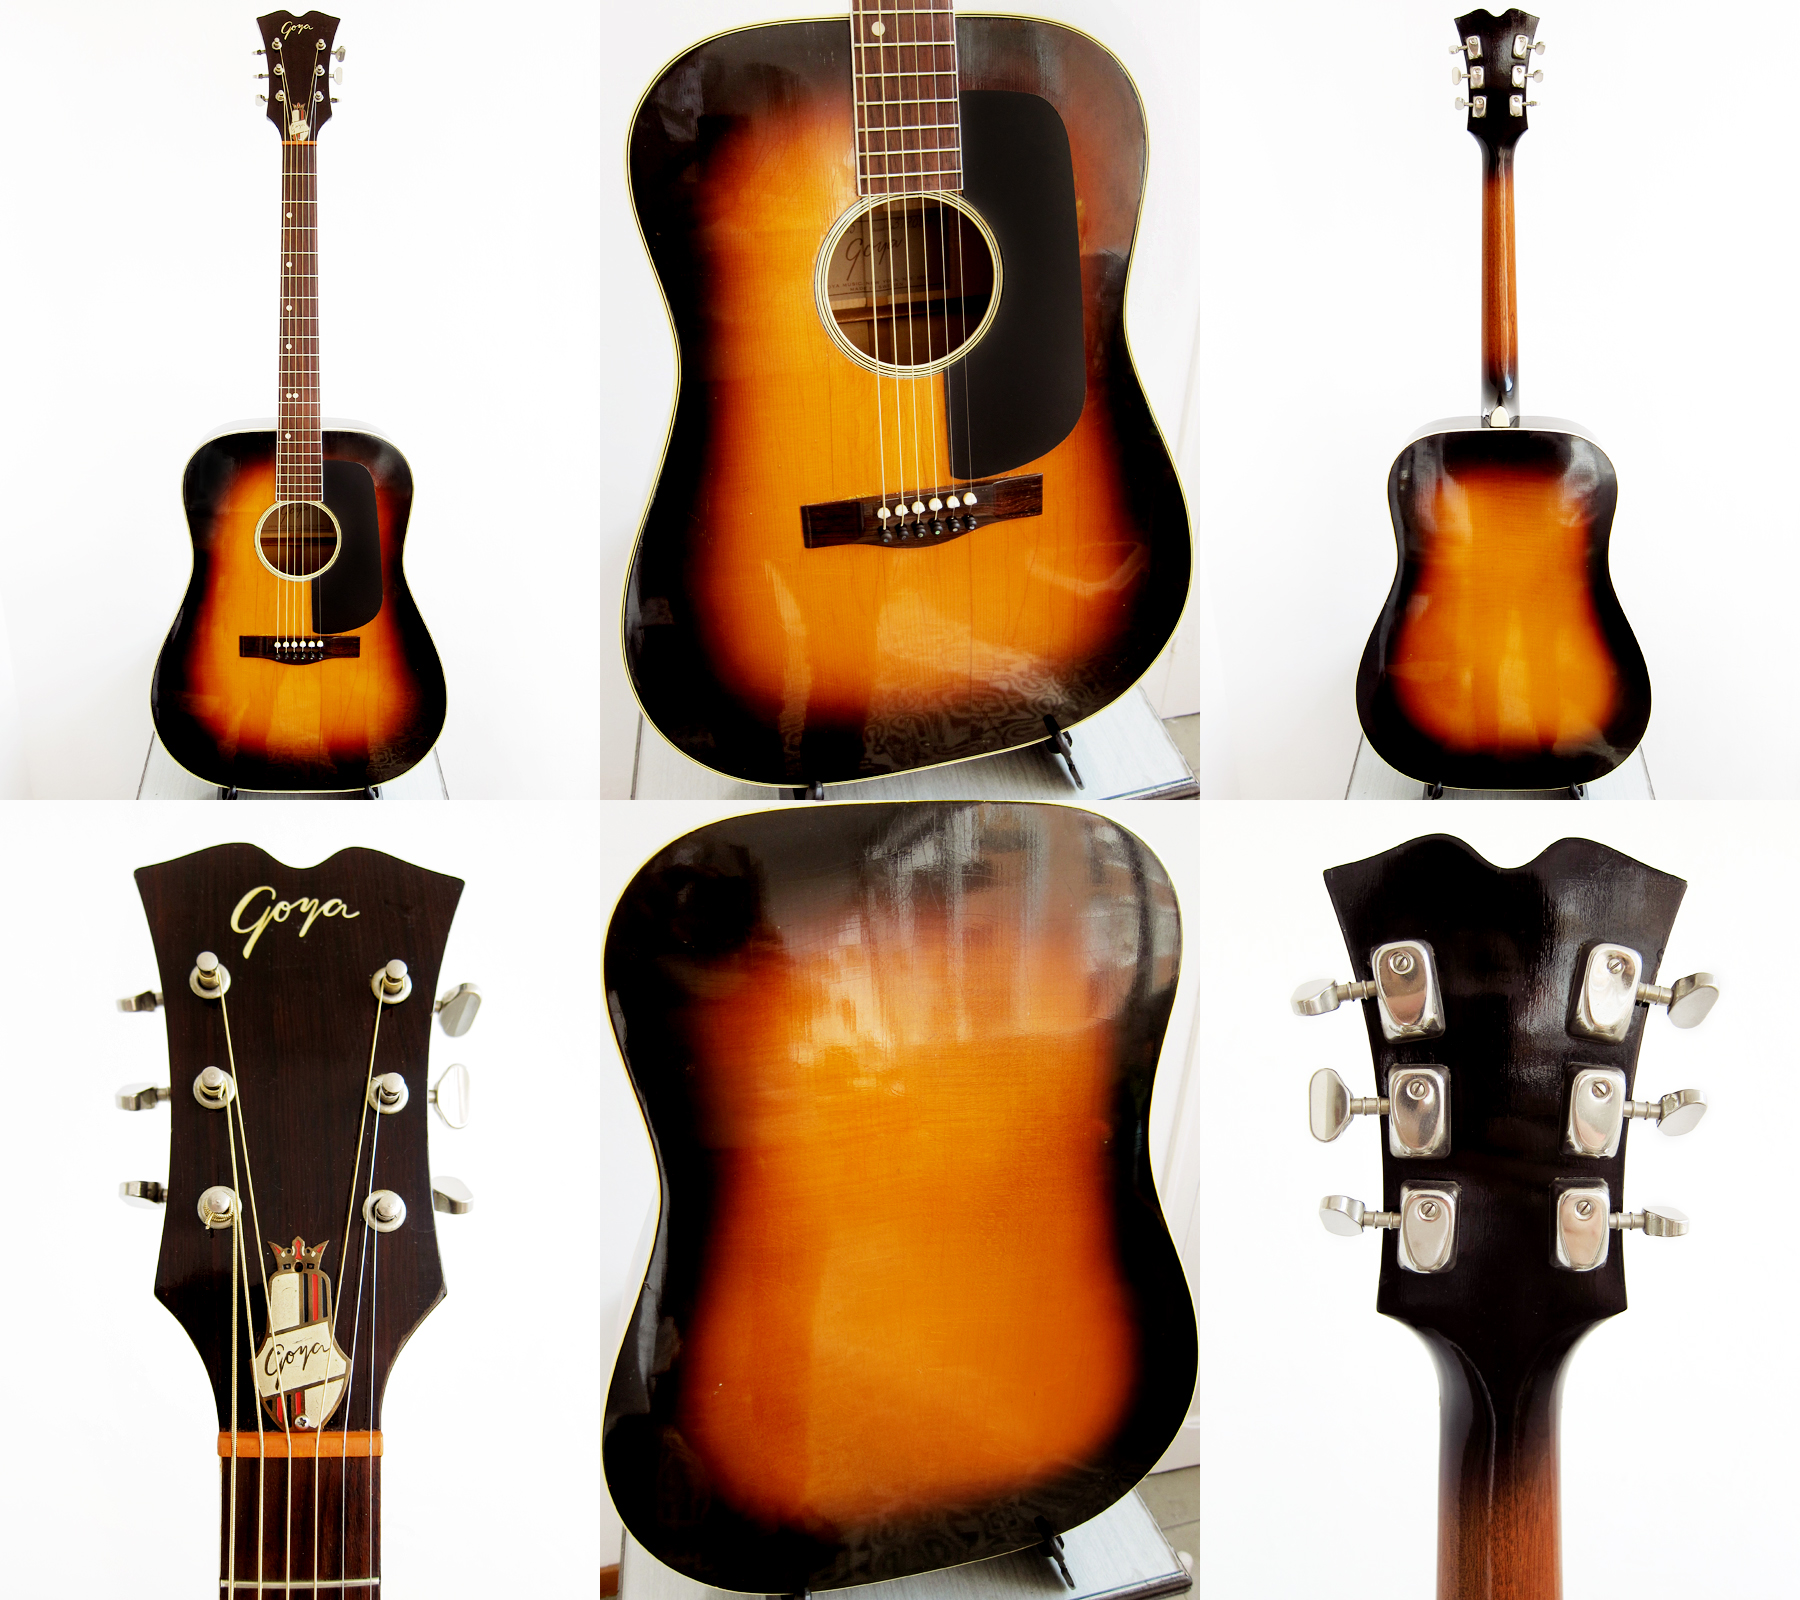
Levin Model 172 / Goya Model 172 / Goya GG-172
Grand Concert size: Body width: 380 mm, body length: 480 mm, body depth: 98 mm
Fingerboard width: 43 mm, scale length: 630 mm
Spruce top, mahogany back and sides, 4-ply bound top, single-bound back
Mahogany bolt-on neck with adjustable truss rod
Single-bound rosewood fingerboard with bass side pearloid dot inlay
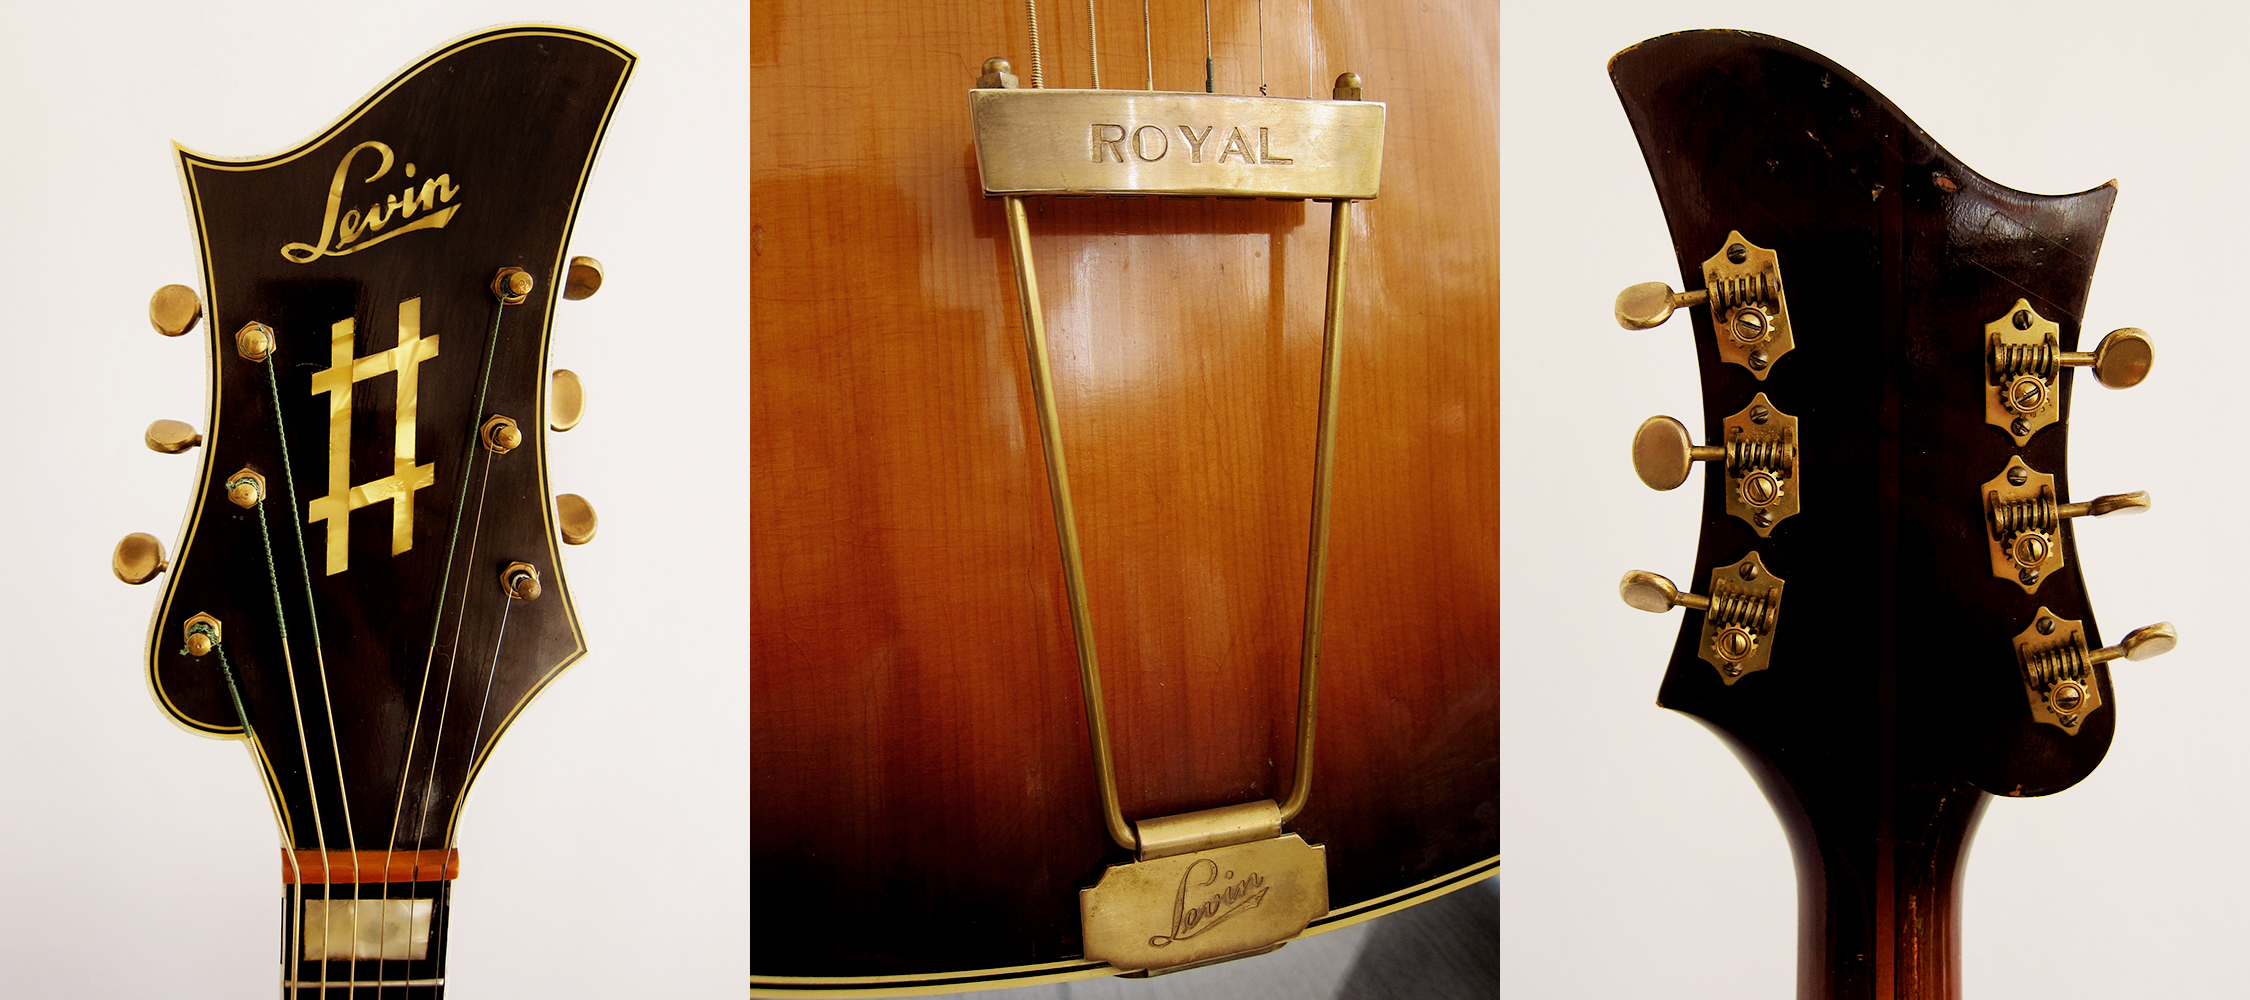
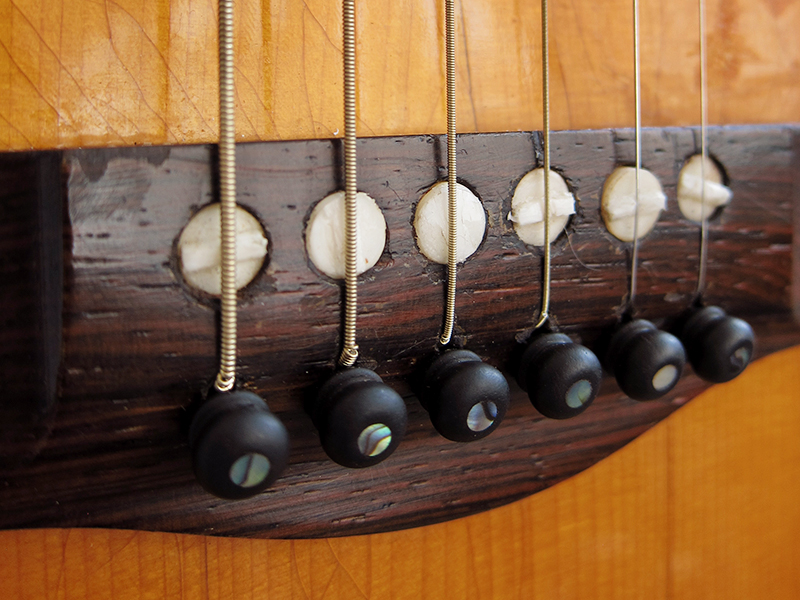
Rosewood bridge with individual height adjustable plastic saddles
Nickel plated individual Van Gent tuners with metal buttons
Matte natural finish and ten year warranty
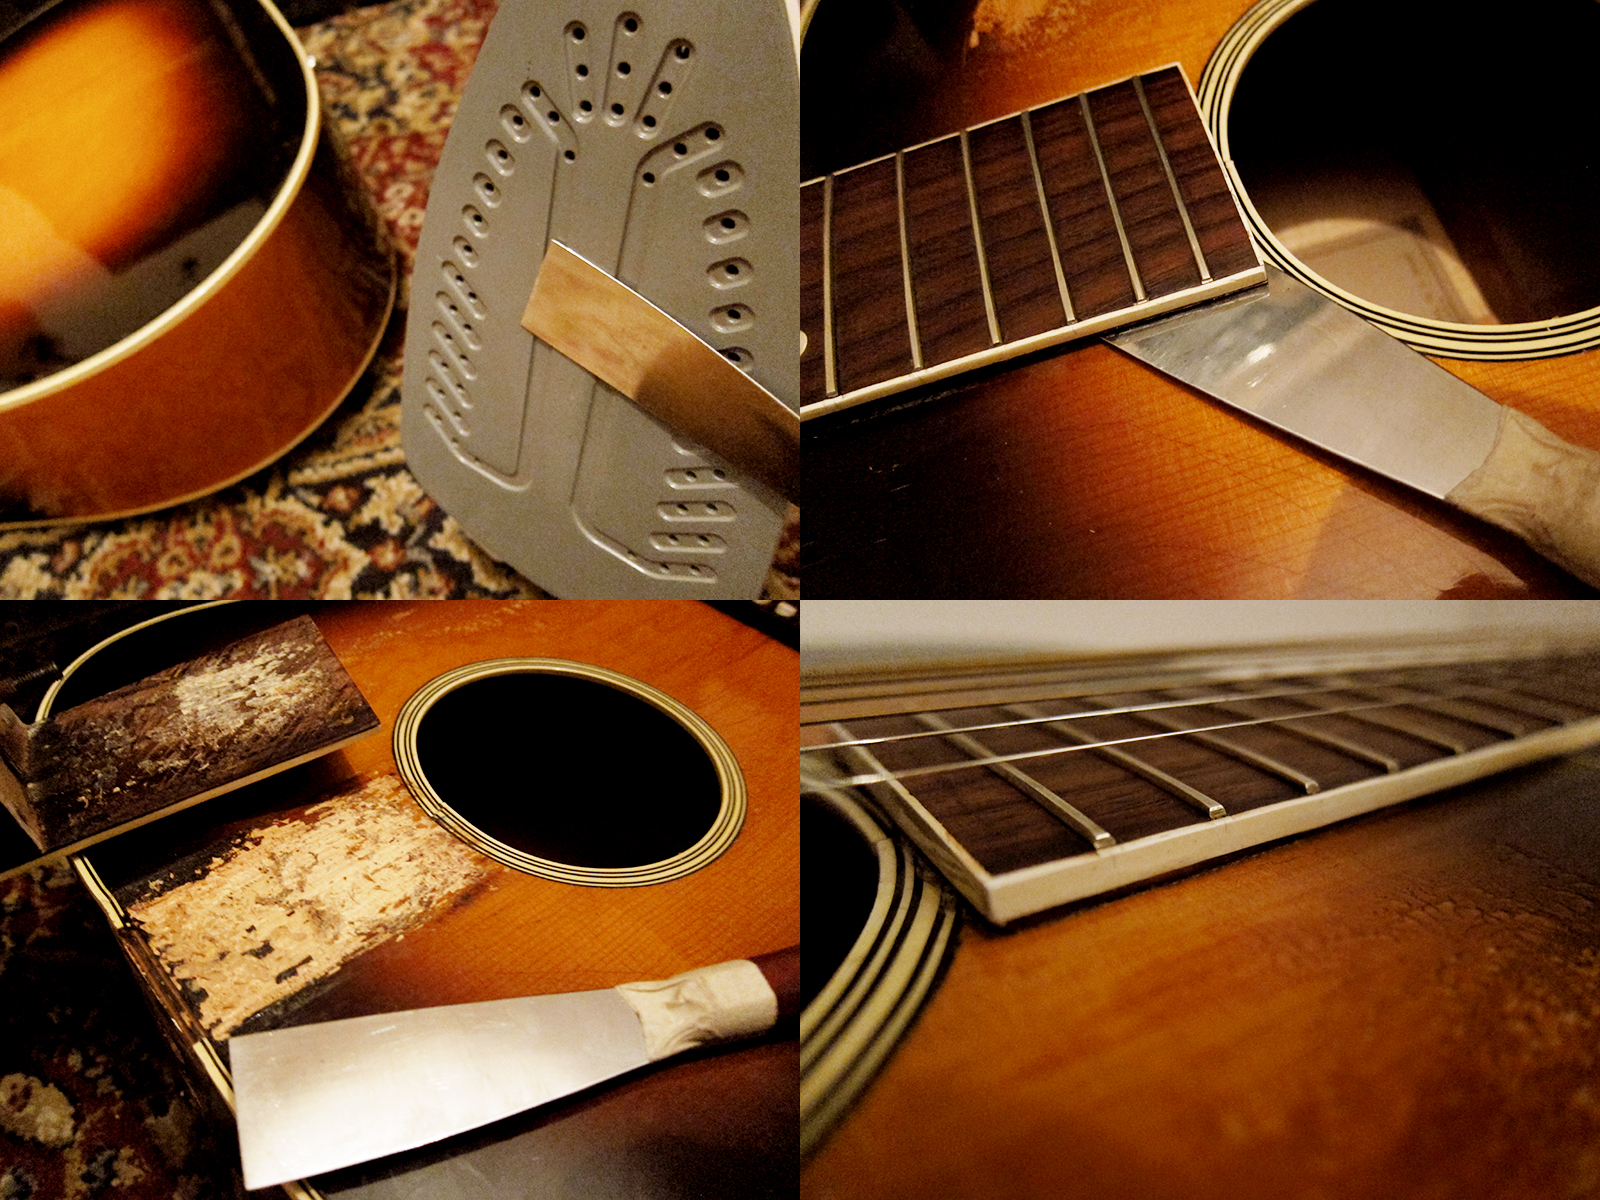
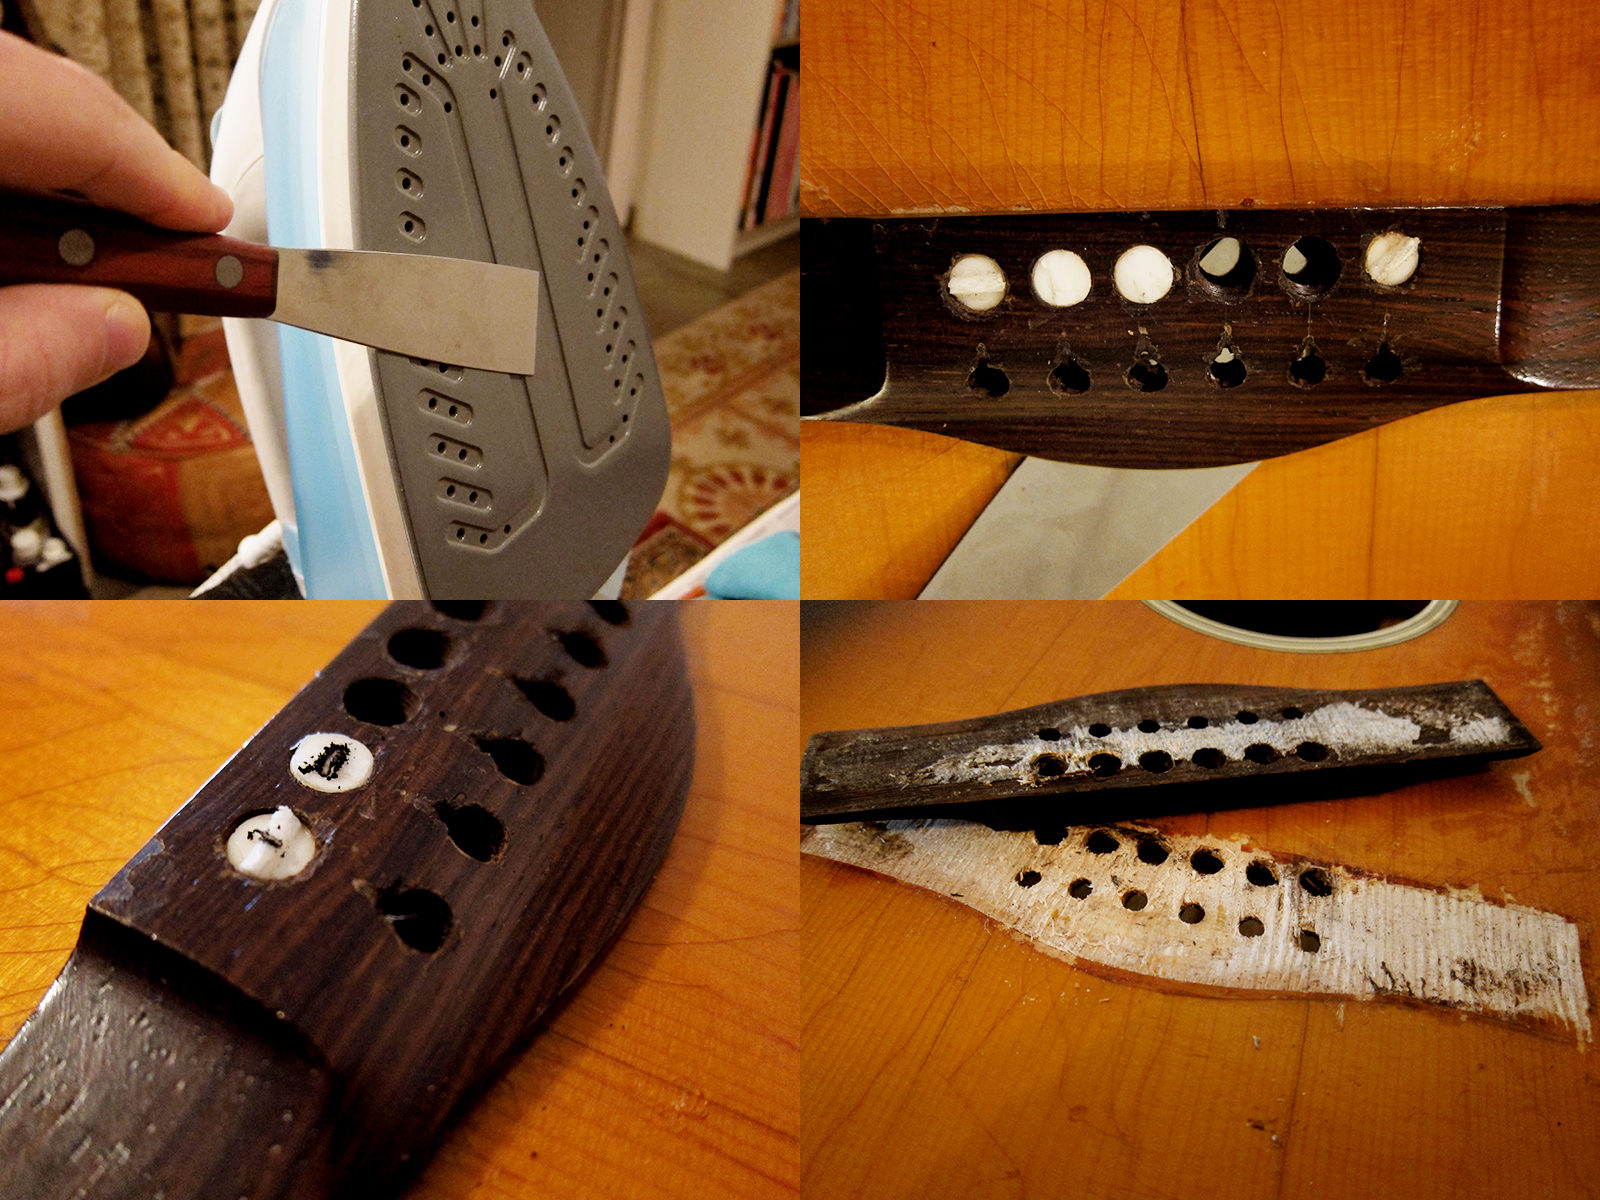
 I started with taking the guitar apart. The neck needed a reset, the pickguard was loose and the previous owner had bolted the bridge to the top. I used a spatula that I heated on a normal clothes iron, worked like a charm.
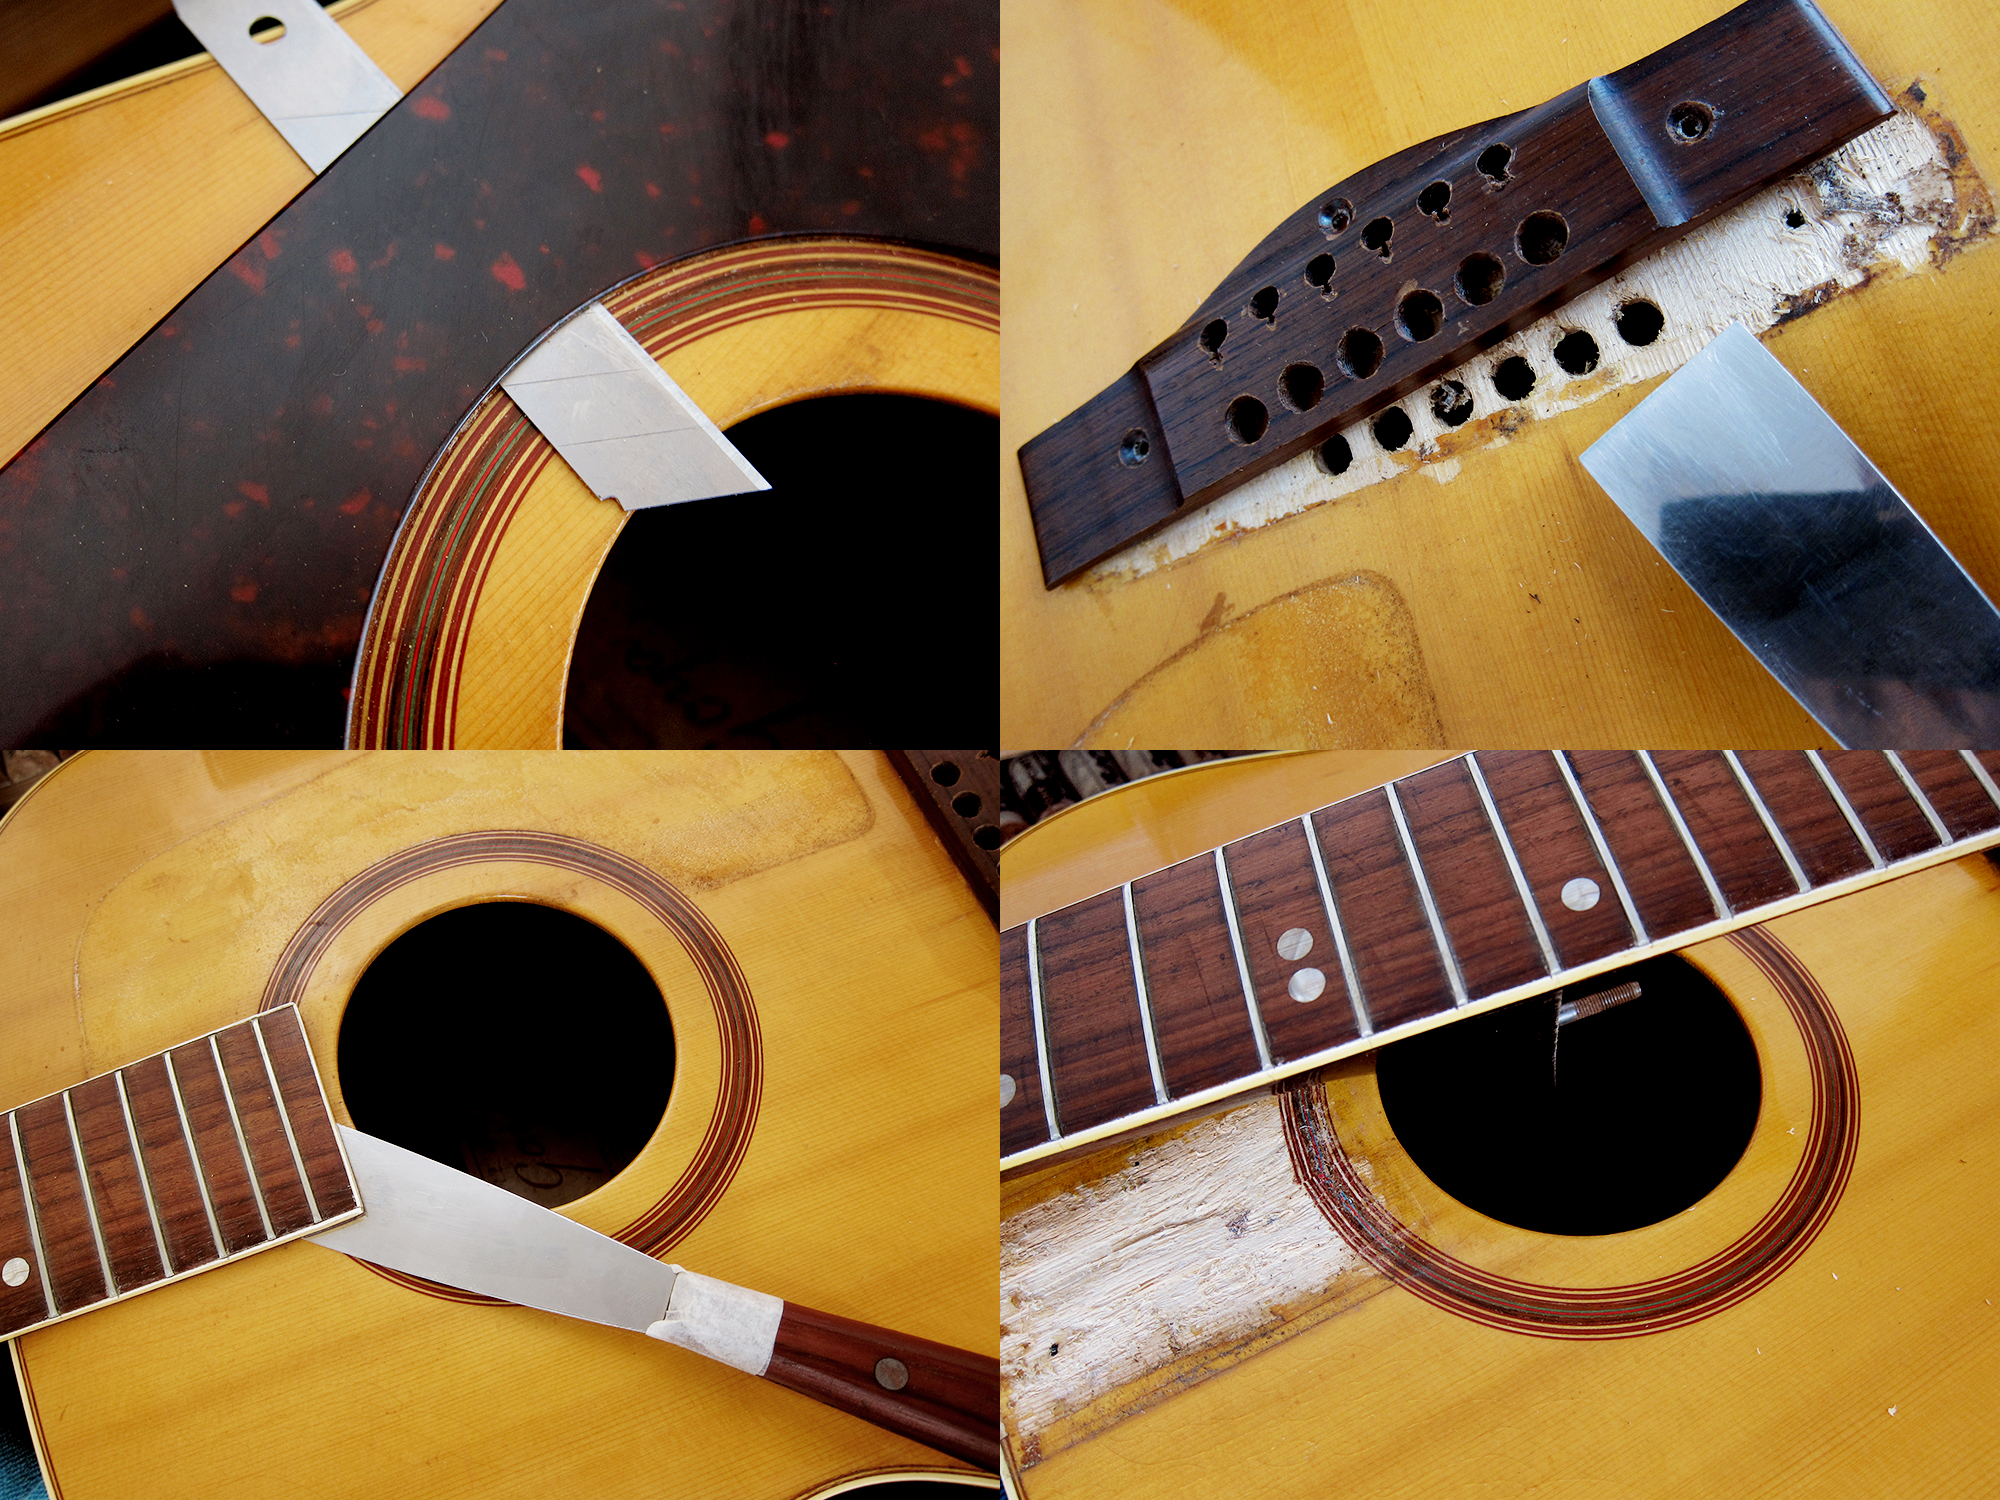
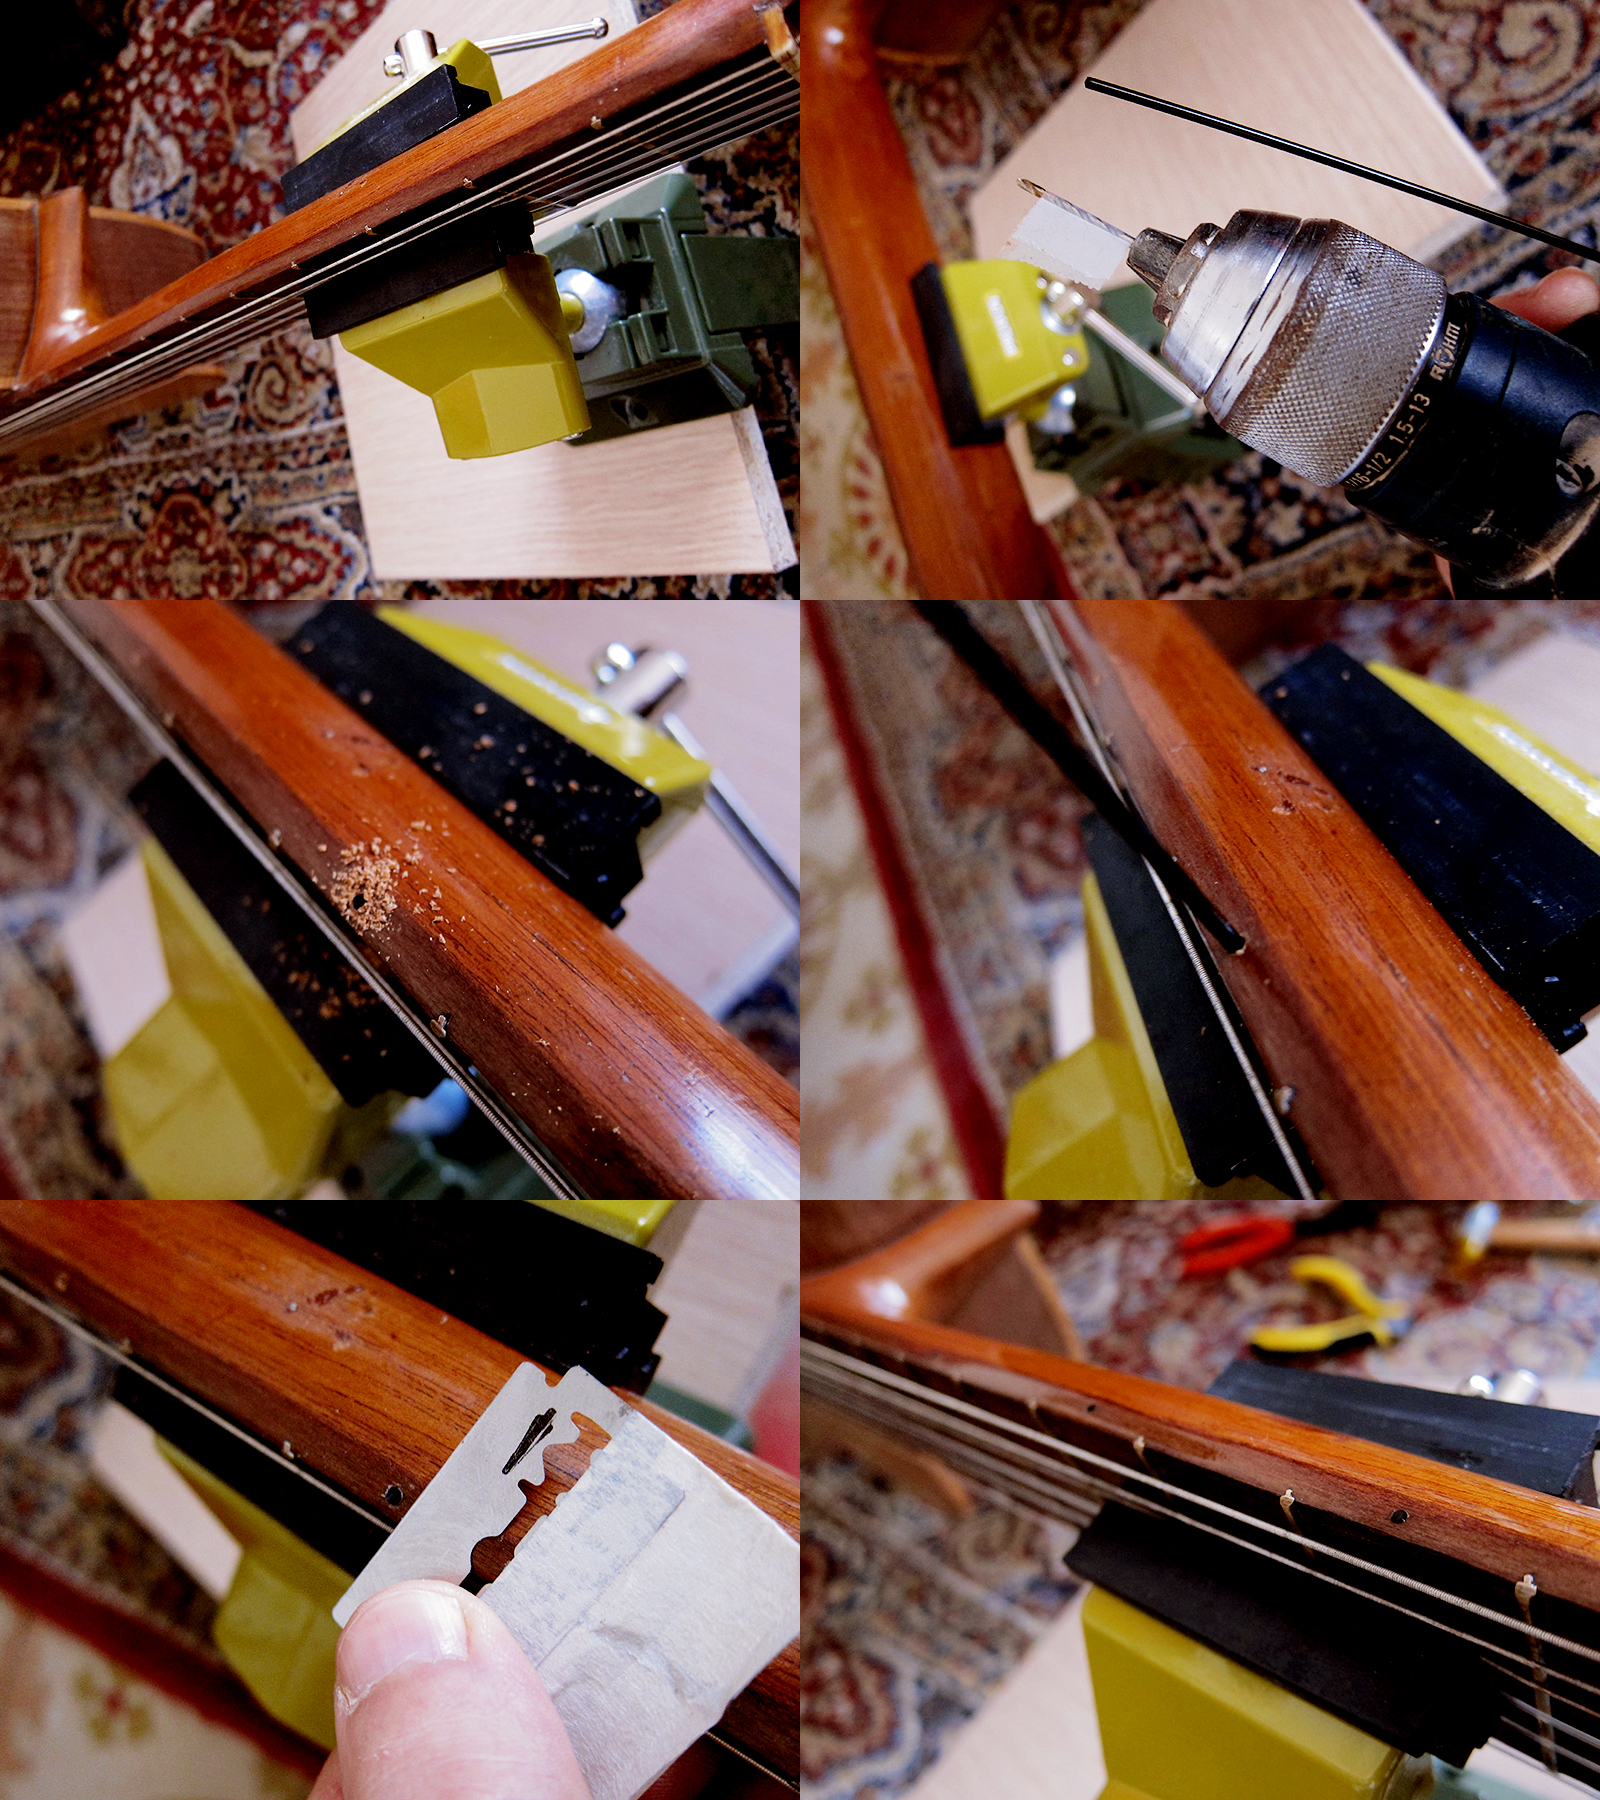
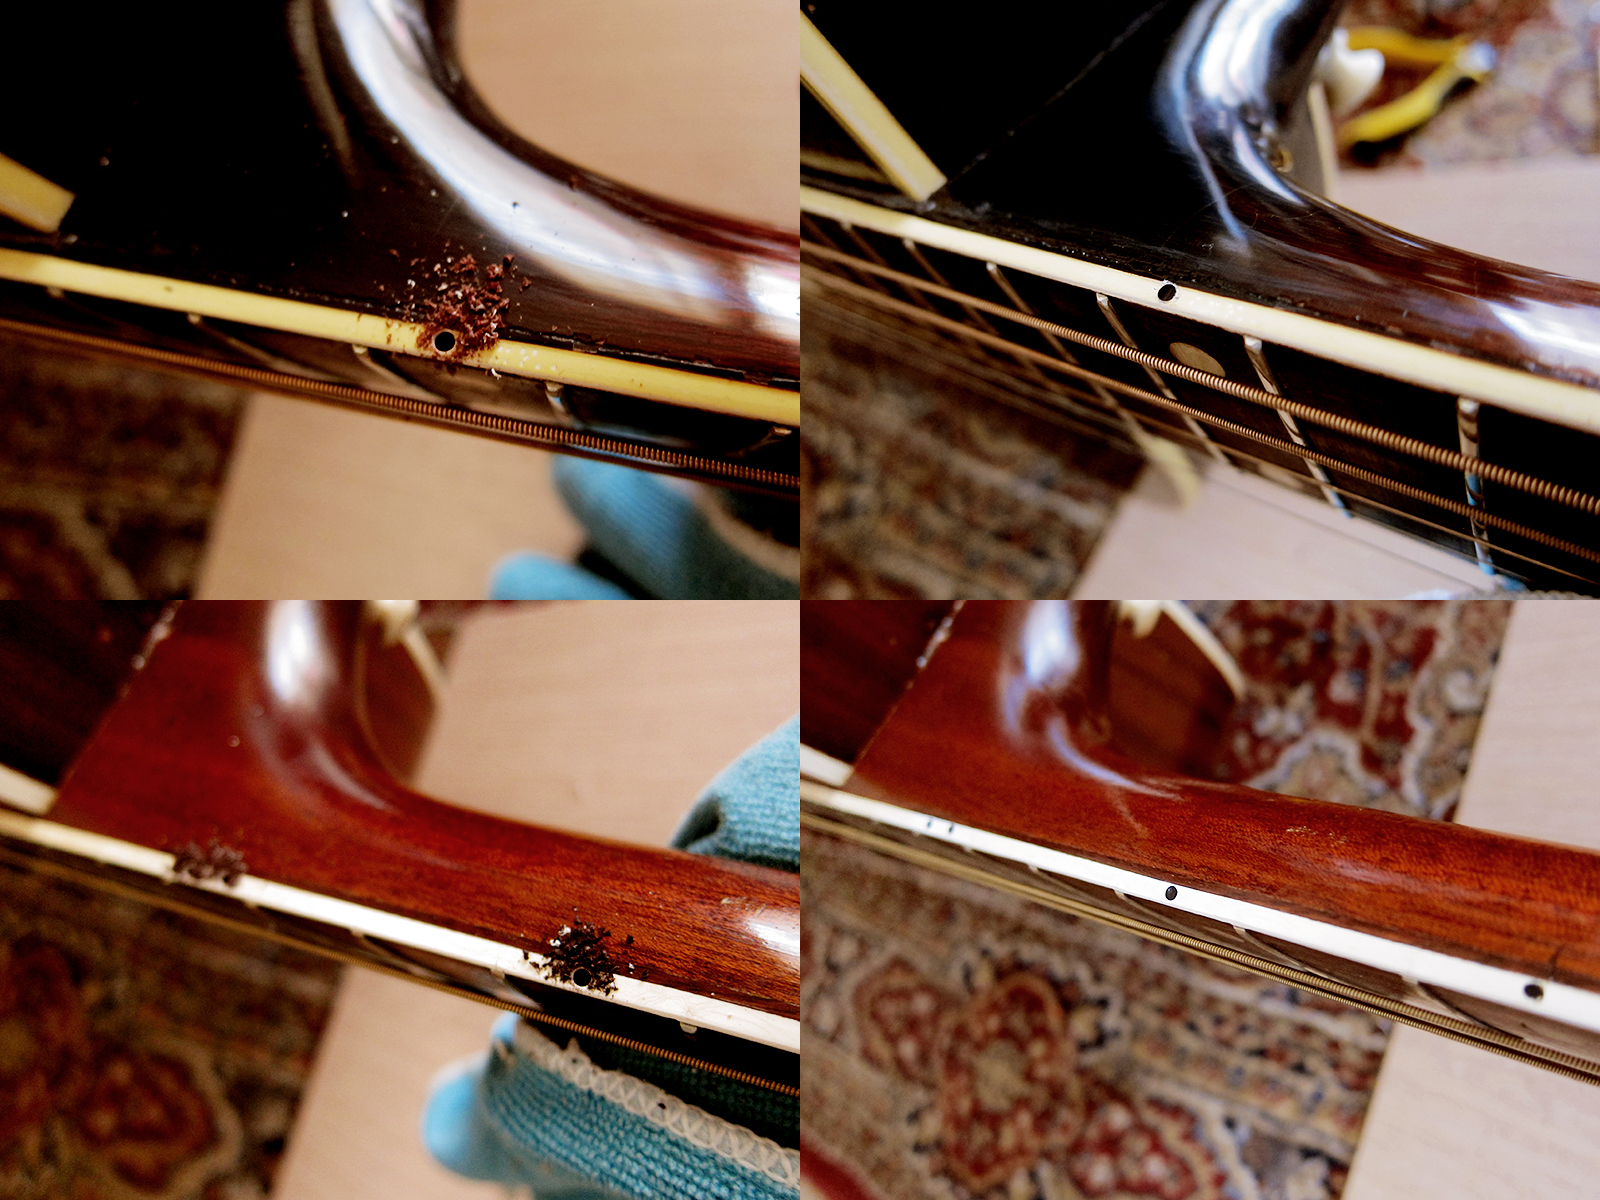
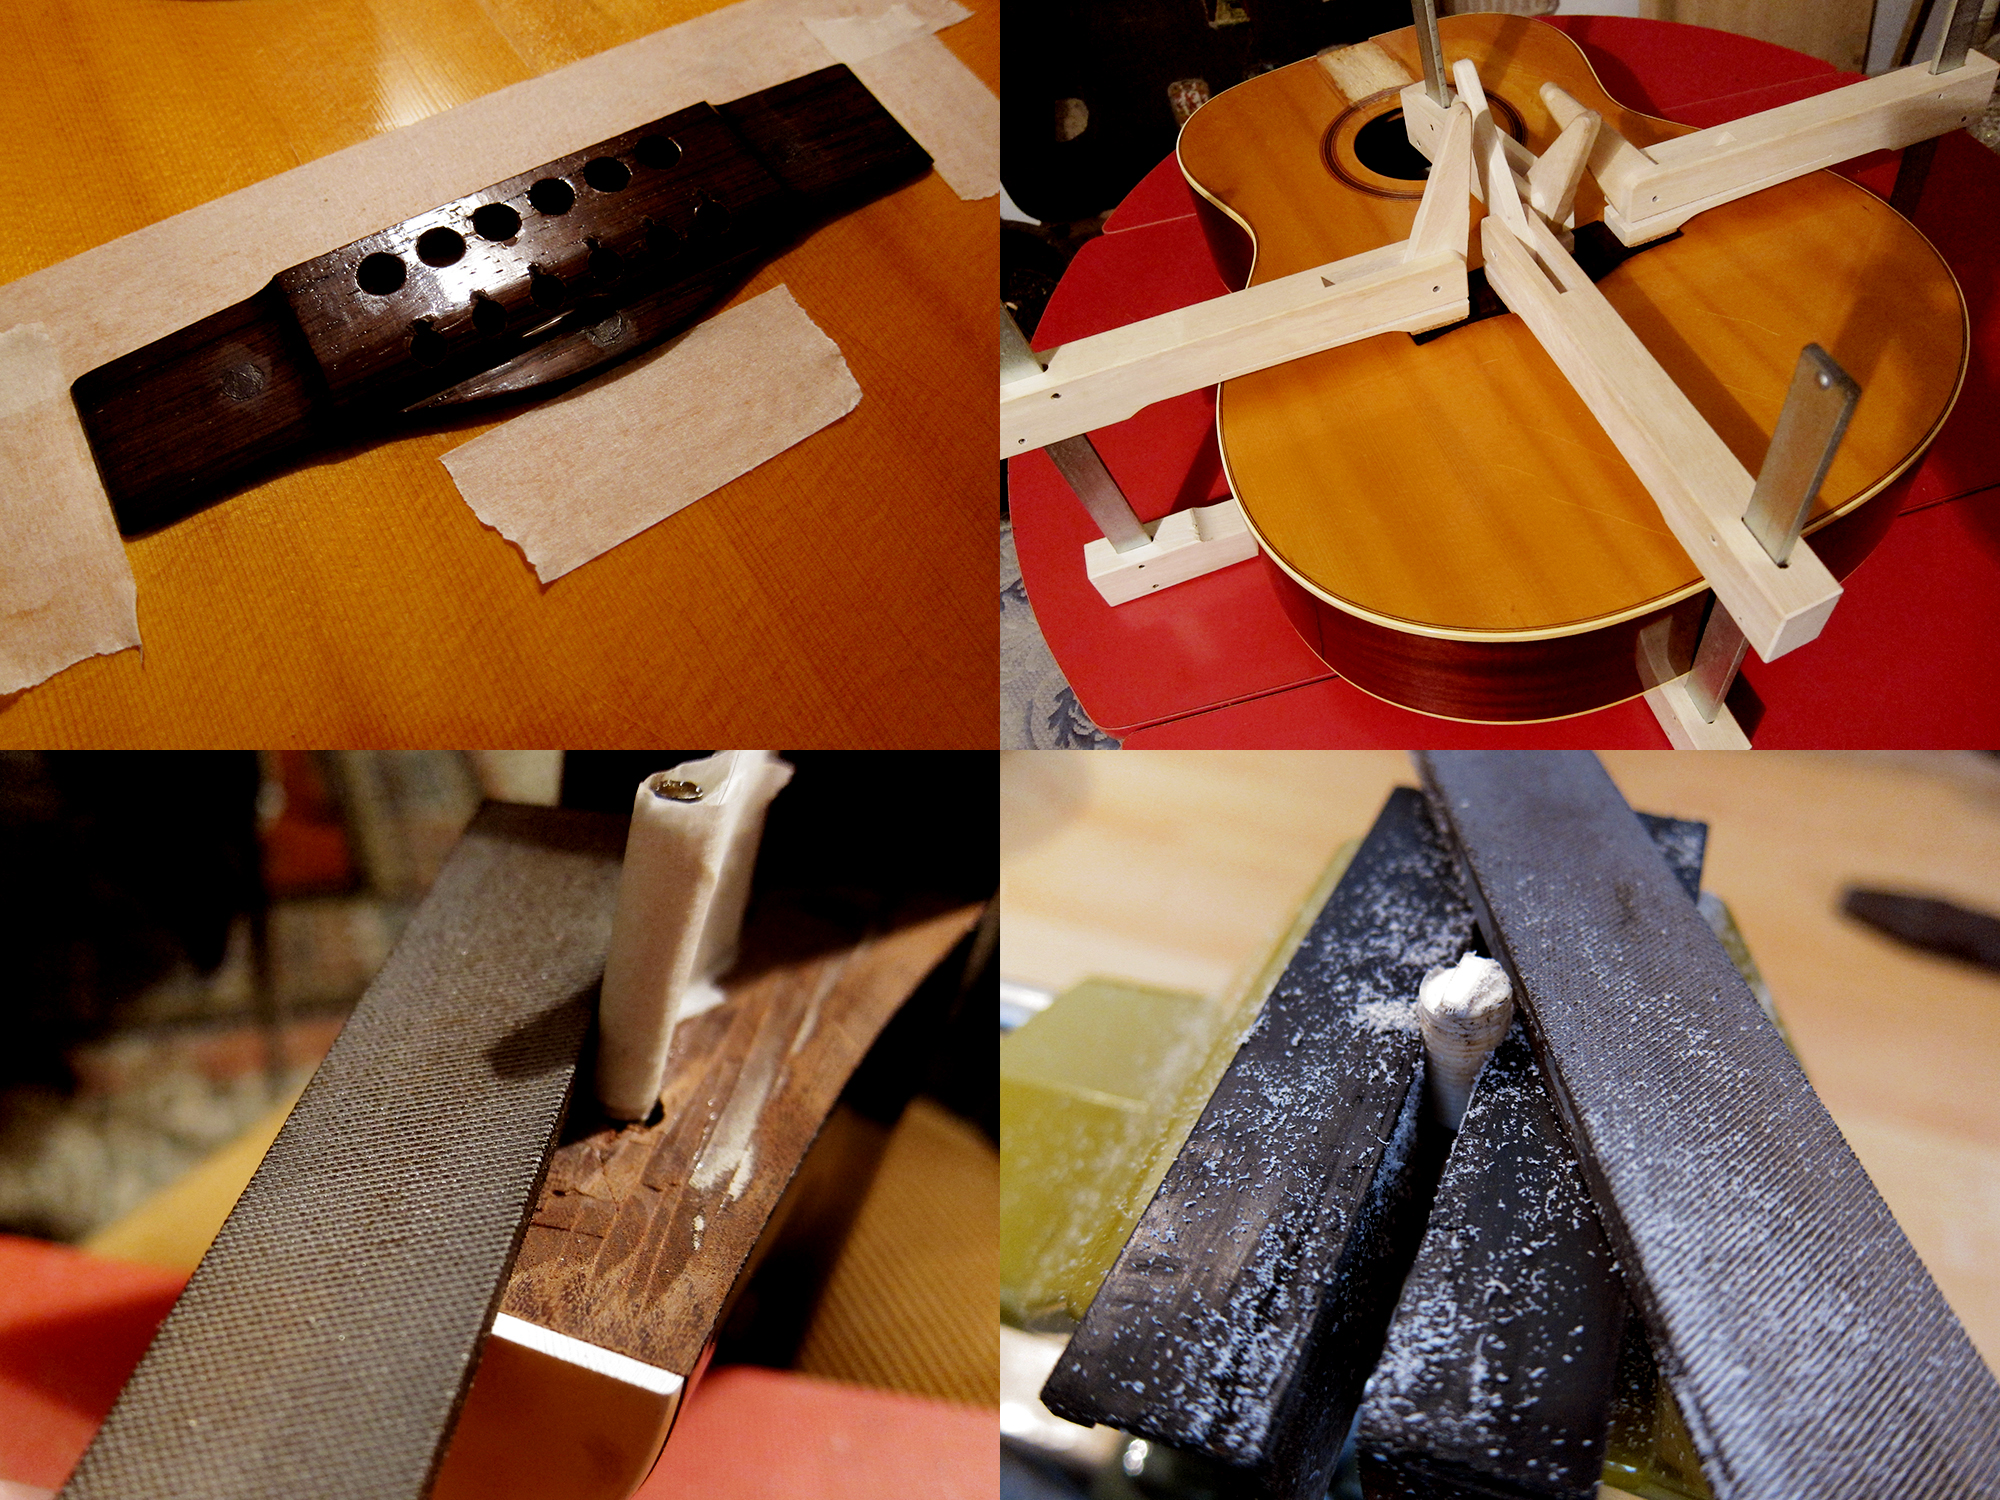 I filled the holes in the bridge and then glued it back. I filed down the heel to get the neck angle correct and get guitar playable again. I re-glued the pickguard and reshaped the top on the saddle screws.


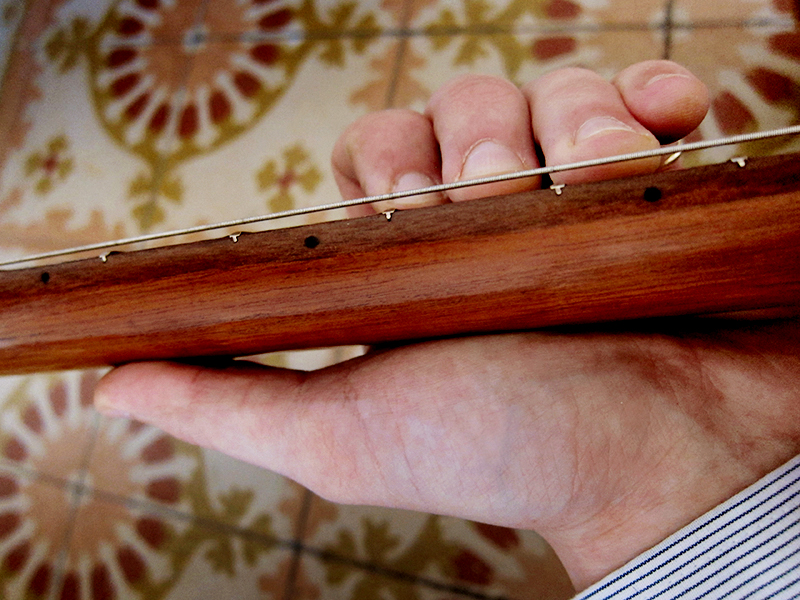

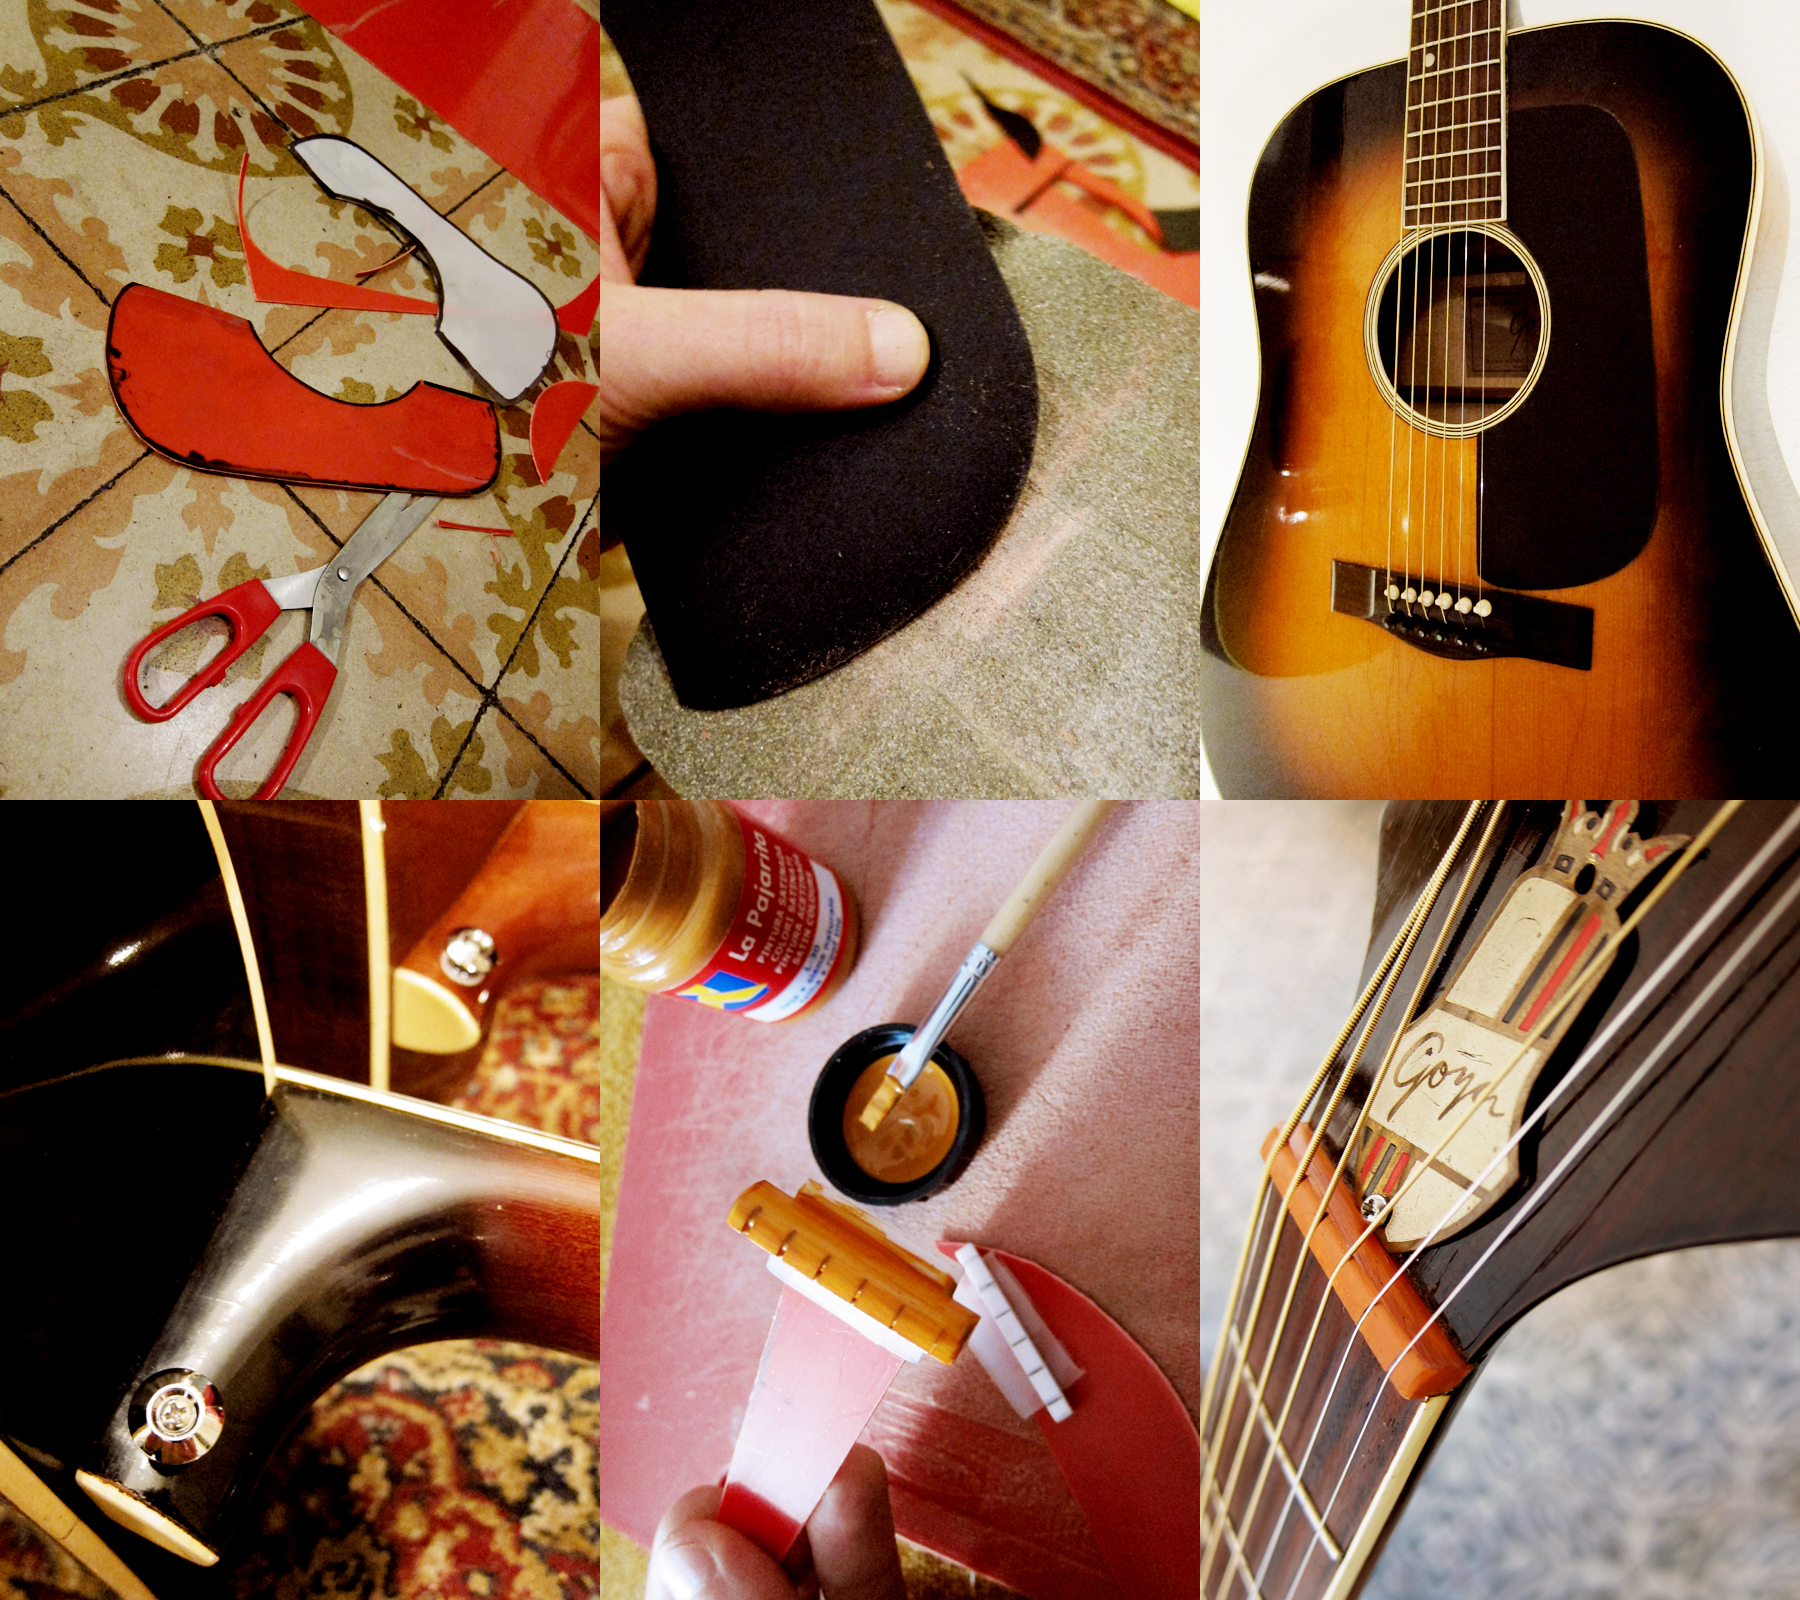

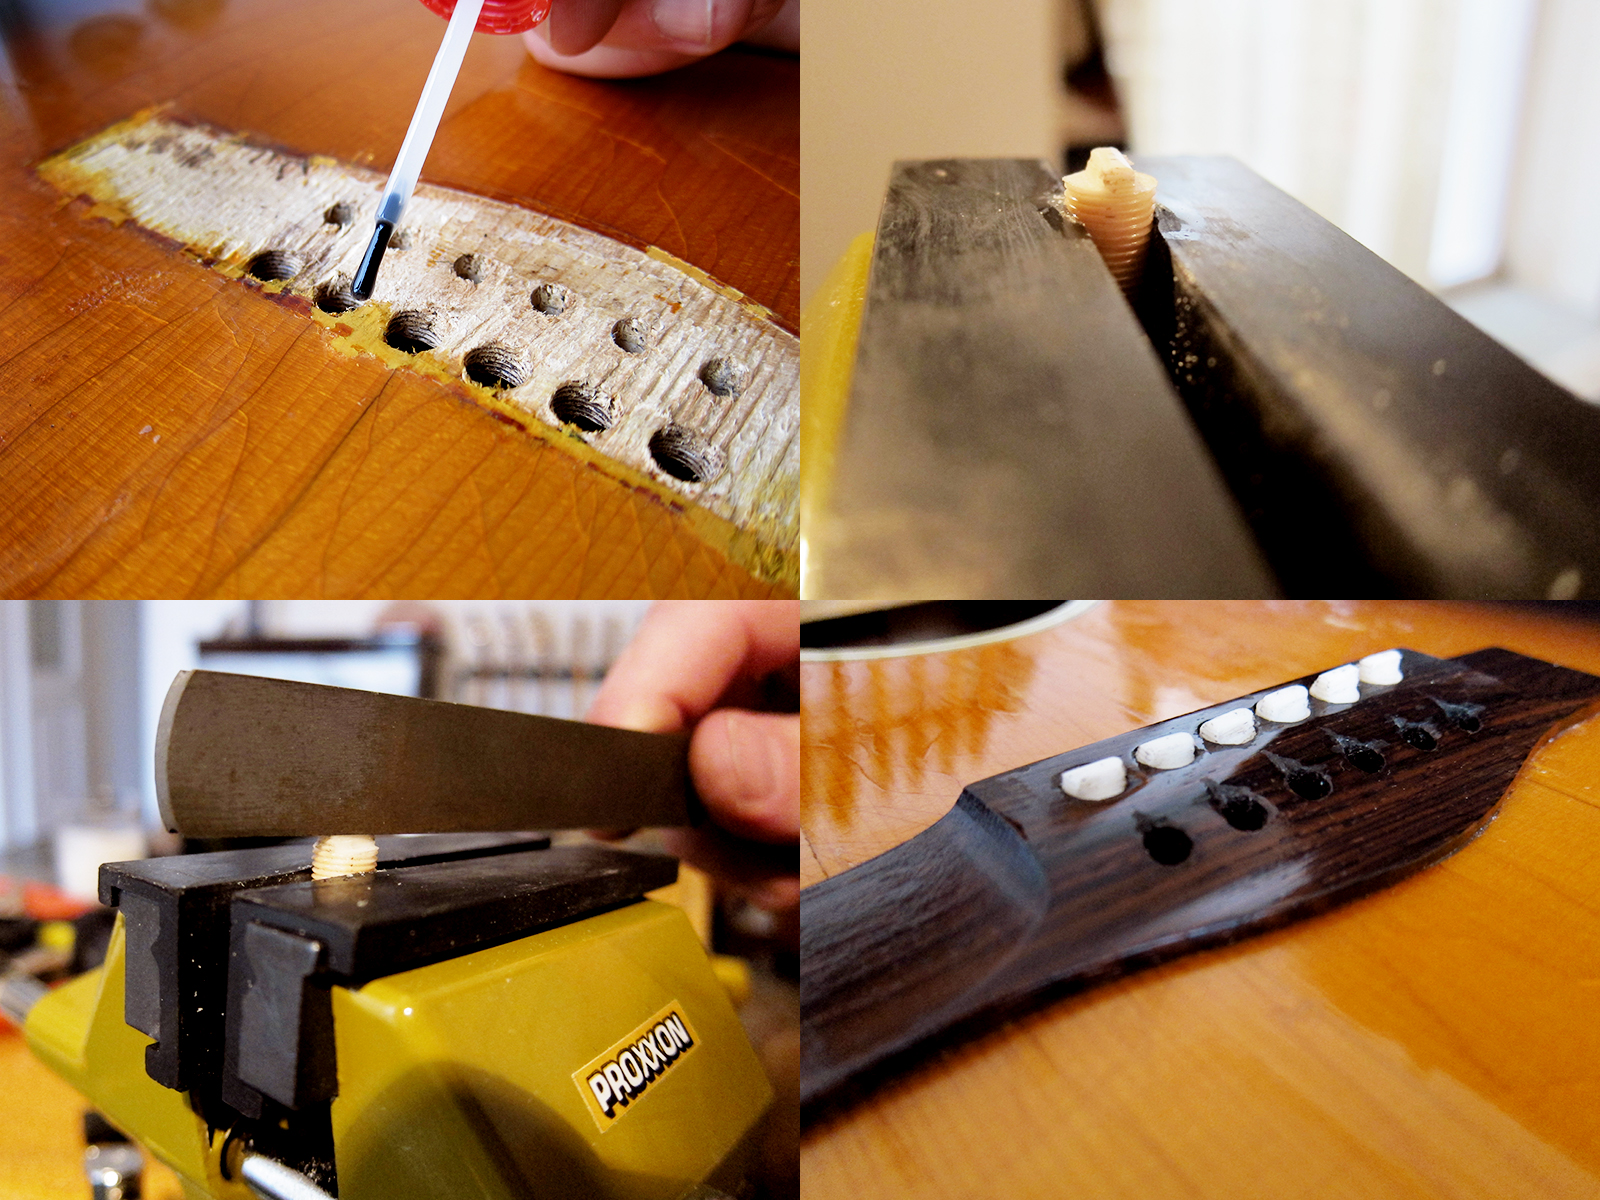
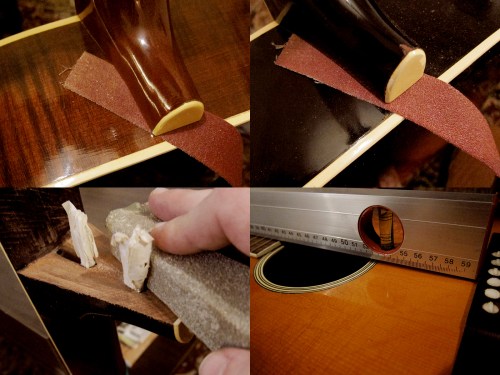 Remove the two bolts that attach the heel with the neck block, you can see them if you look inside. A normal Philips no 2 screwdriver fits if you don’t have a square Allen key. The heel is normally not glued in so you will feel it loose as soon as you remove the bolts. If not, apply a bit of pressure upwards to loosen the heel. Now you will be able to fit a sanding strip under the heel and can start to sand it down and that way change the neck angle and lower the action. Apply a bit of pressure on the neck and just pull, it might take 40-60 pulls on each side so so be patient. Check the neck angle with a straight edge once in a while so you don’t take it too far. As long as the straight edge doesn’t go over the bridge it should be fine. I have done the sanding strip trick on two guitars so far, my