How to… Repair lacquer damage
by claesgellerbrink
I really like worn guitars, well it’s hard to avoid when most of my guitars are 30-40 years old, the oldest guitar I got is my little Levin from 1942. However, there is one thing that I can’t stand, marks and dents on the back of the neck. Some little imperfection that you feel every time you move you hand up and down the neck. I’m not sure if it’s related to my slight OCD but it annoys me so much that I tend not to play any of my guitars that doesn’t have perfect smooth necks. The worst used to be my Greco Les Paul, it had a dent in the neck and I complained so much when I bought that I actually got it cheaper. When I received my Goya T-18 and my Morris W-40 and realised that they both had really bad marks on the back of the neck I just wanted to cry. Then I thought about it and came to the conclusion that I can’t be the only one that has issues with this, so I checked some Youtube videos to learn how to fix it and then ordered everything I needed. It’s actually really easy to fix yourself, well as soon as you find good lacquer and sandpaper with a grit fine enough, that turned out to be impossible around here. I managed to find a eBay seller that sold Nitrocellulose lacquer fairly cheap and was willing to ship to Spain. The sandpaper I had to order from China, I couldn’t find anything finer than 800 in Barcelona. After a months waiting and some feeble practice runs on less loved guitars I was finally ready to try to fix all dents, marks and imperfections on the back of my guitar necks. It went really well, or as well as it could with just 2500 grit, ideally I would have liked to have something much finer for really getting the shine back, especially on flat surfaces like bodies, the necks looked pretty good anyway.

Before I started on any necks I decided to practice on the fairly roadworn body of my old Claescaster. The sandpaper I ordered from eBay came in 1500, 2000, 2500 grit and actually turned out to be made in Japan. I cut wine corks in half and glued sandpaper strips to them to get a straight sanding surface, remember to mark the grit on them otherwise it gets a bit confusing. Next step, apply the lacquer. It dries pretty fast, about 10 min, which is good because you normally need to apply lacquer more than once to really fill the dents. When it’s dry just cut off the access with a razor blade until the surface feels smooth. It’s good to tape around the blade, not only to avoid cutting yourself, but also to not scratch the surrounding surfaces.
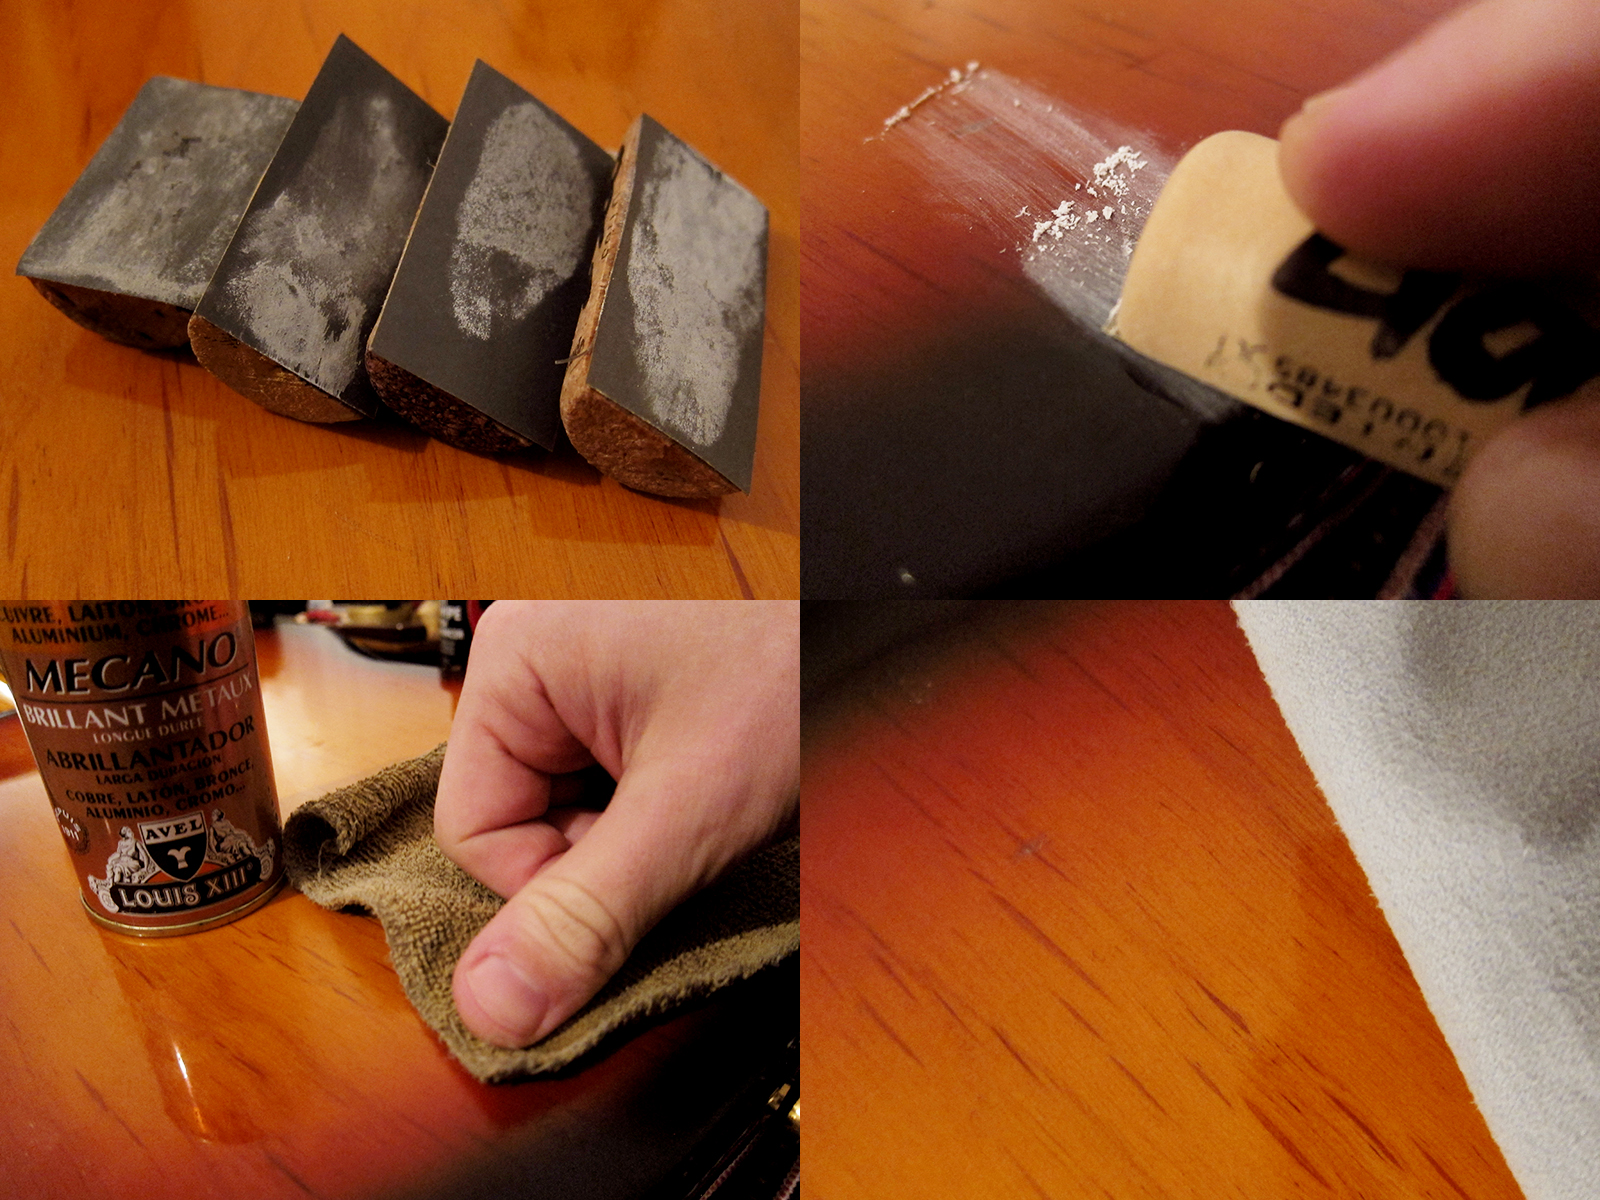
Remember to dip the sandpaper in water before you start sanding, you can really feel the difference especially with the finer grits. I used 400, 800, 1500, 2000 and 2500 grit on my little wine cork sanding blocks. I would have loved to have something even finer. I tried everything I could think of that could have a bit of sanding effect but was finer than 2500 grit. Pencil eraser, sponges, different cloths, in the end I rubbed really hard with metal polish which seemed to work a bit. As a last step I applied a bit of Carnauba wax and a lot of elbow grease and then buffed it up with a fine microfiber cloth.
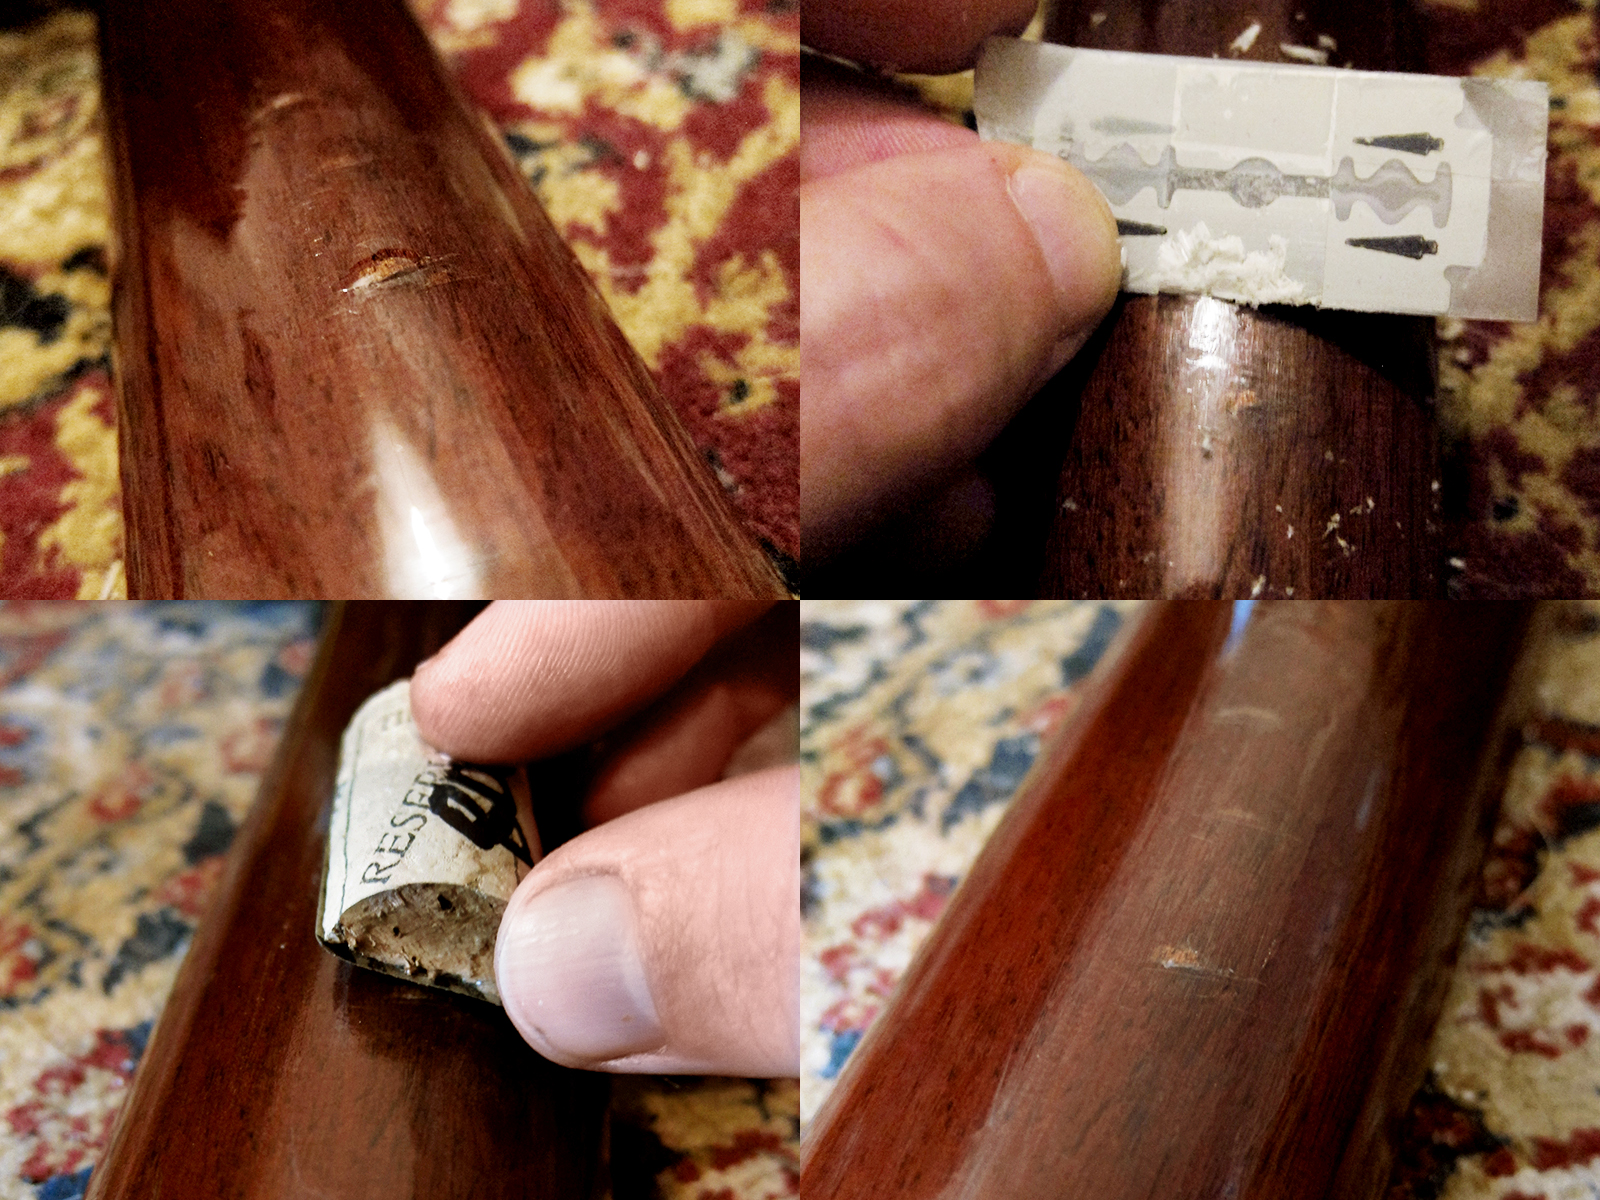
This is the back of the neck of my Morris W-40. The seller didn’t even bother to mention that it had deep cuts in the neck. This took quite a few fills with lacquer to even out the dents but in the end it worked pretty well. You can still see a slight colour change but you can’t feel the dents, which was the main thing for me. The last photo is not of the final polished result, it’s in the middle of sanding, I forgot to take a picture when I was done. I’m very happy with the result on all of the guitar necks I tried to fix. It was also a lot easier to get the sanding smooth and unnoticeable on the back of a neck compared to a guitar body.

[…] sinks when it dries. Next step was to get rid of the edges with a razor, like mentioned in my previous post, and then sand it even. I used 400, 800, 1500, 2000 and 2500 grit and then added a layer of […]
[…] all over it. I filled it with nitrocellulose lacquer, as mentioned in my previous post about how to repair lacquer damage. I had to take out the heavy artillery in order to get the neck smo0th and used 180 grit. Then it […]
[…] First I installed 3 side dots on my Francisca Montersat just to warm up. There might be some Flamenco purists saying that I’ve ruined this guitar now but I think it was a fairly discrete modification that will make it hundred times easier for me to play it. I just drilled a 2mm hole, same as the plastic side dot, about 3-4mm deep. I didn’t use any ruler, I felt that my eyes would be the best judge to make a visual estimatation and get them to line up. I made a little mark with a black pen and then when I was happy with that I made a little pilot hole with a nail so the drill wouldn’t slip. I put some super glue in the end of the side dot stick, stuck it in and then cut it off with a pair of pliers. I got it smooth with a razor blade and then sanded it down with 400, 800, 1500, 2000 and 2500 grit paper, the same technique I use for repairing lacquer damage. […]
[…] There was a bit of work needed on this guitar. The back was cracked in the binding just below the heel which made the whole neck tilt forward causing a pretty high action. I cleaned out the crack, someone had put some super glue in there, filled it with fish glue that I let really sink in and connect with the neck block, clamped it and left if for 48 hours. Now it seems really solid and the action got so low that I had to make a new higher bone saddle for it. There was a lot of dents and marks on the back of the neck so I filled them with nitro lacquer and sanded it smooth and buffed it up with metal polish, here you can read more about how to repair lacquer damage. […]
claesgellerbrink-A tip, but first, many thanks on all the pictorials of Levin Goya restoration…I’m a new Goya fan with an S-16 and several G-10’s with hunger for more. So…After you polish/rub out with 2500 grit, you can now graduate to…and I”m not kidding….the opaque white Colgate toothpaste in a tube and rub that with a towel, tube sock, or T shirt or bedsheet as a very gentle rubbing compound. It has just enough fine abrasive to carry on frm 2000x which I do frequently on instruments….as good as buffing, but more calories to apply…and safer than a buffing machine with a whole guitar in your hands. Then, damp rag with water to remove all residue and clean. Keep up the site and Levin restoration proceedures, PLEASE! And Thanks again from Tennessee, USA, Chris