How to… refret a guitar
by claesgellerbrink

Tokai Love Rock LS-55 Les Paul Standard “Made in Japan” 1991
It’s done, it’s all over, I can retire and put my luthier’s tools on the shelf now. Everything I’ve been doing for the last year has been leading up to this moment, to refret my beloved Tokai Love Rock. I decided about a month ago to learn how to refret, crown, dress, polish and care for the frets of my guitars. A fairly wise decision I think since it turned out to not be as hard as everyone said and it has saved me ridiculous amounts of money since people charge 300-400€ for refretting guitars here. I did spend about 170€ on tools but hopefully they will last me a life time and if I refret a couple of more guitars it has soon paid for itself.

I decided to replace the humbucker rings as well since they were in such a bad state. When I got the Tokai I had to drill out the screws in order to replace them, so I could adjust the pickups, so the plastic rings was kind of super glued together and I have been meaning to replace them ever since. Now I did, with a fancy 3€ pair from China that I scratched with wire wool and then soaked over night in tea and later with coffee, to try to get them to look less new. The cat didn’t fully approve of my decision to spend 6 hours on Saturday refretting my Tokai when I could be rolling around on the floor with her instead. I tightened the pots too, I hate when the knobs feels wobbly, this is actually on my Westone Les Paul, I tightened the screws on quite a few guitars while I was at it. This is how bad the frets were before.
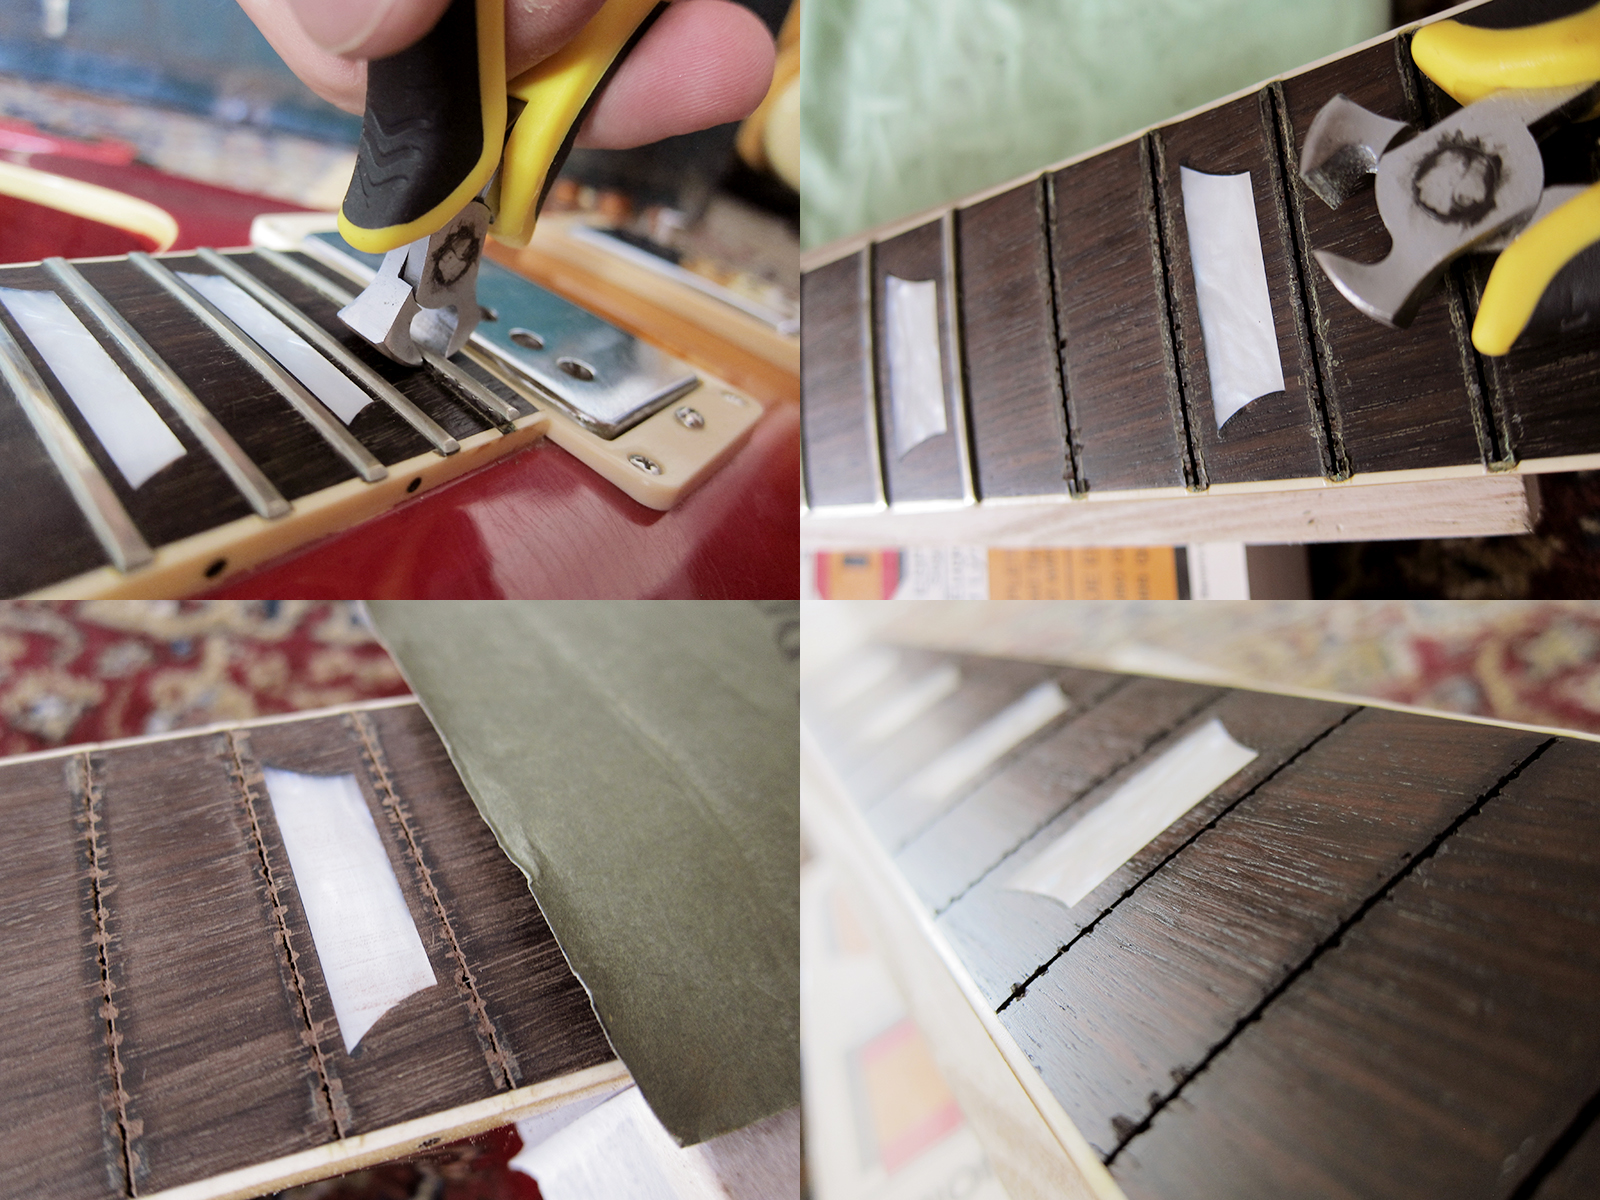
First step, removing the old frets. It went pretty easy, I was scared they would have been glued in so I would have to heat them with a soldering iron but the weren’t. I got a bit of chipping, I think it’s pretty hard to avoid on an old and well played rosewood fretboard. It wasn’t too bad and since the new frets will cover most of it I decided to just ignore it, sand the fretboard smooth like a babies bottom and the oil it up with lemon oil.

This was the part I was dreading the most, how to get the frets to fit without ruining the binding. You can get a fancy tool for doing this but I felt I didn’t want spend 85€ since I only have one guitar to refret with binding. I came up with the idea to take on fret at the time, match it to the old fret, cut it, then try to file down the under side so it wouldn’t cut in too much into the binding. I tried my best to file the edges and corners as well, since it would be hard to reach once the fret was in place. It took forever, it hurt my fingers and I hated it but it worked and I guess was worth the 85€ I saved on doing it by hand, fret by fret.

I made sure the neck was straight with my straight edge and then I marked the top of the frets with a black marker, just to see how much I was taking of when I later leveled the frets. Next step was to crown the frets, make sure everything was straight and even with a fret rocker, file the edges a bit more and then just polish the frets with sand paper and later wire wool.

How shiny, smooth and awesome is that? New Jescar FW47104 pre-radiused 12″ frets installed on a 1991 Japanese Tokai Love Rock LS-55. Just look at those freaking edges, I’m so proud I could burst. I doubt anyone could have done a better job, even if they would have charged me 400€.

I decided to go over my old Claescaster as well. This is the good part with having all the tools needed for taking care of your frets. It cost nothing to make sure that things are in a perfect state. I bought both Claescaster necks from the same guy in the UK, First Avenue Guitars. When I bought the first one it was pretty hard to find cheap necks with a vintage tint, especially with a logo fitted under the lacquer. I really like the profile of these too, it’s a normal C but it feels pretty fat and nice so I got a second one for the new Claescaster. The only problem, as with all cheap necks, is that the edges aren’t that smooth so I decided to level, crown, dress and polish them, with extra detail to the corners. Now it feels better than ever.

Looks pretty good. I decided to put a couple of drops of dry Teflon lubricate in the machine heads before I tightened all the screws and restrung the guitar. I read that these types of dry lubrication for bicycles are good because the attract less dust and crap than normal wet oils so for 4€ I thought it was worth a try. A quick adjustment of the Wilkinson brass saddles and then we are all set. Ready to play.

[…] Re: Found a Tokai loverock can anyone help me find out if it Jap or chinese? I have just managed to refret my Tokai Love Rock LS-55. It was a lot of hard work because of the edge binding but I'm very pleased with the result. You can read about it here: How to […]
[…] is a little update on my previous post on How to… refret a guitar. It turns out that maybe it wasn’t as easy as I first thought to refret a guitar and to level, […]
[…] T-18 that has markers up to the 12th fret, so I decided to change that. I had to order some new Jescar frets from my favourite eBay luthier supplier in the States, Philaluthiertools, so I got some 2mm side […]
[…] Tokai got the broken pot fixed. I also decided to change the frets, something you can read about here and […]
[…] luthier supplier Guitars & Woods. If I had only bought this before I ordered four new sets of Jescar frets from Philaluthiertools. I stupidly thought that most of my old Japanese guitars had a radius of […]